
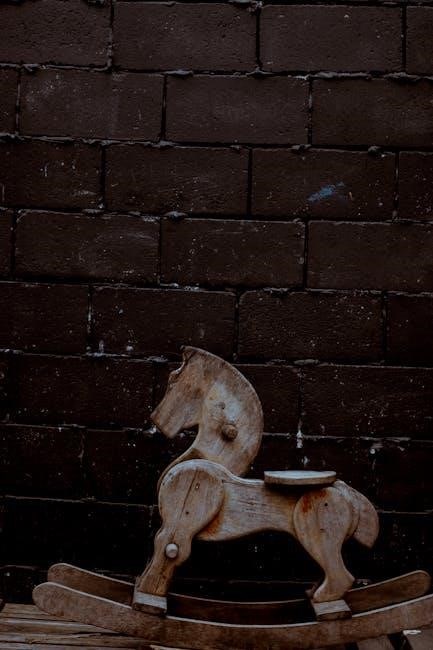
Discover free PDF plans for building wooden rocking horses‚ complete with templates and material lists. These designs cater to various skill levels‚ offering detailed instructions for crafting heirloom toys. Perfect for DIY enthusiasts‚ the plans ensure precise measurements and customizable finishes.

Materials and Tools Needed for the Project
To build a wooden rocking horse‚ you’ll need high-quality materials and essential tools. Start with 19mm (3/4″) project timber‚ easily available at local hardware stores‚ for the main structure. Additional materials include plywood for templates‚ 2×6 lumber for support‚ and plastic wood dough for filling imperfections. For tools‚ a jigsaw or bandsaw is necessary for cutting intricate shapes‚ while sandpaper ensures a smooth finish. Clamps are crucial for holding pieces together during assembly‚ and a drill will help with precise hole drilling. Measuring tools like a tape measure and square are vital for accuracy. Safety gear‚ such as goggles and a dust mask‚ is a must. A paintbrush or foam brush will come in handy for staining and applying a clear finish. Optional items include imitation leather for a bridle and decorative paint for detailing. Having these materials and tools on hand will ensure a successful and enjoyable project. Proper preparation and organization of these items will streamline the building process‚ helping you create a durable and charming rocking horse for years of enjoyment.

Understanding the Importance of Measurements
Accurate measurements are the cornerstone of a successful rocking horse project. Ensuring that every cut‚ drill‚ and assembly aligns perfectly is crucial for both the structural integrity and aesthetic appeal of the final piece. Even slight mismeasurements can lead to misaligned parts‚ affecting the overall balance and functionality of the rocking horse. For instance‚ improper sizing of the rockers can result in uneven movement‚ while incorrect dimensions for the legs or head may compromise safety and stability.
Using a combination of tape measures‚ squares‚ and calipers will help maintain precision. Referencing the full-size templates provided in the PDF plans ensures that each component is cut accurately. Double-checking measurements before cutting is a good practice to avoid costly mistakes. Additionally‚ marking wood carefully and using clamps to hold pieces steady during assembly can prevent errors. By prioritizing precise measurements‚ you’ll achieve a professional-grade finish and ensure the rocking horse is both durable and safe for use. This attention to detail will make your project a cherished heirloom for years to come.
Downloading and Using Rocking Horse PDF Plans
Downloading a rocking horse PDF plan is a straightforward process that provides you with comprehensive instructions and templates to guide your project. These plans are available for free and include detailed diagrams‚ material lists‚ and step-by-step construction notes. Once downloaded‚ you can print the full-size patterns‚ which are essential for ensuring accurate cuts and assemblies. The PDF files are designed to be user-friendly‚ allowing you to print them on standard 8-1/2 x 11 or A4 paper. Simply align and tape the pages together at the designated arrows to create the full-size templates.
The plans are ideal for both beginners and experienced woodworkers‚ offering clear measurements and instructions to help you build a sturdy and visually appealing rocking horse. Many PDF plans also include optional customization ideas‚ such as painting or adding leather details‚ to give your project a personal touch. By following the instructions carefully‚ you can create a heirloom-quality toy that will be cherished for years. Ensure you have Adobe Acrobat Reader installed to view and print the PDF files effectively.

Step-by-Step Instructions for Building the Rocking Horse
Building a rocking horse involves a series of detailed steps‚ starting with cutting out the individual components from your timber. Use the full-size templates provided in the PDF plans to trace and cut the head‚ legs‚ seat‚ and rockers accurately. A jigsaw or bandsaw is ideal for this process‚ ensuring smooth edges. Once all pieces are cut‚ sand them thoroughly to remove any splinters or rough spots.
Next‚ assemble the main structure by attaching the legs and rockers to the seat using wood screws or dowels. Ensure the joints are secure and aligned properly for stability. The head and neck are then attached to the seat‚ followed by the addition of details like the mane‚ tail‚ and bridle. Use clamps to hold pieces in place while gluing and screwing.
After assembly‚ sand the entire rocking horse to achieve a smooth finish. Apply wood filler to any gaps or imperfections before staining or painting. Finally‚ protect the wood with a clear polyurethane coat. These step-by-step instructions guide you through creating a durable and charming rocking horse for your family to enjoy.

Customization Options for Your Rocking Horse
Personalize your rocking horse with creative touches to make it truly unique. Paint or stain the wood to match your desired color scheme‚ adding intricate details like stripes or patterns. Consider adding a soft mane and tail using yarn or imitation leather for a lifelike appearance. Craft a bridle from leather or fabric‚ and attach small decorative elements like buttons or ribbons for a personalized look.
Customize the size by adjusting the measurements in the PDF plans to create a larger or smaller rocking horse. Use templates to add unique designs or engravings to the head and legs. For a more elegant finish‚ apply a clear polyurethane coat to protect the wood and enhance the design. You can also add padded seating for extra comfort‚ ensuring the rocking horse is both functional and visually appealing. These customization options allow you to tailor the project to your skills and preferences‚ creating a one-of-a-kind piece for your home or as a thoughtful gift.
Finishing Techniques to Complete Your Project
Once your rocking horse is assembled‚ the final step is to apply a professional-grade finish. Start by sanding all surfaces to ensure a smooth texture‚ paying special attention to edges and joints. Fill any small gaps or imperfections with plastic wood dough‚ allowing it to dry before sanding again for a seamless look.
Apply a stain or paint to match your desired color scheme‚ following the manufacturer’s instructions for drying times between coats. A clear polyurethane finish is recommended to protect the wood and enhance the appearance. For added durability‚ consider applying multiple thin coats‚ allowing each to dry completely before the next. Avoid using masking tape on painted areas to prevent peeling or damage to the finish.
Optional enhancements include adding a soft‚ padded seat or decorative elements like imitation leather bridles or fabric manes. Protect the finish by avoiding harsh chemicals or excessive moisture. With proper care‚ your rocking horse will remain a beautiful and functional piece for years to come.

Troubleshooting Common Errors in Construction
During the construction of your rocking horse‚ several common errors may arise. One of the most frequent issues is incorrect measurements‚ which can lead to misaligned parts or uneven rocking. To address this‚ double-check your measurements against the PDF plans and use templates to ensure accuracy. If joints appear loose‚ apply wood glue and clamp the pieces firmly‚ allowing them to dry completely before proceeding.
Another common problem is warping of the wood‚ particularly in the rocker supports. This can be resolved by ensuring the wood is properly seasoned and by using a sturdy design. If the rocking motion feels uneven‚ adjust the rocker’s curve or check for any uneven cuts in the supports. Additionally‚ if the finish appears uneven or bubbled‚ lightly sand the area and reapply the stain or polyurethane‚ following the manufacturer’s instructions.
For minor imperfections‚ such as small gaps or cracks‚ use plastic wood dough to fill them before sanding. Always test your tools and materials on scrap wood to avoid unexpected issues. By addressing these common errors early‚ you can ensure your rocking horse turns out sturdy‚ balanced‚ and visually appealing.
Resources and Support for Rocking Horse Builders
Building a rocking horse can be a rewarding project‚ and there are numerous resources available to guide you. Free PDF plans‚ such as those from Woodsmith and other woodworking sites‚ provide detailed instructions‚ templates‚ and material lists to ensure success. Many plans include full-size patterns that can be printed and assembled for accurate cuts. Additionally‚ online forums and woodworking communities offer support‚ where you can ask questions‚ share ideas‚ and troubleshoot common issues.
For those seeking additional guidance‚ some plans come with customer support contact information for clarifying instructions or addressing construction challenges. Social media groups dedicated to woodworking and toy-making are also excellent platforms for connecting with experienced builders. These resources not only help you complete your project but also encourage creativity and customization. With access to these tools and communities‚ you can confidently bring your rocking horse plans to life and create a timeless heirloom.
Building a rocking horse is a fun and rewarding project that can result in a cherished family heirloom. By following detailed PDF plans and paying close attention to measurements‚ you can create a sturdy and beautiful piece. Always use high-quality materials and ensure precise cuts for a professional finish.
For a polished look‚ apply a clear protective finish and consider adding decorative elements like painted details or leather reins. Safety is key‚ especially for children‚ so double-check all joints and ensure the rocking horse is stable. If unsure about any step‚ consult online forums or woodworking communities for advice.
Customize your rocking horse to match your home decor or a child’s preferences. Paint‚ stain‚ or add intricate carvings to make it truly unique. Building a rocking horse is not just about crafting wood—it’s about creating memories. Take your time‚ enjoy the process‚ and be proud of your handmade creation. Happy building!
Leave a Reply
You must be logged in to post a comment.