
Goodman furnace installation requires careful planning and adherence to safety guidelines to ensure efficient heating and long-term reliability․ This guide provides a comprehensive overview of the process, covering essential steps, safety precautions, and best practices for a successful installation․ Proper installation is crucial for optimal performance, energy efficiency, and safety․ Follow the detailed instructions and recommendations to achieve a hassle-free setup and enjoy consistent heating throughout your home․
1․1 Overview of Goodman Furnaces
Goodman furnaces are highly efficient and reliable heating solutions designed for residential use․ Known for their durability and performance, these furnaces offer advanced features like single-stage, two-stage, and modulating burners․ They provide consistent warmth while minimizing energy consumption․ Goodman furnaces are built with high-quality materials and adhere to strict safety and efficiency standards․ With models ranging from basic to high-efficiency units, they cater to various home heating needs․ Their compact designs and quiet operation make them ideal for different installation scenarios․ Goodman furnaces are also backed by comprehensive warranties, ensuring long-term peace of mind for homeowners․
1․2 Importance of Proper Installation
Proper installation of a Goodman furnace is critical for ensuring optimal performance, safety, and energy efficiency․ Incorrect installation can lead to reduced system lifespan, increased energy bills, and potential safety hazards․ A well-executed setup ensures that the furnace operates within its design parameters, delivering consistent heat and minimizing wear and tear․ Additionally, correct installation is essential for maintaining warranty validity and complying with local building codes․ Proper installation also helps prevent issues like gas leaks, carbon monoxide risks, and electrical malfunctions․ Always entrust the installation to a qualified professional to guarantee a safe and efficient heating system․

Pre-Installation Preparation
Pre-installation involves assessing the site, ensuring compatibility, and preparing materials․ Proper preparation ensures a smooth and safe installation process, adhering to local regulations and safety standards․
2․1 Choosing the Right Goodman Furnace Model
Selecting the appropriate Goodman furnace model is crucial for meeting your heating needs․ Consider factors like heating capacity, efficiency ratings, and space requirements․ Goodman offers various models with different AFUE (Annual Fuel Utilization Efficiency) ratings, ensuring energy efficiency․ Assess your home’s size, insulation, and local climate to determine the ideal furnace size․ Proper sizing prevents overheating or insufficient warmth․ Review product specifications and compare features to align with your budget and preferences․ Consulting a professional can help ensure the chosen model is compatible with your home’s existing HVAC system and ventilation setup for optimal performance and safety․
2․2 Gathering Necessary Tools and Materials
Gathering the right tools and materials is essential for a smooth Goodman furnace installation․ Start with basic tools like screwdrivers, wrenches, pliers, drills, and measuring tools․ Ensure you have safety gear such as gloves and goggles․ For materials, collect venting pipes, gas line components, electrical wiring, and insulation․ Check the furnace manual for specific requirements, as some models may need additional parts like drain kits or thermostats; Organize all items beforehand to avoid delays․ Ensure compatibility of materials with local regulations and furnace specifications for a safe and efficient setup․
2․3 Understanding Local Building Codes and Regulations
Compliance with local building codes and regulations is crucial for a legal and safe Goodman furnace installation․ Research and verify requirements for venting, gas lines, electrical connections, and furnace placement․ Ensure all installations meet standards like ANSI Z21․47 for gas-fired furnaces․ Obtain necessary permits and schedule inspections to avoid violations․ Familiarize yourself with specific municipal rules, as they may exceed national standards․ Proper adherence ensures safety, efficiency, and avoids potential fines or rework․ Always consult local authorities if unsure about specific regulations or requirements for your installation project․
Safety Precautions and Warnings
Ensure proper gas shutoff and electrical safety to prevent hazards․ Protect against freezing and water damage by securing drain lines and traps․ Follow all safety symbols and guidelines in the installation manual to avoid equipment damage and ensure safe operation․
3;1 Recognizing Safety Symbols and Precautions
Recognizing safety symbols and precautions is critical during Goodman furnace installation․ These symbols, found in the manual, indicate potential hazards like gas leaks or electrical risks․ Always adhere to warnings and cautions to prevent accidents․ Properly affix all manuals near the unit for easy reference․ Understanding these symbols ensures compliance with safety standards and prevents equipment damage or personal harm․ Familiarize yourself with ANSI Z21․47/CSA-2․3 standards for gas-fired furnaces․ Safety precautions are non-negotiable to guarantee a safe and functional installation․ Never overlook these guidelines to avoid serious risks, including property damage or carbon monoxide exposure․
3․2 Protecting Against Freezing and Water Damage
Protecting your Goodman furnace from freezing and water damage is essential for optimal performance and longevity․ If installing in areas prone to freezing, ensure the drain trap and line are properly insulated or heated․ Water damage can occur from condensation leaks or improper drainage․ Always elevate the furnace on a concrete base if the floor is damp or wet․ Regularly inspect and maintain the drain system to prevent blockages․ Failure to protect against freezing can lead to equipment failure or property damage․ Follow the manufacturer’s guidelines to safeguard your furnace and ensure reliable operation during cold weather conditions․
3․3 Gas Shutoff and Electrical Safety
Ensuring gas shutoff and electrical safety is critical during Goodman furnace installation․ Always turn off the gas supply at the manual shutoff valve located external to the furnace before servicing․ Disconnect the electrical power supply to the furnace to prevent accidental start-ups․ Install a ground union joint and manual shutoff valve exterior to the furnace cabinet for added safety․ Follow the installation manual’s guidelines for proper electrical connections and ensure compliance with local codes․ Failure to adhere to these precautions can result in gas leaks, electrical hazards, or carbon monoxide risks․ Always prioritize safety to protect both the equipment and occupants․

Installation Steps
Goodman furnace installation involves site preparation, venting, gas line connections, electrical wiring, and thermostat setup․ Follow detailed steps to ensure a safe and efficient setup process․
4․1 Site Preparation and Furnace Placement
Proper site preparation and furnace placement are critical for safe and efficient operation․ Ensure the area is clean, dry, and free from flammable materials․ The furnace should be placed on a level surface, ideally on a concrete base, to prevent vibration and ensure stability․ If installed in a garage or utility room, check local codes for specific requirements․ Keep the furnace away from windows and doors to maintain proper ventilation․ Secure the unit firmly to prevent movement during operation․ Ensure adequate clearance around the furnace for maintenance and service access, as specified in the installation manual․ Proper placement enhances safety and performance, ensuring your Goodman furnace operates optimally for years to come․
4․2 Venting and Flue Pipe Requirements
Proper venting and flue pipe installation are essential for safe and efficient furnace operation․ Ensure the venting system complies with local building codes and Goodman furnace specifications․ Use approved materials like PVC or stainless steel for the flue pipe, avoiding galvanized steel due to corrosion risks․ The flue pipe must be properly sloped and secured to prevent leaks or damage․ Maintain required clearance from combustible materials to prevent fire hazards․ Ensure the flue pipe is correctly connected to the furnace and terminates outside the building, following the manufacturer’s guidelines․ Proper venting ensures safe removal of combustion byproducts and optimal furnace performance․
4․3 Gas Line Installation and Connections
Proper gas line installation is critical for safe and efficient furnace operation․ Ensure the gas line is correctly sized to meet the furnace’s BTU requirements․ Use approved materials, such as copper or steel, and install a manual shutoff valve external to the furnace․ Secure the gas line properly to prevent movement or damage․ Test for leaks using a soap solution or leak detector to ensure tight connections․ Always follow local building codes and manufacturer guidelines for gas line installation․ Improper connections can lead to safety hazards, so careful attention is necessary to ensure a secure and reliable setup․
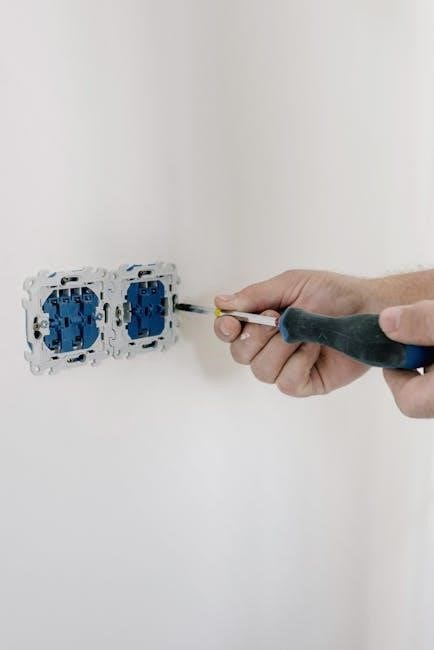
4․4 Electrical Connections and Wiring
Ensure the electrical connections are properly sized to meet the furnace’s power requirements․ Use approved wiring materials and follow local electrical codes․ Connect the furnace to a dedicated circuit with the correct voltage rating; Install a disconnect switch near the furnace for safe servicing․ Verify polarity and phase wiring to avoid damage․ Test all connections for tightness and integrity․ Ground the furnace according to the manufacturer’s instructions and local regulations to prevent electrical hazards․ Proper electrical connections are essential for safe and efficient operation, so double-check all wiring before powering up the system․
4․5 Thermostat Installation and Setup
Mount the thermostat in a central location, away from drafts and direct sunlight․ Connect the thermostat wiring to the furnace’s control board, ensuring correct terminal connections․ Set the thermostat type (e․g․, heat only, heat/cool) and configure the temperature range․ Program the schedule or settings as desired for energy efficiency․ Test the system by running a heating cycle to ensure proper operation․ Refer to the thermostat manual for advanced features like Wi-Fi connectivity or smart home integration․ Proper setup ensures precise temperature control and optimal system performance, enhancing comfort and energy savings․

Post-Installation Checks
After installation, test the furnace for proper operation, check venting and combustion safety, and perform final inspections and adjustments to ensure everything functions correctly․
5․1 Testing the Furnace for Proper Operation
After installation, test the furnace to ensure it operates correctly․ Check the ignition system, gas flow, and venting to confirm they function as intended․ Verify that the furnace cycles on and off smoothly and heats evenly․ Listen for unusual noises or vibrations, which could indicate issues․ Ensure all safety features, such as the limit switch and pressure switch, activate properly․ Measure temperature rises and compare them to the manufacturer’s specifications․ Test the thermostat to ensure it accurately controls the furnace’s operation․ Finally, monitor the system for leaks or drafts in the venting system to guarantee safe and efficient performance․
5․2 Ensuring Venting and Combustion Safety
After installation, inspect the venting system to ensure it is free from blockages, damage, or leaks․ Verify that the flue pipe is properly connected and meets local building codes․ Check the combustion air supply to ensure it is adequate and unobstructed․ Test for gas leaks using approved methods and inspect the heat exchanger for cracks or damage․ Ensure the venting system is correctly sized and installed to prevent carbon monoxide hazards․ Refer to the manufacturer’s guidelines for specific venting requirements and perform a combustion safety test to confirm proper operation and safety standards are met․
5․3 Final Safety Inspections and Adjustments
Conduct a thorough final inspection to ensure all components are correctly installed and functioning safely․ Check the gas line for leaks, verify electrical connections, and test the thermostat operation․ Inspect the venting system for proper installation and ensure all safety switches are operational․ Review the drain system to prevent water damage and verify that the furnace is level and securely fastened․ Perform a test run to ensure proper ignition, heating, and venting․ Address any issues promptly and document the installation for future reference․ Ensure compliance with local codes and manufacturer recommendations for a safe and efficient system․

Maintenance and Troubleshooting
Regular maintenance and troubleshooting are essential for optimal furnace performance․ This section outlines routine tasks and common issues, ensuring efficiency and safety․ Refer to the manual for detailed procedures․
6․1 Routine Maintenance Tasks
Regular maintenance is crucial for ensuring your Goodman furnace operates efficiently and safely․ Start by cleaning or replacing air filters monthly to improve airflow and system performance․ Inspect the venting system for blockages or damage, ensuring proper ventilation to prevent carbon monoxide hazards․ Check the drain line and trap for condensation buildup, as clogs can lead to water damage․ Verify that all electrical connections are secure and free from corrosion․ Schedule annual professional tune-ups to inspect heat exchangers, burners, and gas lines for leaks or wear․ Keep the furnace area clear of debris to maintain proper airflow and combustion․ Addressing these tasks regularly will extend the furnace’s lifespan and ensure reliable heating performance․
6․2 Common Issues and Troubleshooting Tips
Common issues with Goodman furnaces include ignition failures, uneven heating, or strange noises․ For ignition problems, check the gas supply and ensure the pilot light is functioning․ If the furnace isn’t heating evenly, inspect ductwork for leaks or blockages․ Strange noises may indicate loose parts or damaged belts․ Always refer to the installation manual for specific troubleshooting guidance․ Addressing these issues promptly can prevent more severe problems․ If DIY solutions fail, contact a certified technician to ensure safety and proper repairs․ Regular maintenance and inspections can help minimize these issues and extend the furnace’s lifespan․
Leave a Reply
You must be logged in to post a comment.