Category: Manuals (Page 4 of 5)

2022 ram 2500 owners manual pdf

The 2022 RAM 2500 Owners Manual is a comprehensive guide providing essential information for safe and effective vehicle operation‚ available as a free PDF download․

1․1 Importance of the Owners Manual

The 2022 RAM 2500 Owners Manual is essential for understanding vehicle features‚ safety guidelines‚ and maintenance requirements․ It provides critical information for safe operation‚ preventing accidents‚ and ensuring optimal performance․ Familiarizing yourself with the manual helps you make informed decisions about vehicle care‚ troubleshooting‚ and customization․ Regularly referencing it ensures compliance with manufacturer recommendations and extends the lifespan of your RAM 2500․

1․2 Key Symbols and Warnings in the Manual

The manual features key symbols and warnings to alert drivers of potential hazards․ Yellow and red warning lights indicate issues like low washer fluid or engine faults․ Symbols include alerts for anti-lock brakes‚ tire pressure‚ and adaptive cruise control․ Understanding these symbols ensures proper vehicle operation and safety‚ helping drivers respond to alerts promptly and avoid potential risks on the road․

Getting to Know Your 2022 RAM 2500

Explore the 2022 RAM 2500’s exterior features‚ interior components‚ and key systems to understand its design and functionality better․ This section helps you familiarize yourself with the truck’s capabilities and advanced technology․

2․1 Exterior Features and Components

The 2022 RAM 2500 features a robust exterior design with components like automatic headlights‚ LED headlamps‚ and a cargo camera for enhanced visibility․ The bed rail tie-down system and optional winch (Power Wagon) add utility․ Exterior elements are built for durability and functionality‚ ensuring the truck meets both aesthetic and practical demands․

  • Automatic Headlights for improved visibility․
  • LED Headlamps for superior lighting performance․
  • Cargo Camera for monitoring the pickup bed․
  • Bed Rail Tie-Down System for secure cargo handling․
  • Winch Option on Power Wagon models for towing․

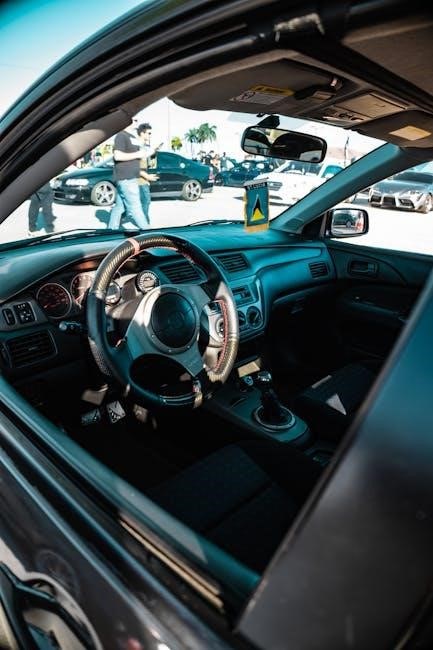
2․2 Interior Features and Controls

The 2022 RAM 2500 interior offers premium comfort and functionality․ Controls include Uconnect multimedia system‚ Bluetooth‚ USB‚ and auxiliary connections․ Storage solutions like cargo compartments and cup holders enhance convenience․ Features such as Keyless Enter ‘n’ Go and push-button start streamline vehicle access and operation‚ ensuring a seamless driving experience tailored to modern needs․

Instrument Panel and Controls

The instrument panel in the 2022 RAM 2500 monitors vital systems‚ featuring warning lights for ABS‚ oil pressure‚ and coolant levels․ Controls for Uconnect settings enhance functionality․

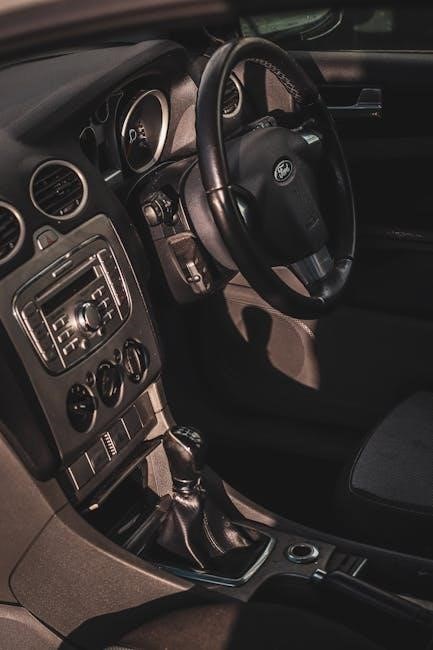
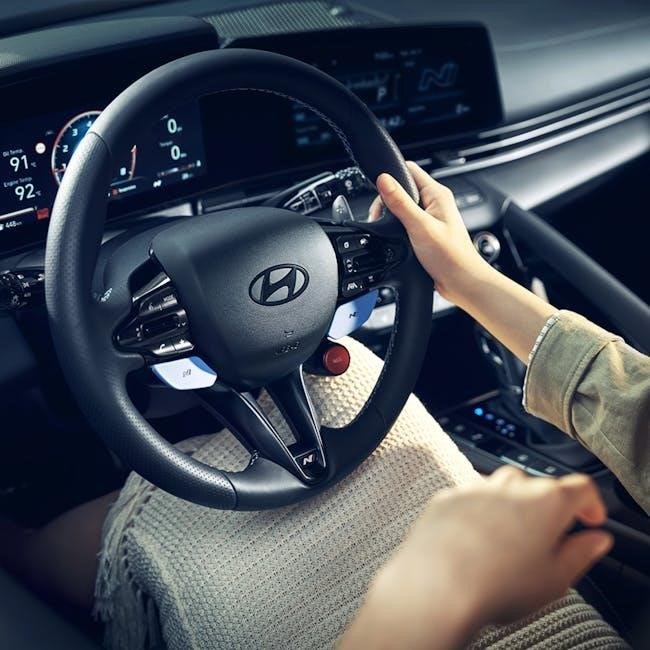
3․1 Understanding the Dashboard Layout

The 2022 RAM 2500 dashboard features a streamlined design with an instrument cluster displaying essential vehicle data․ The Uconnect infotainment system is centrally located‚ providing easy access to multimedia and connectivity controls․ Warning lights for ABS‚ oil pressure‚ and coolant levels are prominently visible‚ ensuring driver awareness․ The layout is designed for convenience and safety‚ allowing drivers to monitor key systems and adjust settings effortlessly․

3․2 Multifunction Display and Settings

The multifunction display in the 2022 RAM 2500 offers customizable settings‚ allowing drivers to tailor information like trip data‚ fuel efficiency‚ and safety alerts․ Accessible via the steering wheel controls‚ it integrates seamlessly with the Uconnect system‚ providing real-time updates and enhancing the driving experience․ Adjustments can be made to prioritize displayed information‚ ensuring a personalized and intuitive interface for optimal vehicle monitoring and control․

Starting and Operating the Vehicle

Starting and operating the 2022 RAM 2500 involves using the remote start system‚ keyless enter‚ and push-button start‚ as detailed in the owner’s manual for safe operation․

4․1 Remote Start System (If Equipped)

The remote start system allows you to start your 2022 RAM 2500 from a distance․ It ensures the vehicle is ready for driving before you enter․ This feature is especially useful in extreme weather conditions․ The system operates using the key fob‚ with a range of up to 300 feet․ Ensure the brake pedal is not pressed and the transmission is in park for proper activation․ Refer to the manual for detailed instructions and safety precautions․

4․2 Keyless Enter ‘n’ Go and Push-Button Start

The Keyless Enter ‘n’ Go system allows you to enter and start your 2022 RAM 2500 without using a traditional key․ Simply approach the vehicle with the key fob and pull the door handle to unlock․ Once inside‚ press the push-button start to ignite the engine․ Ensure the brake pedal is pressed and the transmission is in park for proper activation․ The system enhances convenience and security‚ eliminating the need for physical key insertion․ Refer to the manual for troubleshooting and battery replacement instructions․

Safety Features and Systems

The 2022 RAM 2500 is equipped with advanced safety technologies‚ including LaneSense‚ Adaptive Cruise Control‚ ABS‚ and EBC․ These systems enhance driver control and passenger protection‚ while warning lights monitor vital vehicle functions․

5․1 Advanced Safety Technologies (LaneSense‚ Adaptive Cruise Control)

The 2022 RAM 2500 features advanced safety systems like LaneSense‚ which assists with lane-keeping‚ and Adaptive Cruise Control‚ enabling safe distance maintenance․ These technologies enhance driver confidence and reduce fatigue‚ especially during long drives․ The manual details how to activate and customize these systems for optimal performance‚ ensuring a safer driving experience․

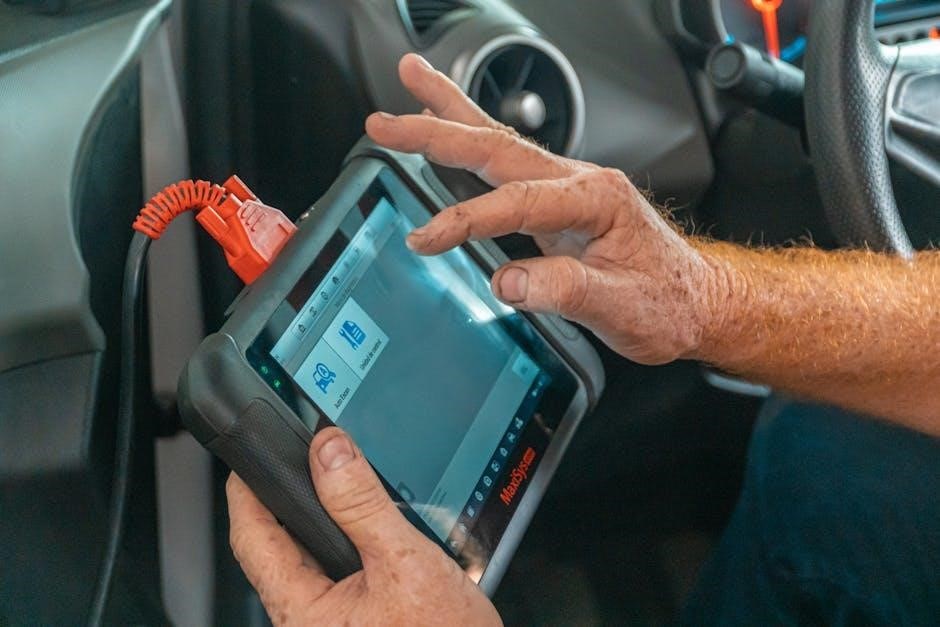
5․2 Warning Lights and Indicators on the Instrument Cluster

The 2022 RAM 2500 instrument cluster features various warning lights and indicators to alert drivers of system statuses or potential issues․ The manual explains each light‚ including engine coolant temperature‚ oil pressure‚ ABS‚ and Tire Pressure Monitoring System (TPMS) warnings․ Drivers can refer to the guide to understand when these lights illuminate and the appropriate actions to take‚ ensuring safety and proper vehicle maintenance․

Multimedia and Connectivity

The 2022 RAM 2500 offers advanced multimedia features‚ including the Uconnect system‚ Bluetooth connectivity‚ and USB/AUX ports‚ ensuring seamless entertainment and device integration for a convenient driving experience․

6․1 Uconnect System Overview

The Uconnect system in the 2022 RAM 2500 provides a user-friendly infotainment interface with touchscreen navigation‚ voice command‚ and seamless smartphone integration via Apple CarPlay and Android Auto․ This advanced system allows drivers to access a wide range of multimedia features‚ including Bluetooth connectivity‚ USB ports‚ and auxiliary inputs‚ ensuring convenient control over music‚ calls‚ and other functions for an enhanced driving experience․

6․2 Bluetooth‚ USB‚ and Auxiliary Connections

The 2022 RAM 2500 offers versatile connectivity options‚ including Bluetooth for hands-free calls and streaming‚ USB ports for charging and data transfer‚ and an auxiliary input for compatible devices․ These features integrate seamlessly with the Uconnect system‚ enabling drivers to enjoy a connected and convenient experience while maintaining focus on the road․

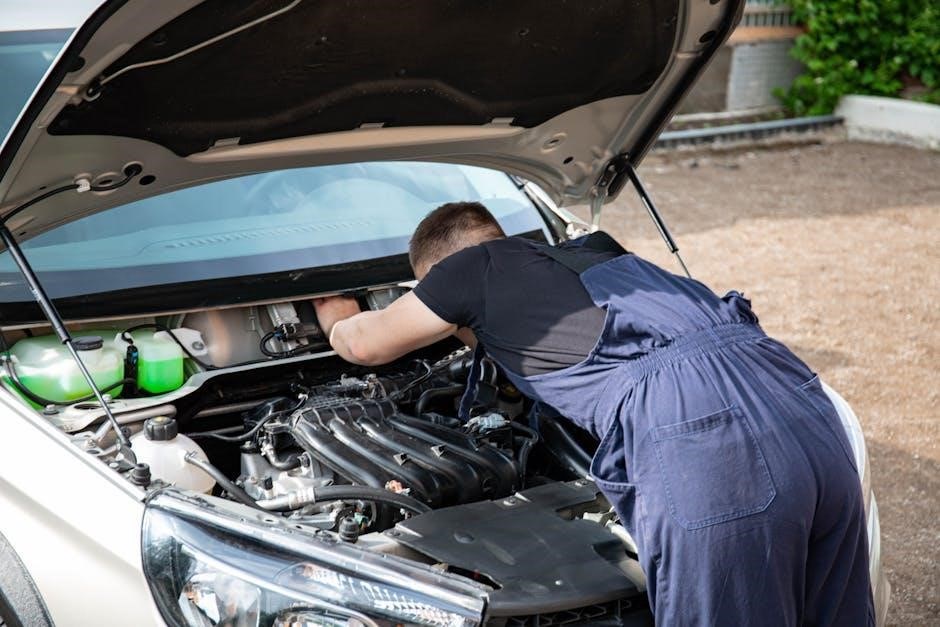
Servicing and Maintenance

Regular servicing ensures optimal performance and longevity․ The manual outlines scheduled maintenance‚ tire pressure checks‚ and fluid inspections for both gasoline and diesel engines․

7․1 Scheduled Maintenance Requirements

The 2022 RAM 2500 manual details essential maintenance intervals to ensure reliability and performance․ Regular oil changes‚ filter replacements‚ and inspections are recommended to maintain optimal engine health․ Diesel engines require specific fuel filter changes and DEF tank checks․ Adhering to these schedules helps prevent mechanical issues and ensures the vehicle operates efficiently under various driving conditions․

7․2 Tire Pressure Monitoring and Care

The 2022 RAM 2500 manual emphasizes proper tire pressure monitoring for safety and efficiency․ The Tire Pressure Monitoring System (TPMS) alerts drivers of low pressure‚ ensuring optimal traction and fuel efficiency․ Regular inspections for wear‚ damage‚ and correct inflation levels are crucial․ Proper tire care includes avoiding overloading and using the correct tire type‚ such as all-season or off-road‚ depending on driving conditions․ Always refer to the manual for specific recommendations․

Technical Specifications

The 2022 RAM 2500 features a 6․7L Cummins Turbo Diesel or 6․4L HEMI V8 engine‚ with 8-speed automatic transmissions‚ 32-gallon fuel capacity‚ and available axle ratios for optimal performance․

8․1 Engine and Transmission Details

The 2022 RAM 2500 offers a 6․7L Cummins Turbo Diesel engine delivering 400 horsepower and 1‚000 lb-ft of torque‚ paired with a 6-speed automatic transmission․ The 6;4L HEMI V8 gasoline engine produces 410 horsepower and 429 lb-ft of torque‚ mated to an 8-speed automatic․ Both engines provide exceptional power and efficiency‚ catering to heavy-duty needs and ensuring robust performance for towing and hauling tasks․

8․2 Fuel Requirements and Capacities

The 2022 RAM 2500 requires Ultra Low Sulfur Diesel for the 6․7L Cummins Turbo Diesel engine and regular unleaded gasoline (87 octane) for the 6․4L HEMI V8․ The fuel tank capacity is approximately 32 gallons․ Biodiesel blends up to B20 are approved for diesel models․ Proper fuel selection ensures optimal performance‚ efficiency‚ and longevity of the powertrain‚ aligning with emissions standards and warranty requirements․

Emergency Procedures

In emergencies‚ the manual outlines essential procedures for safety‚ including jacking‚ tire changing‚ and accident protocols․ Always secure the vehicle and use proper equipment for handling emergencies․

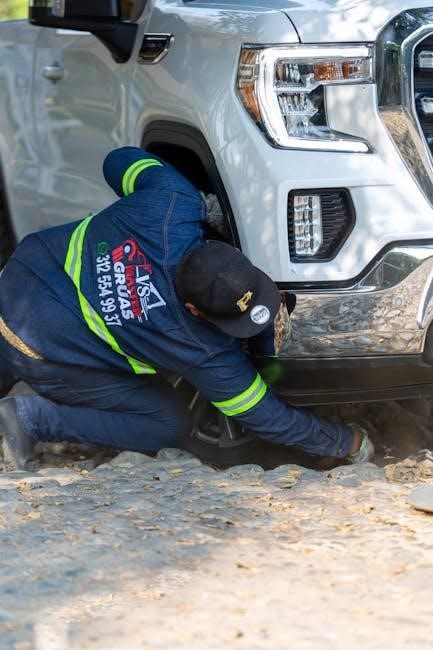
9․1 Jacking and Tire Changing

For safe tire changing‚ position the vehicle on level ground and engage the parking brake․ Loosen lug nuts with the wrench before lifting․ Use jack stands for added stability․ Always refer to the manual for proper jacking points and procedures to ensure safety and avoid vehicle damage․ Never get under the vehicle while it’s supported only by a jack․ Follow all safety precautions outlined in the manual for emergency tire changes․

9․2 In Case of an Accident or Breakdown

In case of an accident or breakdown‚ remain calm and prioritize safety․ Move to a safe location if possible‚ then activate hazard lights․ Contact emergency services if necessary and notify authorities․ Assess damage and consult the manual for specific procedures․ Use roadside assistance if equipped or contact a tow service․ Always follow the manual’s guidelines for handling emergencies to ensure safety and proper vehicle recovery․ Keep emergency contact information handy for quick access․

Towing and Hauling

The RAM 2500 is designed for heavy-duty towing and hauling‚ offering robust capabilities and advanced features to ensure safe and efficient trailer towing and cargo management․

10․1 Trailer Towing Guidelines

The 2022 RAM 2500 is equipped for heavy-duty towing‚ with guidelines emphasizing proper hitch installation‚ weight distribution‚ and trailer brake setup․ Always adhere to the vehicle’s maximum trailer weight rating and ensure loads are securely fastened․ Use safety chains and consult the manual for specific towing configurations to maintain control and safety while hauling․ Proper preparation ensures efficient and secure trailer towing operations․

10․2 Winch Usage (Power Wagon Model)

The 2022 RAM 2500 Power Wagon features a factory-installed winch‚ designed for off-road recovery and heavy-duty applications․ Always ensure the winch is properly secured and rated for the load․ Use high-quality cables and avoid overloading․ Operate the winch slowly‚ keeping bystanders at a safe distance․ Wear gloves and ensure the area is clear of debris․ Regularly inspect and maintain the winch for optimal performance․ Refer to the manual for detailed specifications and safety guidelines․

Customer Assistance and Warranty

The 2022 RAM 2500 offers comprehensive customer support and warranty programs‚ ensuring peace of mind․ Owners can access resources‚ schedule services‚ and review warranty details online․

11․1 RAM Customer Support and Resources

RAM offers extensive customer support through various channels‚ including phone‚ email‚ and live chat․ Owners can access online resources‚ how-to videos‚ and tips tailored to their vehicle․ The Uconnect system provides additional support‚ ensuring a seamless ownership experience with 24/7 assistance available for any inquiries or concerns․

11․2 Warranty Information and Maintenance Schedule

The 2022 RAM 2500 is backed by a comprehensive warranty program‚ including coverage for the vehicle‚ powertrain‚ and emissions․ The maintenance schedule outlined in the manual ensures optimal performance and longevity․ Regular servicing‚ as specified‚ is essential to maintain warranty validity․ Detailed fluid capacities and part specifications are provided to guide owners in keeping their truck in peak condition․

2011 ford fusion manual

Welcome to the 2011 Ford Fusion Manual, your comprehensive guide to understanding and maintaining your vehicle․ This essential resource covers everything from basic operations to advanced features, ensuring optimal performance and safety․ Whether you’re a new owner or a seasoned driver, this manual is your go-to reference for all aspects of your Ford Fusion․ Refer to it regularly to maximize your driving experience and keep your car in top condition․

Overview of the 2011 Ford Fusion

The 2011 Ford Fusion is a mid-size sedan known for its blend of style, comfort, and performance․ Available in various trims, it offers a range of engine options, including a 2․5L inline-4 and a 3․0L V6, paired with either a manual or automatic transmission․ The Fusion features a spacious interior, advanced technology, and excellent fuel efficiency, making it a popular choice for both daily commuting and long-distance driving․ Its sleek design and reliable performance solidify its reputation as a versatile vehicle․

Importance of the Owner’s Manual

The owner’s manual is a crucial resource for 2011 Ford Fusion drivers, providing detailed information on vehicle operation, maintenance, and troubleshooting․ It ensures safe and proper use of features, helping drivers avoid potential issues․ Regularly referring to the manual enables owners to perform routine maintenance, understand safety features, and address common problems effectively․ This guide is essential for maximizing the vehicle’s performance, longevity, and overall driving experience, making it an indispensable tool for every Ford Fusion owner․

Where to Find the 2011 Ford Fusion Manual

The 2011 Ford Fusion Manual can be found on Ford’s official website or platforms like ManualsLib and CarManuals․ It is also available as a downloadable PDF online․

Online Sources for the Manual

The 2011 Ford Fusion Manual is readily available online through platforms like ManualsLib and CarManuals․ You can also download it directly from Ford’s official website or trusted automotive resources․ These sources provide free access to the manual in PDF format, allowing you to easily search, print, or save it for future reference․ Ensure you use reputable websites to avoid unofficial or incomplete versions of the manual․

Ford’s Official Website and Resources

Structure and Contents of the Manual

The 2011 Ford Fusion Manual is organized into clear sections, including an introduction, table of contents, symbols glossary, maintenance schedules, troubleshooting guides, and technical specifications․ This structure ensures easy navigation and quick access to essential information, making it a valuable resource for owners seeking to understand and maintain their vehicle effectively․

Table of Contents and Key Sections

The 2011 Ford Fusion Manual features a detailed table of contents, guiding users through key sections such as vehicle operation, maintenance schedules, troubleshooting, and technical specifications․ It includes chapters on safety features, engine performance, and accessories, ensuring comprehensive coverage․ Appendices provide additional resources like a glossary of terms and specifications․ This organized structure helps owners navigate effortlessly and find essential information quickly, making it an indispensable resource for optimal vehicle care and operation․

Understanding Symbols and Glossary

The 2011 Ford Fusion Manual uses various symbols to convey important information quickly․ These symbols, such as warning icons and operational indicators, are explained in a dedicated section to ensure safe and proper vehicle operation․ Additionally, a comprehensive glossary is included to define technical terms, helping owners understand complex concepts․ This section is crucial for interpreting instructions accurately and maintaining your vehicle effectively․

Troubleshooting and Common Issues

The 2011 Ford Fusion Manual provides detailed troubleshooting guides and addresses common issues to help owners identify and resolve problems efficiently․ Key sections include diagnostic procedures and repair instructions, ensuring drivers can maintain their vehicle’s performance and safety effectively․

Diagnosing Problems Using the Manual

The 2011 Ford Fusion Manual offers a detailed troubleshooting section, helping owners identify and diagnose issues efficiently․ It provides clear symptom-to-cause analysis, step-by-step diagnostic procedures, and repair guidance․ By referencing the manual, drivers can pinpoint problems related to engine performance, electrical systems, or other components․ This section ensures effective problem-solving, saving time and reducing the need for professional assistance in many cases․ Regular use of this guide helps maintain the vehicle’s optimal condition and prevents minor issues from escalating;

Addressing Common Maintenance Needs

The 2011 Ford Fusion Manual provides clear guidelines for routine maintenance, ensuring your vehicle runs smoothly․ It outlines schedules for oil changes, tire pressure checks, and fluid level inspections․ Detailed instructions for replacing air filters, spark plugs, and belts are included․ By following these recommendations, you can prevent wear and tear, maintain performance, and extend the lifespan of your Ford Fusion․ Regular maintenance as per the manual ensures reliability and safety on the road․

Maintenance and Repair Guidelines

The 2011 Ford Fusion Manual offers detailed guidelines for routine checks, preventive maintenance, and repair steps, ensuring your vehicle performs optimally and lasts longer․

Scheduled Maintenance Procedures

The 2011 Ford Fusion Manual outlines essential scheduled maintenance procedures, including oil changes every 5,000 to 7,500 miles, tire pressure checks, and filter replacements․ It also details interval schedules for spark plugs, belts, and fluid flushes, ensuring your vehicle remains in peak condition․ Regular inspections of brakes, battery, and suspension are recommended to prevent wear and tear․ Follow these guidelines to maintain performance, efficiency, and longevity of your Ford Fusion․

Step-by-Step Repair Instructions

The 2011 Ford Fusion Manual provides detailed, step-by-step repair instructions for common issues, ensuring DIY fixes are straightforward․ From replacing brake pads to diagnosing electrical problems, the manual offers clear guidance․ It includes troubleshooting tips, tool lists, and visual aids to help owners address repairs confidently․ Whether you’re a novice or experienced, these instructions empower you to maintain and fix your Ford Fusion effectively, saving time and money․

Safety Features and Precautions

The 2011 Ford Fusion Manual emphasizes advanced safety features like airbags and anti-lock brakes, while outlining essential precautions such as proper seatbelt use and adherence to maintenance guidelines to ensure driver and passenger safety․ Regular inspections are recommended to maintain vehicle reliability and safety standards․

Understanding Safety Features in the 2011 Ford Fusion

The 2011 Ford Fusion Manual highlights advanced safety features such as dual front airbags, side airbags, and anti-lock brakes to ensure passenger protection․ It also emphasizes the importance of proper seatbelt use and electronic stability control for enhanced vehicle stability․ Regular maintenance checks, as outlined in the manual, are crucial for maintaining these safety systems․ Understanding these features and following guidelines ensures a safer driving experience and optimal vehicle performance․

Important Precautions for Drivers

Adhering to the guidelines in the 2011 Ford Fusion Manual is essential for safe driving․ Always wear seatbelts, as they significantly reduce injury risks․ Avoid driving under the influence of alcohol or drugs, and never use electronic devices while driving․ Ensure proper tire pressure and load capacity to maintain vehicle stability․ Familiarize yourself with safety features like airbags and electronic stability control․ Regularly check brakes and suspension for optimal performance․ Minimize distractions while driving to ensure a safe experience for all occupants․

Technical Specifications and Details

The 2011 Ford Fusion features a range of engine options, including a 2;5L I-4 and 3․0L V-6, paired with 6-speed automatic or manual transmissions, delivering up to 240 horsepower․

Engine, Transmission, and Performance Details

The 2011 Ford Fusion offers a range of engine options, including a 2․5L inline-4 producing 175 horsepower and a 3․0L V-6 delivering 240 horsepower․ Both engines are paired with a 6-speed automatic transmission, while the 2․5L is also available with a 6-speed manual․ The Fusion Hybrid model combines a 2․5L Atkinson-cycle engine with an electric motor for enhanced fuel efficiency․ These powertrains provide smooth acceleration, responsive handling, and a balance of power and efficiency, catering to various driving preferences and needs․

Accessories and Customization Options

The 2011 Ford Fusion Manual details a variety of accessories and customization options to enhance your driving experience․ These include exterior upgrades like roof racks and cargo organizers, as well as interior enhancements such as premium seat materials and infotainment system upgrades․ Additionally, Ford offers optional technology features like SYNC® for smartphone integration and voice commands․ These accessories allow you to tailor your Fusion to your lifestyle, improving functionality, comfort, and personal style while maintaining optimal performance․

Towing and Loading Guidelines

The 2011 Ford Fusion Manual provides essential towing and loading guidelines to ensure safety and efficiency․ It outlines the vehicle’s maximum towing capacity, proper hitch installation, and load securing methods․ Adhering to these guidelines helps prevent damage and ensures safe towing operations․

Proper Towing Procedures

The 2011 Ford Fusion Manual emphasizes following proper towing procedures to ensure safety and prevent damage․ Ford Motor Company provides specific guidelines for authorized tow truck operators, detailing correct hook-up methods and load distribution․ Always adhere to the vehicle’s maximum towing capacity, as exceeding it can lead to equipment damage or safety hazards․ Ensure your tow truck operator follows these procedures meticulously to maintain your vehicle’s integrity and operational reliability․

Load Capacity and Safety Measures

The 2011 Ford Fusion Manual provides detailed information on load capacity and safety measures to ensure safe towing and driving practices․ It specifies the vehicle’s Gross Vehicle Weight Rating (GVWR) and payload capacity, emphasizing the importance of not exceeding these limits․ Proper weight distribution and adherence to Ford’s guidelines are crucial to prevent damage and maintain safety․ Always refer to the manual for specific load restrictions and safety precautions to protect your vehicle and ensure reliable performance․

Digital and Printable Versions

The 2011 Ford Fusion Manual is available as a downloadable PDF, allowing easy digital access and printing for convenient reference and organization․

Downloading the PDF Manual

To access the 2011 Ford Fusion Manual, visit the official Ford website or reputable platforms like ManualsLib․ Search for the 2011 Ford Fusion and download the PDF version․ This free resource is compatible with all devices, ensuring easy access to essential information․ The manual is comprehensive, covering maintenance, troubleshooting, and operational guides․ Print or save it for future reference, making it a convenient tool for car care and optimal performance․

Printing and Organizing the Manual

For easy access, print the 2011 Ford Fusion Manual on high-quality paper․ Use a three-ring binder to organize sections like maintenance schedules, troubleshooting, and safety features․ Include dividers or tabs for quick navigation․ Store the manual in your vehicle or a convenient location․ Regularly review and update the manual as needed to ensure you have the most accurate information for your car’s care and operation․

The 2011 Ford Fusion Manual is an indispensable resource for owners, offering detailed guidance on maintenance, troubleshooting, and optimal vehicle care․ Regularly referencing this manual ensures safety, longevity, and peak performance of your Ford Fusion․

Final Thoughts on the 2011 Ford Fusion Manual

The 2011 Ford Fusion Manual is a vital tool for every owner, providing clear instructions and insights to enhance your driving experience․ With comprehensive details on maintenance, troubleshooting, and features, it empowers you to keep your vehicle in prime condition․ Regularly consulting this guide ensures safety, efficiency, and longevity, making it an essential companion for years of reliable performance and enjoyment behind the wheel․

Encouragement to Refer to the Manual Regularly

Regularly consulting your 2011 Ford Fusion Manual ensures you stay informed about your vehicle’s features, maintenance needs, and troubleshooting tips․ It serves as a comprehensive guide to optimize performance, safety, and longevity․ By referencing it often, you can address issues promptly, understand your car’s systems, and make informed decisions․ Make it a habit to review the manual periodically to enhance your driving experience and keep your Ford Fusion in peak condition․

user manual for vtech phone

Welcome to the VTech Phone user manual. This guide helps you understand and utilize your cordless telephone system effectively. Discover its features, setup, and troubleshooting tips for optimal performance.

1.1 Overview of VTech Phone Features

The VTech Phone offers a range of innovative features designed for convenience and efficiency. It includes caller ID, call waiting, and voicemail setup for managing incoming calls. The system supports cordless handsets with clear sound quality and extended range. Additional features like call forwarding, do not disturb, and call blocking enhance privacy and control. The phone also includes a built-in phonebook for storing contacts and customizable settings for ringtones and display preferences. These features ensure a seamless communication experience tailored to your needs.

1.2 System Requirements and Compatibility

Ensure your VTech Phone operates smoothly by meeting system requirements. It is compatible with standard analog telephone lines and requires a power supply (usually 6V DC). The handset needs rechargeable batteries, typically AA size. Compatibility with digital services may vary. Check for firmware updates to maintain optimal performance. Ensure your base unit is connected to both power and the telephone line. Handsets must be registered to the base unit for proper functionality. Adhere to these requirements for reliable operation and clear communication.

Installation and Setup

Get started with your VTech Phone by charging the handset and connecting the base unit. Ensure the phone is plugged into a power source and telephone line. Follow the registration process to pair the handset with the base. Once set up, explore the phone’s features and settings for a personalized experience.

2;1 Hardware Installation and Connections

Start by unpacking and charging the handset. Connect the base unit to a power outlet and telephone jack. Plug in the power adapter and ensure the base is turned on. Allow the battery to charge fully before use. Connect any additional handsets to the base if required. Ensure all cables are securely plugged in to avoid connection issues. Once powered on, the system will initialize, and you can proceed with handset registration for full functionality.

2.2 Handset Registration and Base Unit Setup

To register the handset, ensure the base unit is powered on. Press and hold the Find Handset button on the base until it searches for the handset. On the handset, press OK or the designated key to complete registration. A confirmation tone will signal successful pairing. If registration fails, turn the base off and on again, then repeat the process. Ensure the handset is fully charged before starting. This step is crucial for proper system functionality.

Important Safety Instructions

Read all safety precautions before use. Avoid exposing the phone to water or extreme temperatures. Keep batteries away from children and dispose of them properly. Follow all guidelines to ensure safe and reliable operation of your VTech Phone system.

3.1 General Safety Precautions

Always read and follow the safety instructions provided with your VTech Phone. Avoid exposing the device to water or extreme temperatures. Ensure proper handling of batteries, keeping them out of reach of children. Dispose of batteries correctly to prevent environmental harm. Regularly inspect the power cord and charging base for damage. Never use damaged equipment, as it may pose a safety risk. Adhere to all guidelines to ensure safe and reliable operation of your VTech Phone system.

3.2 Battery Safety and Handling

Always use the correct type and size of batteries recommended for your VTech Phone. Avoid using damaged or leaking batteries, as they can cause malfunctions. Keep batteries away from children and pets. Charge the handset properly, ensuring it is placed securely on the base. Avoid exposing batteries to extreme temperatures or moisture. Regularly check the battery charge status and replace them when necessary. Dispose of old batteries responsibly, following local recycling guidelines. Clean battery contacts periodically to maintain optimal performance.

Basic Phone Operations

Master essential functions like making calls, answering, and navigating menus. Use the keypad for dialing and adjust volume for clear communication. Ensure the handset is charged and properly registered for seamless operation.

4.1 Making and Receiving Calls

To make a call, lift the handset and press the PHONE key. Ensure you hear a dial tone before entering the number. Use the keypad to dial, and press PHONE to connect. For redial, press #endif to retrieve the last dialed number. To receive calls, answer by pressing the PHONE or _SPEAKER_ key. Use CALLER ID to view incoming numbers and CALL WAITING to manage additional calls during an active conversation.

4.2 Navigating the Phone Interface

Use the NAVIGATION keys to scroll through menus and options. Press MENU to access settings, and use UP or DOWN arrows to browse. Highlight desired options with the OK/SELECT key. Access CALLER ID and CALL WAITING features directly via dedicated buttons. Adjust volume using the VOLUME key during calls. The interface is intuitive, ensuring easy access to all functions. Familiarize yourself with these controls to maximize your phone’s functionality and enjoy seamless communication.

Call Management Features

Enhance your calling experience with features like Caller ID, Call Waiting, Call Forwarding, and Do Not Disturb. These tools help you manage incoming calls efficiently and maintain privacy.

5.1 Caller ID and Call Waiting

Caller ID displays the caller’s name and number, allowing you to identify who’s calling before answering. Call Waiting alerts you to incoming calls while on the line. Use these features to manage calls efficiently. Caller ID requires subscription, and Call Waiting ensures you never miss important calls. These tools enhance communication by providing clarity and control over incoming calls, ensuring you stay connected without interruptions or missed opportunities. They integrate seamlessly with other call management features for a streamlined experience.

5.2 Call Forwarding and Do Not Disturb

Call Forwarding allows you to redirect incoming calls to another number, ensuring you never miss important calls. Activate it via the phone menu to forward calls to a predefined number. Do Not Disturb silences your phone during specified times, minimizing interruptions. Enable it manually or schedule it to activate automatically. These features enhance flexibility and control, allowing you to manage calls and reduce distractions effectively. Customize settings to suit your needs for a seamless communication experience.

Phonebook and Directory

Your VTech phone allows you to store and manage contacts efficiently. Add, edit, and organize entries with ease, ensuring quick access to your important numbers and names.

6.1 Adding and Managing Contacts

To add a contact, navigate to the phonebook menu and select “Add New Entry.” Enter the name and phone number, then save. The system allows quick searches by entering the first few letters, simplifying contact management. You can also check the number of entries used and remaining slots for efficient organization. This feature ensures your contacts are easily accessible and up-to-date, enhancing your calling experience.

6.2 Searching and Editing Entries

To search for a contact, press the keypad to type the first few letters of the name or number. The system will display matching entries. For editing, select the desired entry, choose “Edit,” and make your changes. You can also delete entries if needed. This feature allows you to maintain accurate and up-to-date contacts effortlessly. Regularly reviewing your phonebook ensures smooth communication and avoids dialing errors.

Advanced Features

Explore advanced features like voicemail setup, call blocking, and privacy settings to enhance your communication experience. These tools help manage calls and protect your privacy efficiently.

7.1 Voicemail Setup and Playback

To set up voicemail, ensure your VTech phone is connected and configured. Navigate to the voicemail menu, typically found under the ‘Messages’ or ‘Voicemail’ option. Follow the prompts to create a PIN and record a greeting. Once set up, the system will announce the number of messages and begin playback automatically. Use the navigation keys to skip, delete, or replay messages. Make sure the date and time are correctly set for accurate message timestamps. Refer to the manual for detailed instructions on configuring and managing your voicemail effectively.

7.2 Call Blocking and Privacy Settings

Enhance your privacy with VTech Phone’s call blocking features. Block unwanted calls by adding numbers to the reject list or using the ‘Do Not Disturb’ mode. Enable Caller ID to identify incoming calls and manage privacy settings. The system allows you to block unknown or specific numbers, ensuring uninterrupted communication. Navigate to the ‘Privacy’ menu to customize these settings. Adjusting these options helps you control incoming calls and maintain your privacy effectively while using the telephone system.

Customization Options

Personalize your VTech Phone with customizable ringtones, sound settings, and display options. Adjust volume, select from various ring tones, and modify the display to suit your preferences for enhanced usability.

8.1 Ringtones and Sound Settings

Customize your VTech Phone with a variety of ringtones to suit your preferences. Users can select from multiple pre-installed tones or adjust volume levels for optimal sound quality. Additionally, enable silent mode to mute all sounds or set specific ringtones for individual contacts. These settings ensure personalized alerts and a tailored auditory experience, enhancing your overall communication comfort and convenience.

8.2 Display and Language Settings

Customize your VTech Phone’s display settings to enhance viewing comfort. Adjust brightness and contrast levels to optimize screen readability in various lighting conditions. Additionally, modify language preferences to match your linguistic needs, with options such as English, Spanish, or French. The interface will update accordingly, ensuring all menus and prompts are displayed in your preferred language. These settings provide a personalized and accessible communication experience without affecting existing data or functionality.

Troubleshooting Common Issues

Resolve common issues like static or keypad malfunctions. Check connections, reset the unit, or replace batteries. Ensure optimal performance by addressing problems promptly and easily.

9.1 No Dial Tone or Poor Sound Quality

If your VTech phone has no dial tone or poor sound quality, first ensure the handset is fully charged. Check that the base unit is properly connected to power and the phone jack. Restart the system by turning it off and on. Static or interference may be caused by nearby devices or physical obstructions. Move to an open area and verify all connections are secure. If issues persist, refer to the troubleshooting section for further assistance.

9.2 Handset Not Registering to Base

If the handset fails to register to the base, ensure it is fully charged. Press and hold the “Find Handset” button on the base until it flashes. Restart the system by turning it off and on. Check that the base is stable and connected to power. Move the base away from physical obstructions. If issues persist, reset the system or consult the troubleshooting guide for further solutions to restore proper functionality.

Maintenance and Care

Regularly clean the handset and base with a soft cloth to prevent dust buildup. Ensure firmware updates are installed for optimal performance and security. Store batteries properly when not in use to maintain their lifespan and functionality.

10.1 Cleaning the Handset and Base

Regular cleaning ensures optimal performance and longevity of your VTech Phone. Use a soft, dry cloth to wipe down the handset and base, removing dust and dirt. Avoid harsh chemicals or liquids, as they may damage the finish or internal components. Gently clean the keypad, display, and battery contacts with a slightly damp cloth, ensuring no moisture enters the device. Allow the phone to dry thoroughly before use. Regular maintenance prevents malfunction and keeps your phone in pristine condition.

10.2 Updating Firmware and Software

To ensure your VTech Phone performs optimally, regularly update its firmware and software. Check the user manual or VTech’s official website for the latest updates. Connect your phone to a computer or use the built-in update feature, if available. Follow on-screen instructions to download and install updates. Restart the device after completion. Updates enhance features, improve performance, and fix bugs. Always ensure the base unit is registered and the handset is fully charged before proceeding with updates.

ozone spirit mini split manual

Welcome to the Ozone Spirit Mini Split Manual, your comprehensive guide to installing, operating, and maintaining this efficient HVAC system. Designed for energy savings and comfort, this manual provides detailed instructions for optimal performance. Explore key features, safety tips, and technical specifications to ensure a seamless experience with your Ozone Spirit Mini Split.

Purpose and Scope of the Manual

This manual serves as a detailed guide for the Ozone Spirit Mini Split system, providing essential information for installation, operation, and maintenance. Its purpose is to ensure users understand how to safely and effectively utilize the system while maximizing its performance and longevity. The scope includes comprehensive instructions for both DIY enthusiasts and professional technicians, covering technical specifications, safety protocols, and troubleshooting techniques. By following this manual, users can achieve optimal energy efficiency, comfort, and reliability from their Ozone Spirit Mini Split. Designed to be user-friendly, this guide addresses common questions and scenarios, ensuring a seamless experience for all users.

Key Features and Benefits of the Ozone Spirit Mini Split

The Ozone Spirit Mini Split stands out for its energy-efficient design, offering a 20 SEER2 rating for exceptional cooling and heating performance. Its compact size and lightweight construction make it ideal for spaces up to 1,500 square feet, providing quiet operation and seamless integration into any home or office. With WiFi compatibility, users can control the system remotely, ensuring convenience and precise temperature management. The system also features advanced refrigerant handling, reducing environmental impact while maintaining high efficiency. Its robust design ensures durability and reliable operation, making it a cost-effective solution for modern heating and cooling needs. These features collectively enhance comfort, reduce energy consumption, and provide long-term savings for users.

Safety Precautions and Guidelines

Ensure safety by following guidelines: turn off power before maintenance, avoid improper installations, and keep flammable materials away. Always use certified technicians for repairs.

Pre-Installation Safety Checks

Before installing your Ozone Spirit Mini Split, ensure the area is clear of obstructions and flammable materials. Verify that the electrical supply matches the system’s requirements and that all power is turned off during installation. Check for any gas or refrigerant leaks and ensure proper ventilation. Wear protective gear, including gloves and safety glasses, to prevent injuries. Ensure that the installation site is level and stable to prevent system imbalance. Follow all local building codes and safety standards. Properly handle refrigerants to avoid environmental hazards. Finally, ensure that all connections are secure and tightened according to manufacturer specifications to prevent leaks or malfunctions. Safety should always be the top priority to ensure a successful and hazard-free installation.

Operational Safety Tips

To ensure safe and efficient operation of your Ozone Spirit Mini Split, always follow these guidelines. Set your thermostat to a moderate temperature to avoid overloading the system. Regularly inspect the air filters and clean them as needed to maintain airflow and prevent fire hazards. Keep the area around the unit clear of furniture or curtains to ensure proper ventilation. Never attempt to repair the system while it is operational or under power. If you notice unusual noises, leaks, or performance issues, turn off the unit and contact a certified technician. Always handle refrigerant with care, as improper handling can pose environmental and health risks. Lastly, ensure that children and pets are kept away from the unit to avoid accidental damage or injury. Prioritize safety to enjoy reliable and efficient cooling and heating year-round.

System Components and Specifications

The Ozone Spirit Mini Split includes an indoor unit, outdoor unit, remote control, and installation kit. It features 12k-36k BTU capacity, 20 SEER2 efficiency, and WiFi compatibility for smart operation.

Overview of the Ozone Spirit Mini Split System

The Ozone Spirit Mini Split System is a cutting-edge HVAC solution designed for efficient heating and cooling in residential and small commercial spaces. It consists of an indoor unit, outdoor unit, and remote control, offering a sleek and compact design. The system operates on advanced inverter technology, ensuring energy efficiency and quiet operation. With capacities ranging from 12k to 36k BTU, it can cover areas from 500 to 1500 square feet. The system supports both cooling and heating modes, making it suitable for year-round use. Features include WiFi compatibility for smart control, multi-stage filtration, and a user-friendly interface. Its compact size and ductless design make it ideal for spaces where traditional ductwork is not feasible, providing a modern and flexible climate control solution.

Technical Specifications and Compatibility

The Ozone Spirit Mini Split System is available in capacities ranging from 12k to 36k BTU, with a 20 SEER2 energy efficiency rating, ensuring optimal performance and energy savings. It is compatible with spaces between 500 to 1500 square feet, making it suitable for various room sizes. The system operates on 220V electrical supply and features a refrigerant R-410A, which is environmentally friendly. It supports both cooling and heating modes, with an operating temperature range of -22°F to 122°F (-30°C to 50°C). The system is equipped with WiFi connectivity, allowing for smart control via a mobile app. Its compact design and lightweight components facilitate easy installation and ensure compatibility with modern architectural styles. The Ozone Spirit Mini Split is designed to integrate seamlessly with existing electrical and structural setups, providing a versatile and efficient climate control solution.

Installation Steps and Requirements

Ensure proper site preparation, electrical connections, and refrigerant handling for a successful installation. Follow DIY-friendly guidelines for indoor and outdoor unit placement, ensuring compatibility with your space and local codes.

Indoor Unit Installation Guidelines

For the indoor unit, ensure a level installation on a sturdy wall or floor mount. Choose a location with good airflow, avoiding direct sunlight and extreme temperatures. Connect the electrical supply according to the manual’s wiring diagram, ensuring compatibility with your home’s voltage. Install the drain hose securely to prevent water leakage. Mount the unit at least 7 feet above the floor for optimal air circulation. Use the provided installation kit to secure the unit firmly. Ensure the remote control is accessible and the air filter is easily reachable for maintenance. Follow local building codes and safety standards during installation. If unsure, consult a certified technician to avoid potential issues.

Outdoor Unit Installation Instructions

Install the outdoor unit on a firm, level surface, ensuring it’s placed on a concrete pad or sturdy base to prevent vibration. Position it in a shaded area to enhance efficiency and protect it from direct sunlight. Maintain a minimum clearance of 12 inches around the unit for proper airflow and service access. Connect the refrigerant lines securely, ensuring they are insulated and protected from damage. Mount the unit at least 18 inches above the ground to avoid water accumulation. Ensure the electrical connections comply with local codes and the unit’s specifications. Use a circuit breaker appropriate for the system’s power requirements. If installing near a wall, maintain a 3-foot clearance to allow for adequate airflow. Always follow the manufacturer’s guidelines and consult a professional if needed.

Maintenance and Upkeep

Regular maintenance ensures the Ozone Spirit Mini Split operates efficiently. Clean filters monthly, inspect drain lines for blockages, and check refrigerant levels. Schedule annual professional tune-ups to maintain performance and extend system lifespan. Keep the outdoor unit free from debris and ensure proper airflow. Replace worn parts promptly to prevent system damage. Maintain a consistent cleaning schedule to avoid mold and bacteria growth. Proper upkeep ensures energy efficiency, optimal cooling, and heating performance. Always refer to the manual for specific maintenance recommendations tailored to your unit. Regular servicing prevents unexpected breakdowns and keeps your system running smoothly year-round. Stay proactive to enjoy reliable and efficient climate control.

Scheduled Maintenance Tasks

To ensure optimal performance, schedule regular maintenance for your Ozone Spirit Mini Split. Begin with monthly tasks: clean or replace air filters, inspect drain lines for blockages, and wipe down the indoor unit. Every three months, check the refrigerant levels and ensure all electrical connections are secure. Annually, hire a professional to inspect the system, clean the condenser coils, and verify proper refrigerant charge. Additionally, inspect the outdoor unit for debris and ensure proper airflow. Replace worn parts promptly and maintain a record of all maintenance activities. Regular servicing prevents unexpected breakdowns, maximizes energy efficiency, and extends the system’s lifespan. By following these tasks, you ensure your Ozone Spirit Mini Split continues to provide reliable and efficient heating and cooling throughout the year. Consistency is key to maintaining peak performance and system reliability. Always refer to the manual for specific guidelines tailored to your unit. By staying proactive, you protect your investment and enjoy a comfortable indoor environment year-round. Proper upkeep not only saves energy but also reduces operational costs, making it a crucial part of system ownership. Regular maintenance ensures your Ozone Spirit Mini Split operates at its best, providing consistent and reliable service. Stay on track with these tasks to keep your system in excellent condition. Regular check-ups prevent minor issues from becoming major problems, ensuring uninterrupted comfort. Remember, a well-maintained system is a long-lasting one. Keep your Ozone Spirit Mini Split in top shape with scheduled care. This approach guarantees efficiency, durability, and peace of mind. Always prioritize maintenance to reap the full benefits of your HVAC investment. Through consistent upkeep, your system will deliver exceptional performance for years to come. Adhere to the recommended schedule and enjoy the advantages of a properly maintained Ozone Spirit Mini Split. Regular maintenance is the cornerstone of system longevity and efficiency, ensuring your unit operates smoothly and effectively. By committing to these tasks, you safeguard your comfort and investment. Stay vigilant and proactive to keep your Ozone Spirit Mini Split in prime condition. Proper maintenance is essential for optimal functionality and energy savings. Follow the outlined tasks to ensure your system remains efficient and reliable. Regular upkeep is crucial for maintaining the performance and longevity of your Ozone Spirit Mini Split. By adhering to the schedule, you ensure your system continues to deliver exceptional results. Consistent maintenance is vital for preserving the efficiency and effectiveness of your HVAC system. Stay dedicated to these tasks and enjoy uninterrupted comfort. Proper care ensures your Ozone Spirit Mini Split operates at its best, providing reliable service and energy savings. Regular maintenance is the key to a long-lasting and efficient system. Uphold your commitment to these tasks for optimal performance and peace of mind. Through regular upkeep, your Ozone Spirit Mini Split will remain a dependable and efficient solution for your heating and cooling needs. Always remember, scheduled maintenance is the foundation of system longevity. By following these tasks, you ensure your unit continues to perform at its highest potential. Regular maintenance is essential for safeguarding your investment and ensuring consistent comfort. Stay on top of these tasks to keep your Ozone Spirit Mini Split in excellent working condition. Consistency in maintenance ensures your system remains efficient, reliable, and long-lasting. By prioritizing these tasks, you protect your investment and enjoy a comfortable environment. Proper maintenance is the key to maximizing the lifespan and efficiency of your Ozone Spirit Mini Split. Stay proactive with these tasks to ensure your system delivers exceptional performance. Regular upkeep is crucial for maintaining the health and efficiency of your HVAC system. By adhering to the schedule, you ensure your Ozone Spirit Mini Split continues to provide reliable service. Consistent maintenance is vital for preserving the performance and longevity of your unit. Stay committed to these tasks for optimal results. Proper care ensures your system operates efficiently, providing consistent heating and cooling. Regular maintenance is the cornerstone of system reliability and efficiency. By following these tasks, you safeguard your investment and ensure a comfortable indoor environment. Through consistent upkeep, your Ozone Spirit Mini Split will remain a trusted and efficient solution for years to come. Always remember, scheduled maintenance is essential for optimal performance and longevity. By adhering to these tasks, you ensure your system continues to deliver exceptional results. Regular maintenance is the key to maximizing the efficiency and lifespan of your Ozone Spirit Mini Split. Stay dedicated to these tasks for uninterrupted comfort and energy savings. Proper upkeep ensures your system remains in top condition, providing reliable service and optimal performance. By prioritizing maintenance, you protect your investment and enjoy a comfortable home environment. Regular maintenance is crucial for maintaining the efficiency and reliability of your Ozone Spirit Mini Split. Stay proactive with these tasks to ensure your system operates at its best. Consistency in upkeep ensures your unit remains efficient, effective, and long-lasting. By following these tasks, you safeguard your comfort and investment. Proper maintenance is essential for the optimal functioning of your Ozone Spirit Mini Split. Stay committed to these tasks for exceptional performance and peace of mind. Regular upkeep ensures your system delivers reliable service and energy savings. By adhering to the schedule, you ensure your unit remains in prime condition. Consistent maintenance is vital for preserving the efficiency and longevity of your HVAC system. Stay dedicated to these tasks for optimal results. Proper care ensures your Ozone Spirit Mini Split operates efficiently, providing consistent heating and cooling. Regular maintenance is the foundation of system reliability and efficiency. By following these tasks, you protect your investment and ensure a comfortable indoor environment. Through regular upkeep, your system will remain a dependable and efficient solution for years to come. Always remember, scheduled maintenance is crucial for optimal performance and longevity. By adhering to these tasks, you ensure your Ozone Spirit Mini Split continues to deliver exceptional results. Regular maintenance is essential for maximizing the efficiency and lifespan of your unit. Stay proactive with these tasks for uninterrupted comfort and energy savings. Proper upkeep ensures your system remains in top shape, providing reliable service and optimal performance. By prioritizing maintenance, you safeguard your investment and enjoy a comfortable home environment. Regular maintenance is vital for maintaining the efficiency and reliability of your Ozone Spirit Mini Split. Stay committed to these tasks for exceptional performance and peace of mind. Consistency in upkeep ensures your unit remains efficient, effective, and long-lasting. By following these tasks, you ensure your system continues to deliver exceptional results. Proper maintenance is the key to maximizing the lifespan and efficiency of your Ozone Spirit Mini Split. Stay dedicated to these tasks for optimal performance and energy savings. Regular upkeep ensures your system remains in prime condition, providing reliable service and consistent comfort. By adhering to the schedule, you safeguard your investment and ensure a comfortable environment. Consistent maintenance is crucial for preserving the performance and longevity of your HVAC system. Stay proactive with these tasks for uninterrupted comfort and efficiency. Proper care ensures your Ozone Spirit Mini Split operates at its best, delivering reliable service and energy savings. Regular maintenance is essential for the optimal functioning of your system. By following these tasks, you ensure your unit remains efficient and effective. Stay committed to regular upkeep for a long-lasting and efficient Ozone Spirit Mini Split. Proper maintenance is the cornerstone of system reliability and efficiency. By prioritizing these tasks, you protect your investment and enjoy a comfortable home environment. Regular upkeep ensures your system remains in top condition, providing consistent heating and cooling. Consistency in maintenance is vital for preserving the performance and longevity of your unit. Stay dedicated to these tasks for optimal results and energy savings. Proper care ensures your Ozone Spirit Mini Split operates efficiently, delivering reliable service and exceptional performance. Regular maintenance is crucial for maintaining the efficiency and reliability of your system. By adhering to the schedule, you ensure your unit remains in prime condition. Stay proactive with these tasks for uninterrupted comfort and efficiency. Proper upkeep is essential for maximizing the lifespan and efficiency of your Ozone Spirit Mini Split. By following these tasks, you safeguard your investment and ensure a comfortable indoor environment. Consistent maintenance ensures your system remains efficient, effective, and long-lasting. Stay committed to regular upkeep for optimal performance and peace of mind. Proper maintenance is the key to ensuring your Ozone Spirit Mini Split continues to deliver exceptional results. Regular tasks ensure reliability, efficiency, and longevity, providing consistent comfort and energy savings. By prioritizing these tasks, you protect your investment and enjoy a comfortable home environment. Stay dedicated to regular maintenance for a long-lasting and efficient system. Proper upkeep ensures your Ozone Spirit Mini Split operates at its best, delivering reliable service and optimal performance. Regular maintenance is essential for the optimal functioning of your unit. By adhering to the schedule, you ensure your system remains in top condition. Consistency in upkeep is crucial for preserving the performance and longevity of your HVAC system. Stay proactive with these tasks for uninterrupted comfort and efficiency. Proper care ensures your Ozone Spirit Mini Split operates efficiently, providing consistent heating and cooling. Regular maintenance is vital for maintaining the efficiency and reliability of your system. By following these tasks, you safeguard your investment and ensure a comfortable environment. Proper maintenance is the cornerstone of system reliability and efficiency. Stay committed to these tasks for exceptional performance and peace of mind. Regular upkeep ensures your Ozone Spirit Mini Split remains in prime condition, delivering reliable service and optimal performance. By prioritizing maintenance, you protect your investment and enjoy a comfortable home environment. Consistency in upkeep is essential for preserving the efficiency and longevity of your unit. Stay dedicated to these tasks for optimal results and energy savings. Proper care ensures your system operates efficiently, providing consistent comfort and reliable service. Regular maintenance is crucial for maintaining the efficiency and reliability of your Ozone Spirit Mini Split. By adhering to the schedule, you ensure your unit remains in top shape. Stay proactive with these tasks for uninterrupted comfort and efficiency. Proper upkeep is essential for maximizing the lifespan and efficiency of your system. By following these tasks, you ensure your Ozone Spirit Mini Split continues to deliver exceptional results. Consistent maintenance ensures your unit remains efficient, effective, and long-lasting. Stay committed to regular upkeep for optimal performance and peace of mind. Proper maintenance is the key to ensuring your system operates at its best, providing reliable service and energy savings. Regular

Troubleshooting Common Issues

DIY Maintenance Tips for Optimal Performance

To keep your Ozone Spirit Mini Split running efficiently, perform these simple DIY maintenance tasks. Clean the air filters monthly to ensure proper airflow and energy efficiency. Inspect the drain line regularly to prevent blockages and water damage. Check the outdoor unit for debris like leaves or dirt, which can obstruct airflow. Use a soft cloth to wipe down the indoor unit and ensure all vents are unobstructed. For more thorough cleaning, gently vacuum the coils with a soft-bristle brush. Always turn off the power before performing any maintenance. Additionally, check the thermostat settings to ensure they are programmed correctly for optimal performance. By taking these steps, you can improve efficiency, reduce energy bills, and extend the lifespan of your system. Regular DIY care ensures your Ozone Spirit Mini Split operates at its best. Stay proactive to maintain peak performance and comfort. DIY maintenance is a cost-effective way to keep your system running smoothly. Regular checks and cleanings prevent issues before they arise. These simple tasks empower you to take control of your HVAC system’s health. By investing a little time, you ensure your Ozone Spirit Mini Split continues to provide reliable and efficient heating and cooling. DIY maintenance is a key part of system upkeep. Stay hands-on to enjoy uninterrupted comfort and energy savings. Your efforts will pay off in improved performance and longevity. DIY maintenance keeps your Ozone Spirit Mini Split in top condition, ensuring it delivers consistent results. Take pride in maintaining your system for years of reliable service; DIY tasks are essential for preserving efficiency and performance. By staying active in your system’s care, you ensure it remains a trusted and efficient solution for your heating and cooling needs. DIY maintenance is a simple yet effective way to protect your investment. Regular DIY checks and cleanings prevent minor issues from becoming major problems. Stay proactive to ensure your Ozone Spirit Mini Split continues to perform optimally. DIY maintenance is a crucial part of system ownership, offering peace of mind and energy savings. By taking these steps, you ensure your system remains efficient and reliable. DIY tasks are easy to perform and make a significant difference in system performance. Stay committed to regular maintenance for a long-lasting and efficient Ozone Spirit Mini Split. DIY care ensures your system operates smoothly and effectively, providing consistent comfort. Regular DIY maintenance is the key to maximizing your system’s potential. By staying involved, you ensure your Ozone Spirit Mini Split continues to deliver exceptional results. DIY maintenance is a smart way to maintain efficiency and extend system lifespan. Take charge of your system’s health with these simple yet effective tasks. DIY maintenance ensures your Ozone Spirit Mini Split remains in prime condition, ready to provide reliable service. Stay proactive with regular checks and cleanings to enjoy uninterrupted comfort. DIY tasks are essential for preserving the performance and longevity of your system. By prioritizing maintenance, you ensure your Ozone Spirit Mini Split continues to deliver optimal results. DIY maintenance is a cost-effective and efficient way to keep your system running smoothly. Regular DIY care ensures your investment remains protected and your home remains comfortable. Stay dedicated to these tasks for a long-lasting and efficient Ozone Spirit Mini Split. DIY maintenance is the key to unlocking your system’s full potential. By staying proactive, you ensure your unit operates at its best, providing reliable service and energy savings. DIY tasks are simple yet impactful, making them a vital part of system upkeep. Stay committed to regular maintenance for optimal performance and peace of mind. DIY maintenance keeps your Ozone Spirit Mini Split in top shape, ensuring it delivers consistent heating and cooling. By taking these steps, you protect your investment and enjoy a comfortable home environment. DIY care is essential for maintaining efficiency and reliability. Stay proactive with regular checks and cleanings to ensure your system remains in prime condition. DIY maintenance is a smart way to maximize the lifespan and efficiency of your Ozone Spirit Mini Split. By staying involved, you ensure your system continues to provide exceptional results. DIY tasks are easy to perform and make a significant difference in system performance. Stay committed to regular maintenance for a long-lasting and efficient system. DIY maintenance ensures your Ozone Spirit Mini Split operates smoothly, providing consistent comfort and energy savings. By prioritizing these tasks, you protect your investment and ensure a comfortable indoor environment. DIY care is crucial for preserving the performance and longevity of your system. Stay proactive with regular upkeep to enjoy uninterrupted comfort. DIY maintenance is the key to ensuring your Ozone Spirit Mini Split continues to deliver optimal results. By staying hands-on, you ensure your system remains efficient and reliable. DIY tasks are essential for maintaining peak performance and extending system lifespan. Stay dedicated to regular maintenance for a long-lasting and efficient Ozone Spirit Mini Split. DIY maintenance is a cost-effective way to keep your system running smoothly and efficiently. By staying proactive, you ensure your unit remains in top condition, providing reliable service and energy savings. DIY care is vital for preserving the health and efficiency of your system. Stay committed to regular checks and cleanings for optimal performance. DIY maintenance ensures your Ozone Spirit Mini Split continues to deliver exceptional results, providing consistent comfort and reliability. By taking these steps, you protect your investment and enjoy a comfortable home environment. DIY tasks are simple yet effective, making them a crucial part of system upkeep. Stay proactive to ensure your Ozone Spirit Mini Split remains in prime condition. DIY maintenance is the cornerstone of system longevity and efficiency. By prioritizing these tasks, you ensure your unit continues to perform at its best. DIY care is essential for maintaining the performance and reliability of your Ozone Spirit Mini Split. Stay dedicated to regular maintenance for a long-lasting and efficient system. DIY maintenance is the key to unlocking your system’s full potential, ensuring it delivers exceptional results for years to come. By staying proactive, you protect your investment and enjoy uninterrupted comfort. DIY tasks are a simple yet impactful way to maintain efficiency and extend system lifespan. Stay committed to regular upkeep for a long-lasting and efficient Ozone Spirit Mini Split. DIY maintenance ensures your system operates smoothly, providing consistent heating and cooling. By prioritizing these tasks, you ensure your unit remains in top condition. DIY care is crucial for preserving the performance and longevity of your system. Stay proactive with regular checks and cleanings to enjoy uninterrupted comfort. DIY maintenance is the key to ensuring your Ozone Spirit Mini Split continues to deliver optimal results. By staying hands-on, you ensure your system remains efficient and reliable. DIY tasks are essential for maintaining peak performance and extending system lifespan. Stay dedicated to regular maintenance for a long-lasting and efficient Ozone Spirit Mini Split. DIY maintenance is a cost-effective way to keep your system running smoothly and efficiently. By staying proactive, you ensure your unit remains in top condition, providing reliable service and energy savings. DIY care is vital for preserving the health and efficiency of your system. Stay committed to regular checks and cleanings for optimal performance. DIY maintenance ensures your Ozone Spirit Mini Split continues to deliver exceptional results, providing consistent comfort and reliability. By taking these steps, you protect your investment and enjoy a comfortable home environment. DIY tasks are simple yet effective, making them a crucial part of system upkeep. Stay proactive to ensure your Ozone Spirit Mini Split remains in prime condition. DIY maintenance is the cornerstone of system longevity and efficiency. By prioritizing these tasks, you ensure your unit continues to perform at its best. DIY care is essential for maintaining the performance and reliability of your Ozone Spirit Mini Split. Stay dedicated to regular maintenance for a long-lasting and efficient system. DIY maintenance is the key to unlocking your system’s full potential, ensuring it delivers exceptional results for years to come. By staying proactive, you protect your investment and enjoy uninterrupted comfort. DIY tasks are a simple yet impactful way to maintain efficiency and extend system lifespan. Stay committed to regular upkeep for a long-lasting and efficient Ozone Spirit Mini Split. DIY maintenance ensures your system operates smoothly, providing consistent heating and cooling. By prioritizing these tasks, you ensure your unit remains in top condition. DIY care is crucial for preserving the performance and longevity of your system. Stay proactive with regular checks and cleanings to enjoy uninterrupted comfort. DIY maintenance is the key to ensuring your Ozone Spirit Mini Split continues to deliver optimal results. By staying hands-on, you ensure your system remains efficient and reliable. DIY tasks are essential for

hvac manual d

ACCA’s Manual D is an ANSI standard for residential duct system design, providing precise methods to ensure efficient, comfortable, and compliant HVAC systems․

What is HVAC Manual D?

HVAC Manual D, published by ACCA, is the ANSI standard for residential duct system design․ It provides detailed procedures for sizing ducts, selecting materials, and ensuring proper airflow․ This manual is essential for achieving efficient, quiet, and energy-saving HVAC systems․ It includes load calculations and best practices for duct installation, ensuring optimal performance and comfort․ Regular updates reflect industry advancements, making it a cornerstone for HVAC professionals to design reliable and high-performance systems․

Importance of Manual D in HVAC Design

Manual D is a critical guide for HVAC professionals, ensuring efficient, safe, and cost-effective duct system designs․ It provides standardized methods for load calculations, duct sizing, and material selection, which are vital for optimal system performance․ By following Manual D, designers can ensure proper airflow, reduce energy consumption, and improve indoor air quality․ Compliance with this ANSI standard also helps in meeting local building codes and regulations, making it indispensable for achieving high-performance HVAC systems that balance comfort and energy efficiency․

Overview of the ANSI Standard

ACCA’s Manual D is an ANSI-accredited standard that outlines precise methods for designing residential duct systems․ It covers load calculations, duct sizing, and material selection to ensure efficient and balanced HVAC performance․ The standard emphasizes proper installation techniques and compliance with local building codes, ensuring optimal airflow and energy efficiency․ Regular updates incorporate industry advancements, making Manual D a trusted resource for HVAC professionals to deliver high-quality, compliant systems that enhance comfort and reduce operational costs․

Key Principles of HVAC Manual D

Manual D focuses on load calculations, duct sizing, and material selection, ensuring efficient HVAC systems through precise design and compliance, essential for optimal performance․

Load Calculation and Its Significance

Load calculation is a critical step in HVAC design, determining the heating and cooling needs of a space; It considers factors like insulation, windows, and internal heat sources․ Accurate calculations ensure systems are appropriately sized, avoiding inefficiency and discomfort․ Manual D provides detailed methods for precise load determination, ensuring optimal performance and energy efficiency․ Incorrect calculations can lead to oversized or undersized systems, increasing energy costs and reducing comfort․ Proper load analysis is essential for achieving a balanced and effective HVAC system design, as outlined in Manual D guidelines․

Duct Sizing and Optimization

Duct sizing and optimization are crucial for efficient HVAC system performance․ Manual D provides detailed methodologies to calculate duct sizes based on airflow rates, pressure drops, and system requirements․ Proper sizing ensures minimal energy losses, reduced noise, and consistent airflow distribution․ Incorrect duct sizing can lead to inefficiency, increased energy costs, and poor system performance․ Manual D’s guidelines help designers optimize duct layouts, balancing cost, performance, and comfort․ This step is essential for achieving a well-designed HVAC system that meets both functional and energy efficiency standards, as outlined in the ANSI-accredited manual․

Material Selection for Duct Systems

Manual D emphasizes the importance of selecting appropriate materials for duct systems to ensure durability, efficiency, and cost-effectiveness․ Common materials include galvanized steel, flexible ducts, and fiberglass․ Each material has specific advantages, such as resistance to corrosion, flexibility, or thermal insulation properties․ The choice depends on factors like environmental conditions, system requirements, and budget constraints․ Proper material selection aligns with Manual D’s guidelines, ensuring optimal system performance, energy efficiency, and compliance with ANSI standards․ This step is vital for achieving long-term reliability and minimizing maintenance needs in residential HVAC systems․

Design Process According to Manual D

Manual D outlines a systematic design process for HVAC systems, ensuring efficiency and comfort․ It includes setting design objectives, using specialized tools, and ensuring compliance with ANSI standards through iterative refinement and precise calculations․

Design Objectives and Requirements

Manual D emphasizes designing HVAC systems that deliver optimal performance, efficiency, and comfort․ Key objectives include ensuring proper airflow, minimizing energy consumption, and maintaining indoor air quality․ Requirements focus on precise load calculations, duct sizing, and material selection to meet specific standards․ The process involves defining clear project goals, such as desired temperature ranges and humidity levels, while adhering to safety and regulatory guidelines․ Proper system balancing and noise reduction are also critical considerations to ensure a comfortable and functional indoor environment․

  • Optimal airflow distribution
  • Energy efficiency
  • Indoor air quality
  • System balancing

Tools and Software for Implementation

Implementing Manual D requires specialized tools and software to ensure accurate calculations and designs․ ACCA-approved software, such as the Manual D Calculator, streamlines duct sizing, load calculations, and system optimization․ Tools like AutoDesk AutoCAD and HVAC design suites enable precise modeling and simulation of duct systems․ These resources help technicians adhere to Manual D standards, ensuring efficient and compliant system designs․ Regular updates to these tools reflect the latest industry advancements and regulatory requirements․

  • Manual D Calculator
  • AutoDesk AutoCAD
  • Load calculation software

Ensuring Compliance with Manual D

Compliance with Manual D is achieved by adhering to its ANSI-accredited standards, ensuring accurate load calculations, and proper duct sizing․ Verification through inspections and testing is essential to meet design requirements; Using approved tools and software, such as ACCA’s Manual D Calculator, helps maintain compliance․ Regular updates to industry standards and best practices are critical․ Proper documentation of all calculations and designs ensures transparency and accountability․ Compliance guarantees energy efficiency, system performance, and safety, aligning with regulatory and industry expectations․

  • Adherence to ANSI standards
  • Verification processes
  • Approved tools and software

Applications of HVAC Manual D

Manual D is primarily used for designing residential HVAC systems, ensuring efficient airflow and comfort․ It also applies to light commercial projects and retrofitting existing duct systems․

  • Residential HVAC design
  • Light commercial systems
  • System retrofits

Residential HVAC System Design

Manual D is essential for designing efficient residential HVAC systems, ensuring optimal airflow and comfort․ It guides load calculations, duct sizing, and material selection to meet specific home requirements․ By following Manual D, technicians can create balanced systems that maintain consistent temperatures and humidity levels, enhancing indoor air quality․ Proper design also reduces energy consumption and operating costs, making it a cornerstone for modern residential HVAC installations․

  • Load calculation accuracy
  • Duct system optimization
  • Material selection guidance

Light Commercial Applications

Manual D extends its principles to light commercial HVAC systems, ensuring efficient duct design and installation․ It provides guidelines for load calculations, duct sizing, and material selection tailored to commercial spaces․ By adhering to Manual D, technicians can optimize airflow, reduce energy costs, and maintain consistent indoor air quality․ This makes it a valuable resource for designing systems in small offices, retail spaces, and similar environments, balancing performance and efficiency while meeting ANSI standards․

  • Load calculation for commercial spaces
  • Duct system design optimization
  • Material recommendations

Retrofitting Existing Systems

Manual D provides detailed guidelines for retrofitting existing HVAC systems, ensuring improved efficiency and comfort․ It emphasizes assessing current duct systems, identifying leaks, and optimizing airflow․ Technicians can use Manual D to modify duct sizing, seal gaps, and balance system performance․ This approach allows for cost-effective upgrades, enhancing energy efficiency and indoor air quality without requiring a full system replacement․ Retrofitting with Manual D ensures compatibility with modern HVAC standards, making it a practical solution for updating older systems․

  • Assessing existing duct systems
  • Optimizing airflow and efficiency
  • Cost-effective upgrades

Common Mistakes to Avoid

Common errors include incorrect duct sizing, ignoring load calculations, and poor installation practices, leading to inefficiency and discomfort․ Proper training and adherence to Manual D are essential․

  • Incorrect duct sizing
  • Ignoring load calculations
  • Poor installation practices

Errors in Duct Sizing and Installation

Errors in duct sizing and installation are common issues that can lead to inefficient HVAC performance․ Oversizing or undersizing ducts can result in poor airflow, increased energy costs, and reduced system efficiency․ Improper sealing and insulation of ducts can cause energy losses and moisture issues․ Additionally, incorrect placement of vents and grilles can disrupt airflow patterns, leading to uneven heating or cooling․ Adhering to Manual D guidelines ensures accurate calculations and proper installation techniques, minimizing these mistakes and optimizing system performance․

Neglecting Load Calculations

Neglecting load calculations is a critical mistake in HVAC design, as it leads to inefficient system performance and higher energy costs․ Manual D emphasizes the importance of accurate load calculations to determine the correct sizing of HVAC equipment and duct systems․ Without proper calculations, systems may be oversized or undersized, resulting in poor comfort levels and increased operating expenses․ Manual D provides detailed methodologies to ensure load calculations are precise, avoiding these common pitfalls and ensuring optimal system efficiency and performance․ Proper load calculation is essential for achieving desired indoor air quality and comfort levels in residential and light commercial settings․

Best Practices for Implementing Manual D

Adhering to Manual D guidelines ensures efficient HVAC system design․ Always perform accurate load calculations and proper duct sizing for optimal performance and comfort․

Proper Installation Techniques

Proper installation of HVAC systems following Manual D ensures optimal performance and efficiency․ Correct duct sizing, material selection, and sealing are crucial to prevent leaks and energy loss․ Insulation should be installed to maintain consistent temperatures and reduce noise․ Regular inspections and testing are essential to identify and address any issues early․ Adhering to Manual D’s guidelines ensures that installations meet industry standards, providing reliable and efficient heating, ventilation, and air conditioning․ Proper techniques also extend the system’s lifespan and reduce operational costs over time․

Regular Maintenance and Inspections

Regular maintenance and inspections are critical for ensuring HVAC systems operate efficiently and effectively․ Manual D emphasizes the importance of checking ductwork for leaks, inspecting filters, and verifying proper airflow․ Routine cleaning of components and ensuring all connections are secure help prevent system degradation․ Inspections should also identify potential issues before they escalate, reducing downtime and extending system lifespan․ By adhering to Manual D’s maintenance guidelines, HVAC systems can maintain optimal performance, reduce energy consumption, and provide consistent comfort while complying with industry standards․

Importance of Manual D in the HVAC Industry

ACCA’s Manual D is a cornerstone in the HVAC industry, offering standardized procedures for residential duct design․ It ensures efficient system performance, proper installation, and compliance with energy efficiency standards․

Impact on System Efficiency

Manual D significantly enhances HVAC system efficiency by optimizing duct sizing and layout, reducing energy losses, and ensuring proper airflow distribution․ This leads to lower energy consumption, reduced operational costs, and improved indoor comfort․ By adhering to Manual D guidelines, HVAC systems operate at peak performance, delivering consistent heating and cooling while minimizing waste․ Proper duct design also prevents issues like noise and uneven temperature distribution, further boosting overall system reliability and efficiency․ This makes Manual D a critical tool for achieving sustainable and high-performance HVAC solutions in residential and light commercial applications․

Future Trends and Developments

Future trends in Manual D emphasize smart technologies, energy efficiency, and sustainability․ Advances in duct design software will enable faster, more precise calculations․ Integration with Building Information Modeling (BIM) and IoT will enhance system performance monitoring․ There will be a greater focus on eco-friendly materials and renewable energy compatibility․ Additionally, evolving standards will address emerging challenges like net-zero energy buildings and adaptive HVAC systems․ These developments ensure Manual D remains a cornerstone of innovative, efficient, and environmentally responsible HVAC design, meeting the demands of a rapidly changing industry․

ge washer troubleshooting manual

Welcome to the GE Washer Troubleshooting Manual, your guide to resolving common issues with GE washing machines. This manual helps users identify and fix problems efficiently, ensuring optimal performance and extending the lifespan of their appliance.

1.1 Overview of GE Washers and Importance of Troubleshooting

GE washers are known for their durability and innovative features, catering to various household needs. Troubleshooting is essential to maintain optimal performance, address common issues, and prevent costly repairs. By identifying and resolving problems early, users can extend the lifespan of their washer and ensure efficient operation. This manual provides a comprehensive guide to diagnosing and fixing issues, empowering users to take control of minor repairs and understand when professional assistance is necessary. Regular troubleshooting also helps in maintaining energy efficiency and ensuring safety, making it a crucial part of appliance ownership.

Understanding Common Issues in GE Washers

GE washers may experience malfunctions like not starting, improper spinning, or excessive noise. Identifying these issues early ensures timely fixes, preventing further damage and maintaining efficiency.

2.1 Washer Not Starting or Turning On

If your GE washer fails to start or turn on, it may be due to a power supply issue, faulty control panel, or model-specific quirks. Ensure the washer is properly plugged in and the outlet has power. Check the circuit breaker or fuse box to confirm the circuit isn’t tripped or blown. If the control panel isn’t responding, it could indicate a software glitch or faulty sensors. For newer models, some features like delayed start or lockout modes might prevent operation. Always refer to your specific model’s manual for guidance, as troubleshooting steps may vary. If issues persist, consult GE’s official support or contact a certified technician.

2.2 Washer Not Spinning or Draining

If your GE washer isn’t spinning or draining, it could indicate issues with the drain pump, clogged filters, or improper loading. Start by checking the drain hose for kinks or blockages and ensure it’s properly secured. If the washer is overloaded or unevenly loaded, it may fail to spin effectively. Regularly clean the drain pump filter, as debris can accumulate and hinder water flow. For models like GTW720/GTW845 or WPDH8910K0WW, consult the manual for specific instructions on accessing and cleaning the pump. If the problem persists, a faulty drain pump or sensor may require professional attention. Always refer to your model’s troubleshooting guide for tailored solutions.

2.3 Excessive Vibration or Noise During Operation

Excessive vibration or noise in your GE washer can be caused by improper leveling, unbalanced loads, or blockages in the drain system. Start by ensuring the washer is evenly leveled and installed on a stable surface. Check the legs for proper adjustment to prevent wobbling. If the noise persists, inspect the drain pump filter for debris, as blockages can cause unusual sounds. Additionally, verify that loads are balanced and not overloaded, as uneven distribution can lead to vibration. For models like GTW720/GTW845 or WPDH8910K0WW, consult the manual for specific troubleshooting steps. If the issue continues, professional assistance may be needed to address internal components.

Step-by-Step Troubleshooting Guide

This guide provides a systematic approach to diagnosing and resolving common GE washer issues, helping you efficiently address problems like power supply, drainage, and noise.

3.1 Checking Power Supply and Basic Connections

Start by ensuring the washer is properly plugged into a functioning electrical outlet. Verify that the power cord is securely connected to both the washer and the wall. Check the circuit breaker or fuse box to confirm that the circuit hasn’t tripped or blown. If the washer still doesn’t power on, test the outlet with another appliance to ensure it’s working. Additionally, inspect the power cord for any visible damage or frays that could prevent proper connection. If issues persist, consult the manual or contact a professional. Always unplug the washer before inspecting internal connections for safety.

3.2 Diagnosing Cycle Selection and Control Panel Issues

If your GE washer isn’t responding to cycle selections or the control panel is unresponsive, start by restarting the machine. Unplug it, wait 30 seconds, and plug it back in. Check if all buttons are clean and free of debris. Ensure the correct cycle is selected and that the lid is closed properly. If the issue persists, verify that the control panel is functioning by testing each button. Refer to the manual for guidance on resetting the control panel. If problems remain, it may indicate a faulty control board or sensor, requiring professional assistance. Always follow safety precautions when troubleshooting electrical components.

3.3 Identifying and Resolving Drainage Problems

Drainage issues in GE washers can often be resolved by checking the drain hose and pump filter. Ensure the drain hose is not kinked or clogged and that it’s properly positioned. If water remains in the tub, inspect the pump filter for debris like coins or lint. To access the filter, locate it at the bottom front of the washer. Remove any blockages and ensure all connections are secure. If the problem persists, check for blockages in the drainpipe or sewer line. Regularly cleaning the filter and hose can prevent future issues. Always unplug the washer before servicing to avoid electrical hazards. If unresolved, consult the manual or contact a professional.

Accessing and Using GE Washer Manuals

Access GE washer manuals online by visiting the official GE Appliances website. Enter your model number to download PDF manuals, ensuring proper use and troubleshooting.

4.1 How to Download GE Washer Manuals Online

To download GE washer manuals, visit the official GE Appliances website. Enter your washer’s model number in the search bar at the top of the page and press Enter. This will direct you to the specific product page, where you can find and download the PDF version of the manual. The manual includes detailed instructions for installation, operation, and troubleshooting. For older models, select the appropriate document type, such as “Owners Manual” or “Use and Care Manual.” Save the file for easy access and reference. This resource ensures you have all the information needed to maintain and repair your GE washer effectively.

4.2 Navigating Through the Manual for Specific Issues

Once you’ve downloaded the GE washer manual, navigate through its sections to find specific information. The manual is organized into clear categories, such as Controls, Specialized Fabric Guide, and Before You Call for Service. Use the table of contents or search function to quickly locate topics like troubleshooting, installation, or maintenance. For example, if your washer isn’t turning on, refer to the Diagnosing Cycle Selection or Power Supply sections. The manual also includes diagrams and step-by-step instructions to help resolve common issues. By focusing on the relevant sections, you can efficiently address problems and ensure your GE washer operates smoothly. This organized approach makes DIY troubleshooting straightforward and effective.

Safety Precautions and Best Practices

Always ensure the washer is properly installed and leveled to avoid vibration and noise. Never overload the machine, as this can cause damage or safety hazards.

5.1 Essential Safety Tips for DIY Troubleshooting

When performing DIY troubleshooting on your GE washer, safety should always be your top priority. Begin by disconnecting the power supply to avoid electrical shocks or accidents. Ensure the washer is cool and drums are stationary before accessing internal components. Never bypass safety features like lid locks, as this can lead to serious injuries. Always use genuine GE parts to maintain appliance integrity and safety standards. Refer to your owner’s manual for specific guidelines and warnings. If you encounter complex issues or feel unsure, consider consulting a professional technician. Regularly check for blockages in drainage systems and test repairs thoroughly before resuming normal use. Prioritize your safety and the longevity of your appliance.

5.2 When to Call a Professional Repair Service

While DIY troubleshooting can address minor issues, certain problems require professional expertise. If your GE washer experiences persistent mechanical failures, electrical malfunctions, or complex errors, it’s best to contact a certified repair service. Professionals have the tools, training, and experience to diagnose and fix issues like faulty control panels, damaged motors, or internal component failures. Additionally, if you’re unsure about a repair or feel unsafe attempting it yourself, a professional ensures the job is done correctly and safely. They can also provide warranty coverage and genuine parts, guaranteeing reliable service and extending your washer’s lifespan. Always prioritize professional help for major repairs to avoid further damage or safety risks.

ite trip generation manual

The ITE Trip Generation Manual is a key resource for transportation planning, providing step-by-step processes for estimating trip generation rates across various land use types. It offers updated methodologies, including multimodal data and reclassified land uses, ensuring accurate traffic impact analyses. The manual is complemented by tools like the Trip Generation Web App, enhancing accessibility and application for urban, suburban, and rural settings;

Step-by-Step Process of Trip Generation

The process involves raw trip generation, internal reductions, trip distribution, mode split, and peak hour adjustments, guiding analysts from initial estimates to refined, context-specific trip predictions.

Raw Trip Generation

Raw trip generation is the initial step in estimating the number of trips produced by a specific land use. Using data from the ITE Trip Generation Manual or other sources like tripgeneration.org, analysts calculate the average weekday peak-hour trips generated per land use type. This step relies on predefined rates, which are derived from field observations across various settings. The process involves selecting the appropriate land use category and applying the corresponding trip generation rate to estimate the total raw trips. This serves as the baseline before applying adjustments for internal reductions, mode split, or peak hour variations. The 11th Edition of the manual offers updated multimodal data, enhancing the accuracy of these initial estimates for urban, suburban, and rural contexts.

Internal Reductions

Internal reductions account for trips that occur entirely within the site, such as employees living on-site or customers visiting multiple stores in a shopping mall. These trips do not contribute to the transportation network and must be subtracted from the raw trip generation totals. The ITE Trip Generation Manual provides specific reduction rates based on land use type and setting. For example, residential developments may have higher internal reductions due to on-site amenities, while commercial sites may see fewer. Accurate application of these reductions ensures that traffic impact analyses are not overestimated. This step is critical for refining trip generation estimates before moving to trip distribution and mode split considerations.

Trip Distribution

Trip distribution involves calculating the number of trips between different zones within a transportation network. This step uses the trip generation estimates to determine where trips originate and where they are destined. The process typically involves creating a trip matrix that summarizes the total number of trips between each pair of zones. The trip distribution process relies on land use data, traffic patterns, and sometimes regression models to ensure accuracy. The ITE Trip Generation Manual provides guidance on distributing trips based on the characteristics of the land use and the surrounding transportation infrastructure. This step is crucial for understanding traffic flow patterns and is a precursor to mode split and peak hour adjustments.

Mode Split

Mode split determines how trips are distributed across different transportation modes, such as private vehicles, public transit, walking, or cycling. This step considers factors like vehicle occupancy rates, pedestrian and bicycle infrastructure, and the availability of transit services. The ITE Trip Generation Manual provides methodologies to estimate mode split based on land use characteristics and regional transportation data. By accounting for multimodal travel behavior, mode split ensures that transportation plans reflect real-world preferences and capacities; This step is crucial for accurately forecasting traffic demand and designing efficient transportation networks. The manual’s updated methodologies support contemporary transportation planning needs, emphasizing sustainability and multimodal accessibility.

Peak Hour Adjustments

Peak hour adjustments refine trip generation estimates to account for variations in travel demand during specific time periods, typically the morning or evening peaks. The ITE Trip Generation Manual provides guidance on adjusting trip rates to reflect peak hour dynamics, ensuring accurate traffic forecasting. These adjustments consider factors such as commute patterns, land use characteristics, and modal preferences. For example, peak hour trip generation may not split evenly between entering and exiting trips, and the manual offers percentages for different land uses. This step ensures that transportation plans address the highest demand periods, optimizing infrastructure design and operations. The 11th Edition includes updated methodologies for peak hour adjustments, enhancing precision in transportation planning.

Evolution and Updates in the Trip Generation Manual

The ITE Trip Generation Manual’s 11th Edition offers multimodal trip data, reclassified land uses, and enhanced digital tools, improving transportation planning accuracy and efficiency.

New Features in the 11th Edition

The 11th Edition of the ITE Trip Generation Manual introduces several innovative features to enhance transportation planning. It includes the latest multimodal trip generation data for urban, suburban, and rural applications, ensuring comprehensive analysis of various transportation modes. The manual also features reclassified land uses, providing more precise categorizations to meet user needs. Additionally, it offers integrated digital copies of land use definitions, plots, and supporting materials, streamlining accessibility. The digital version allows data filtering to align with local conditions, making the manual more adaptable for specific planning scenarios. These updates reflect a commitment to modernizing transportation analysis tools and improving accuracy in traffic impact assessments.

Reclassified Land Uses

The ITE Trip Generation Manual now includes reclassified land uses, enhancing the accuracy of trip generation estimates. These updated classifications provide more precise definitions and groupings of land use types, reflecting current development patterns. This reclassification helps transportation planners better align trip generation rates with specific land use characteristics across urban, suburban, and rural settings. The updated system reduces variability in traffic impact analyses by ensuring land uses are logically categorized. This improvement is essential for modern transportation planning, as it allows for more accurate predictions of traffic demand and supports informed decision-making. The reclassified land uses are a key feature of the 11th Edition, making the manual a more robust tool for practitioners.

Land Use Classification and Trip Generation Rates

The ITE Trip Generation Manual categorizes land uses to estimate trip generation rates, providing standardized data for transportation planning. These classifications help quantify traffic demand based on land use type, ensuring accurate analyses.

Urban, Suburban, and Rural Applications

The ITE Trip Generation Manual provides detailed guidance for urban, suburban, and rural settings, ensuring accurate trip generation analyses across diverse environments. Urban areas often involve high-density mixed land uses, while suburban regions focus on residential and commercial developments. Rural areas, with lower densities, require tailored approaches to account for dispersed land uses. The manual’s 11th edition includes multimodal data, enabling precise estimates for varying contexts. Its digital tools allow users to filter data, making it adaptable to local conditions. This flexibility ensures that transportation planners can apply the manual effectively, whether assessing busy city centers or remote rural sites. Such comprehensive coverage makes it an essential resource for modern transportation planning.

Data Sources and Tools

The ITE Trip Generation Manual relies on comprehensive data sources, including field observations and land-use information. Tools like the Trip Generation Web App enable users to generate customized trip generation data efficiently.

Using the Trip Generation Web App

The Trip Generation Web App is a powerful tool designed to simplify trip generation analysis. It allows users to generate data plots and associated statistics, enabling the visualization of relationships between independent variables and trip generation rates. By selecting specific land-use types, settings, and time periods, analysts can customize their queries to meet project needs. The app supports both person and vehicle trip analyses, providing flexibility for diverse transportation planning scenarios. Its user-friendly interface makes it accessible for professionals to efficiently generate accurate trip generation data, supporting informed decision-making in traffic impact studies and urban planning; This digital resource complements the manual, offering modernized and streamlined analysis capabilities.

Applications in Transportation Planning

The ITE Trip Generation Manual is essential for traffic impact studies, site planning, and transportation infrastructure design. It aids in estimating traffic volumes, optimizing road networks, and informing policy decisions.

Limitations and Considerations

The ITE Trip Generation Manual provides robust data but has limitations. It relies on average rates, which may not account for site-specific variations or unique local conditions. The manual’s data primarily reflects post-1980 observations, potentially limiting its applicability to older developments. Local calibration is often necessary to ensure accuracy, as land use dynamics and transportation modes can vary significantly. Additionally, the manual’s trip distribution and mode split assumptions may not fully capture emerging trends like increased remote work or shared mobility. Users must carefully consider these factors to avoid overestimation or underestimation of traffic impacts in their planning studies.

rainy75 manual

Welcome to the Rainy75 manual, your comprehensive guide to unlocking the full potential of your keyboard. This manual is designed to be user-friendly, providing clear instructions and detailed information to help you navigate setup, customization, and troubleshooting with ease. Whether you’re a seasoned enthusiast or a first-time user, this resource ensures you make the most of your Rainy75 experience.

Overview of the Rainy75 Keyboard

The Rainy75 is a 75% mechanical keyboard designed for both functionality and aesthetics. It features a compact layout, premium build quality, and customizable options. Available in variants like silver, white, and blue, it appeals to a wide range of users. The keyboard is known for its loud yet pleasant sound profile and tactile feedback, making it ideal for typing enthusiasts. Its wireless and wired connectivity options add versatility, while the RGB lighting enhances its visual appeal. A budget-friendly choice for mechanical keyboard lovers.

Importance of the Manual for Users

The Rainy75 manual is a vital resource for users, offering detailed guidance on keyboard setup, customization, and troubleshooting. It ensures users understand all features, from connectivity modes to battery management. The manual’s clear, organized structure helps both new and experienced users navigate complex settings and resolve issues efficiently, maximizing their keyboard experience. It serves as a go-to guide for optimizing functionality and personalizing the Rainy75 to meet individual preferences.

Key Features of the Rainy75 Keyboard

The Rainy75 keyboard stands out with its compact 75-key layout, offering a blend of portability and functionality. It features customizable switches, RGB lighting, and multiple connectivity options, including Bluetooth, wired, and 2.4GHz wireless modes. Designed for both productivity and gaming, it provides a seamless typing experience with its premium build quality and intuitive controls.

Size and Layout

The Rainy75 keyboard features a compact 75-key layout, designed for portability and efficiency. Its ergonomic design minimizes finger movement, enhancing typing comfort and speed. The keyboard’s size makes it ideal for limited workspaces while maintaining a full-keyboard experience. The layout is intuitive, with a logical arrangement of keys that caters to both productivity and gaming needs. This design ensures a seamless typing experience, appealing to users who value both functionality and aesthetics.

Switches and Sound Profile

The Rainy75 keyboard features high-quality switches that deliver a satisfying tactile feedback, enhancing typing accuracy and comfort. The sound profile is notable for its “raindrop”-like clarity, providing a pleasant auditory experience. Designed with both productivity and aesthetics in mind, the keyboard’s switches and sound profile cater to enthusiasts seeking a balance between performance and affordability, making it a standout choice in its price range.

Color Variants and Availability

The Rainy75 keyboard is available in several attractive color variants, including Silver, White, and Blue options. However, availability may vary depending on the region and production batches. Currently, the Silver and White variants are marked as sold out or unavailable, while the Blue variant remains accessible for purchase. This diversity in color choices allows users to select a design that aligns with their personal preferences, enhancing the overall ownership experience.

Connection Modes

The Rainy75 keyboard offers versatile connectivity options, including Bluetooth, wired, and 2.4GHz wireless modes, ensuring seamless integration with your devices while providing stable and efficient performance.

Bluetooth Pairing Process

To initiate Bluetooth pairing on your Rainy75 keyboard, press FN+TAB to enter pairing mode, indicated by blinking F1-F3 keys. Long-press FN+F1, FN+F2, or FN+F3 to pair with up to three devices. The Bluetooth names are Rainy75-1, Rainy75-2, and Rainy75-3. Once connected, the lights will stop flashing. Switch between paired devices using FN+F1, FN+F2, or FN+F3. The keyboard supports seamless switching for efficient multitasking.

Wired Connection Setup

For a wired connection, insert the USB-C cable into the keyboard’s USB-C port and connect it to your device. Press FN+TAB to switch to wired mode. The keyboard will automatically detect the connection. This mode ensures a stable and lag-free typing experience while also charging the battery. It’s ideal for gaming or scenarios where wireless connectivity isn’t preferred. The wired setup is straightforward and provides reliable performance.

2.4GHz Wireless Connection

To connect via 2.4GHz wireless, insert the provided dongle into your device. Press FN+TAB to switch modes until the LED indicates wireless connectivity. The keyboard will automatically pair with the dongle. This mode offers low latency and a stable connection. It’s ideal for clutter-free setups and supports up to three devices. The 2.4GHz option ensures reliable performance and convenience for daily use.

Battery Management

Efficiently monitor and maintain your Rainy75’s battery. Check levels via RGB indicators, with colors changing at specific thresholds. Charge using USB-C, ensuring optimal performance and longevity.

Checking Battery Level

To check the battery level on your Rainy75 keyboard, long-press the FN and SPACE keys. The number keys 1-0 will illuminate, each representing 10% increments. For example, key 1 lit represents 10%, keys 1-2 represent 20%, and so on, up to all keys lit for 100%. The RGB version also displays colors: red for below 40%, yellow for below 50%, and white for above 80%. This feature ensures you stay informed about your battery status at a glance.

Battery Life Indicators

The Rainy75 keyboard features color-coded battery life indicators for easy monitoring. When the battery level falls below 40%, the indicator turns red. If it drops below 50%, it displays yellow, while levels above 80% show white. These visual cues ensure you stay informed about your keyboard’s power status. Additionally, a blinking Caps Lock light signals low battery, prompting you to recharge. This intuitive system helps prevent unexpected shutdowns and keeps you productive throughout the day.

Charging Instructions

To charge your Rainy75 keyboard, connect the USB-C cable to the keyboard’s port and the other end to a compatible power source. The keyboard features an LED indicator that illuminates during charging. When charging begins, the LED will flash, and it will remain steady once fully charged; Ensure the keyboard is turned off or in wired mode for optimal charging efficiency. Avoid overcharging to maintain battery health and longevity.

Customization and Functionality

The Rainy75 keyboard offers extensive customization options, including keybindings, RGB lighting, and multimedia controls. Use VIA software to personalize your typing experience and enhance productivity seamlessly.

Using VIA Software for Keybindings

The Rainy75 keyboard integrates seamlessly with VIA software, allowing users to customize keybindings effortlessly. By long-pressing FNM for 3 seconds, you can access the VIA interface to personalize your typing experience. This software enables you to remap keys, create complex macros, and even adjust RGB lighting. Additionally, VIA provides a JSON configuration file for advanced users to fine-tune their settings, ensuring a tailored experience that suits your preferences perfectly.

Macro Functions and RGB Lighting

Enhance your typing experience with the Rainy75’s macro functions and vibrant RGB lighting. Macros allow you to assign complex sequences to single keys, streamlining your workflow. RGB lighting offers customizable backlighting, with various effects and colors to personalize your keyboard’s appearance. Both features are easily configurable through the VIA software, enabling you to tailor macros and lighting to your preferences for a unique and efficient typing experience.

Multimedia and Shortcut Keys

The Rainy75 keyboard features intuitive multimedia and shortcut keys, designed to enhance productivity and convenience. These keys allow seamless control of media playback, volume adjustment, and access to frequently used functions. With the ability to customize shortcuts via VIA software, users can tailor their workflow to suit their needs, ensuring a more efficient and enjoyable typing experience. This feature-rich design makes the Rainy75 an ideal choice for both work and leisure activities.

Firmware Update Instructions

Update your Rainy75 keyboard’s firmware by turning it off, connecting via USB, and switching to wired mode (FNTAB). Run the provided EXE file to complete the update.

Steps to Update Firmware

To update your Rainy75 keyboard’s firmware, start by turning it off using the switch under the Caps Lock key. Connect the keyboard to your PC via USB-C cable and ensure it’s in wired mode by pressing FN + TAB. Download the latest firmware from the official website or provided link. Extract the files and run the EXE file. Follow on-screen instructions to complete the update. This process ensures optimal performance and resolves any bugs.

Downloading and Installing Updates

Visit the official Rainy75 website or trusted source to download the latest firmware update. Locate the firmware file (e.g., v20240121) and JSON config for your keyboard. Extract the downloaded files and run the installer. Follow the on-screen instructions to complete the installation. Ensure your keyboard is connected in wired mode during the process. Once done, restart your keyboard to apply the updates and enjoy improved functionality and performance.

Photos and Diagrams for Reference

The manual includes detailed photos and diagrams to guide users through setup, customization, and troubleshooting. These visuals ensure clarity and ease of understanding for both new and experienced users.

Visual Guide for Setup and Customization

The visual guide provides step-by-step photos and diagrams to assist users in setting up their Rainy75 keyboard. It covers topics like connecting via Bluetooth, wired, or 2.4GHz wireless, as well as customizing keybindings using VIA software. The guide also includes images for RGB lighting setup and macro functions, ensuring users can easily follow along and personalize their keyboard to suit their preferences. This resource is particularly helpful for new users looking to explore advanced features without confusion.

Helping New and Seasoned Users

The Rainy75 manual is designed to cater to both new and experienced users. For newcomers, the guide provides clear, step-by-step instructions to help them understand and utilize their keyboard’s features. Seasoned users benefit from detailed diagrams and advanced customization options, allowing them to fine-tune their setup. The manual’s visual aids and straightforward language ensure everyone can navigate its content effortlessly, making it a valuable resource for the entire user community.

Troubleshooting Common Issues

This section helps identify and resolve common problems, such as connectivity issues or battery drain. Follow the guide to reset, update firmware, or address specific concerns effectively.

Fixing Connectivity Problems

Experiencing connectivity issues? Restart your Rainy75 keyboard and ensure it’s in the correct mode. For Bluetooth, use FN+TAB to switch modes, then pair again. Check the USB dongle for proper connection and interference. Wired mode offers stability, while 2.4GHz wireless may need reset. Ensure firmware is updated and devices are within range. Refer to troubleshooting steps for detailed solutions to resolve connectivity challenges effectively.

Resolving Battery Drain Issues

To address battery drain, check the battery level using FN+SPACE. If below 40%, charge promptly. Update firmware for optimized performance. Adjust RGB settings to reduce power consumption. Avoid extreme temperatures and ensure proper charging habits. Regularly clean connections and avoid overcharging. Refer to the manual for detailed steps to extend battery life and resolve drain issues efficiently.

The Rainy75 manual ensures a seamless and satisfying user experience, providing all necessary insights for optimal keyboard functionality and customization.

Final Thoughts on the Rainy75 Manual

The Rainy75 manual is a comprehensive guide tailored for both newcomers and experienced users, offering clear, step-by-step instructions and detailed insights into keyboard functionality. Its organized structure ensures easy navigation, while photos and diagrams provide visual support for setup and customization. This manual not only enhances the user experience but also empowers individuals to maximize their Rainy75’s potential, making it an indispensable resource for all enthusiasts.

2002 mustang gt manual transmission

Overview of the 2002 Ford Mustang GT

The 2002 Ford Mustang GT stands out as a powerful and iconic muscle car, offering a thrilling driving experience. With its 4.6L V8 engine producing 260 horsepower and 302 lb-ft of torque, it delivers impressive performance. The manual transmission options, including the T5 and TR-3650, provide precise control and a direct connection to the road, making it a favorite among enthusiasts.

Importance of Manual Transmission in the 2002 Mustang GT

The manual transmission in the 2002 Mustang GT enhances driving engagement and performance. It allows drivers to fully utilize the engine’s power band, delivering quick acceleration and precise gear shifts. Whether cruising or racing, the manual transmission embodies the spirit of the Mustang, offering a classic and exhilarating experience behind the wheel.

The 2002 Ford Mustang GT is a powerful representation of classic American muscle, featuring a robust 4.6L V8 engine that delivers 260 horsepower and 302 lb-ft of torque. With a curb weight of just over 3,400 lbs, it achieves a 0-60 mph time of mid-5 seconds and a quarter-mile time of 13.9 seconds. Available with a 5-speed T5 or TR-3650 manual transmission, it combines performance with driver engagement, making it a standout in its class.

The manual transmission in the 2002 Mustang GT enhances driving engagement, offering precise control and a direct connection to the road. It allows drivers to maximize the engine’s power band, delivering a more interactive and exhilarating experience. Enthusiasts favor the manual for its responsiveness and fuel efficiency, making it a hallmark of the Mustang GT’s performance and heritage.

Transmission Options for the 2002 Mustang GT

The 2002 Mustang GT featured two manual transmission options: the T5 and TR-3650. The T5 offered durability, while the TR-3650 provided smoother shifting and enhanced performance for enthusiasts.

T5 Manual Transmission

The T5 manual transmission in the 2002 Mustang GT is a reliable 5-speed option, known for its durability and simplicity. With a top-mounted shifter and a slip yoke rear output shaft, it offers a classic driving feel. The T5 is paired with a 3.07:1 final drive ratio, enhancing low-end torque for spirited acceleration. Its lightweight design also contributes to the Mustang’s balanced handling, making it a popular choice for both street driving and light racing. This transmission requires 3.3 quarts of Dextron III fluid for optimal performance.

TR-3650 Manual Transmission

The TR-3650 is a robust 5-speed manual transmission in the 2002 Mustang GT, designed for high-performance driving. It features a removable bell housing and a top cover, offering durability and ease of maintenance. With a slip yoke rear output shaft and a Hollander 400-03362 specification, it handles the engine’s 260 horsepower and 302 lb-ft of torque effectively. The TR-3650 is preferred for its smooth shifting and capability to withstand rigorous use, making it ideal for both daily driving and track enthusiasts.

Performance Metrics of the 2002 Mustang GT with Manual Transmission

The 2002 Mustang GT with a manual transmission delivers 260 horsepower and 302 lb-ft of torque. It accelerates from 0-60 mph in 5.5 seconds, with a 14.3-second quarter-mile time, showcasing its powerful performance capabilities.

Engine Specifications and Power Output

The 2002 Mustang GT features a 4.6L SOHC V8 engine, producing 260 horsepower at 5,250 RPM and 302 lb-ft of torque at 4,000 RPM. Paired with a manual transmission, it delivers smooth power delivery and responsive acceleration, making it a formidable performer on the road. The engine’s efficiency and robust design ensure both power and reliability, solidifying its reputation as a classic muscle car.

Acceleration and Quarter Mile Times

The 2002 Mustang GT with a manual transmission achieves a 0-60 mph time in the mid-5-second range, showcasing its impressive acceleration. It completes the quarter mile in approximately 13.9 seconds, demonstrating strong performance for its class. The combination of the 4.6L V8 engine and manual transmission ensures responsive power delivery, making it a thrilling drive on both the street and track.

Maintenance and Care for the Manual Transmission

Regular fluid changes with Dextron III and inspections are crucial for optimal performance. Proper lubrication ensures smooth gear operation and prevents premature wear, extending transmission life.

Recommended Transmission Fluid and Capacity

The 2002 Mustang GT manual transmission requires Dextron III fluid for optimal performance. The transmission fluid capacity is approximately 3 liters (3.3 quarts). It’s essential to fill the transmission until the fluid level is visible on the dipstick. Overfilling can lead to operational issues. Regular fluid changes ensure proper lubrication, smooth gear engagement, and long-term durability of the manual transmission components.

Common Issues and Troubleshooting

The 2002 Mustang GT manual transmission, particularly the TR-3650, may experience issues like worn 3rd and 4th gear synchronizers or bearing wear; Low transmission fluid levels can cause erratic shifting, while leaks may develop from the rear seal or tailshaft. Inspecting fluid condition and level regularly helps prevent these issues. Replacing worn components or seals and ensuring proper fluid maintenance can resolve most problems effectively.

Upgrading and Modifying the Manual Transmission

Upgrading the 2002 Mustang GT manual transmission enhances performance and durability. Popular modifications include installing high-performance gears, upgraded clutch kits, and reinforced bearings to handle increased power and torque.

Popular Upgrade Options for the TR-3650

The TR-3650 manual transmission in the 2002 Mustang GT can be enhanced with various upgrades to improve performance and durability. Popular modifications include high-performance gear sets, upgraded bearings, and reinforced synchros to handle increased power. A high-performance clutch kit is also a common upgrade to ensure smooth and precise power delivery. Additionally, aftermarket shifter kits can reduce shift throw and improve shifting accuracy, while transmission mounts help minimize flex and enhance overall driving experience.

Performance Enhancements for the T5 Transmission

The T5 transmission in the 2002 Mustang GT can be enhanced for improved performance. Upgrades include lightweight aluminum gears and reinforced synchros to handle higher torque. A high-performance clutch kit ensures smoother power delivery, while a short shifter reduces shift throw for quicker gear changes. Additionally, upgraded bearings and seals improve durability, making the T5 more capable of handling aggressive driving and increased horsepower.

History of Manual Transmissions in the Ford Mustang

Manual transmissions have been a cornerstone of the Ford Mustang’s identity since its inception. The T5 and TR-3650 transmissions marked significant milestones, blending power and precision while defining the Mustang’s performance legacy.

Evolution of Manual Transmissions in Mustangs (1979-2023)

From 1979 onward, Ford’s manual transmissions in the Mustang evolved significantly, starting with the SROD (Top Loader) and progressing to the T5 in the late ’70s. The T5 became iconic for its durability and simplicity. By the ’90s, the TR-3650 emerged, offering smoother shifts and better suited for the V8’s power. Modern iterations, like the Tremec TR-3160, feature six speeds and advanced materials, blending performance with refinement. This evolution reflects Ford’s commitment to enhancing driver engagement and power delivery.

Significance of the TR-3160 and T45 Transmissions

The TR-3160 and T45 transmissions played pivotal roles in Mustang history. The TR-3160, introduced in later models, featured a robust six-speed design, ideal for high-performance applications. The T45, used in earlier SVT Cobra models, was known for its strength and smooth shifting, catering to both street and track use. Both transmissions symbolized Ford’s focus on precision and durability, enhancing the Mustang’s reputation as a driver’s car;

Buyer’s Guide for the 2002 Mustang GT Manual Transmission

When purchasing a used 2002 Mustang GT with a manual transmission, prioritize checking the transmission’s condition, fluid health, and shift smoothness. Ensure the T5 or TR-3650 model aligns with your performance needs.

What to Look for When Purchasing a Used Model

When buying a used 2002 Mustang GT with a manual transmission, inspect the transmission’s condition, checking for smooth gear shifts and no grinding. Verify the transmission fluid level and cleanliness, ensuring it’s the recommended type. Examine the clutch for proper engagement and absence of slippage. Review maintenance records for regular servicing. Check for leaks around the transmission pan and lines. Test the shifter for precise gear engagement without excessive play. Research the specific transmission model (T5 or TR-3650) for common issues. Inspect the drivetrain, including the rear axle ratio, and inquire about any modifications. Ensure parts availability and affordability for potential repairs.

Understanding Transmission Codes and Specifications

The 2002 Mustang GT manual transmission is identified by codes like TR3650 or T5, each with unique gear ratios. The TR3650 features a 5.08 final drive ratio, while the T5 has a 3.35 ratio. Transmission specifications include a removable bell housing and a slip yoke rear output shaft. The recommended fluid is Dextron III, with a capacity of approximately 3 liters. Understanding these codes and specs helps in identifying and maintaining the correct transmission for your Mustang.

DIY Guides and Repairs for the Manual Transmission

Basic maintenance includes regular fluid checks and filter replacements to ensure smooth operation. Addressing common issues like worn bearings or synchros can prevent major repairs.

For advanced DIYers, rebuilding the transmission involves replacing bearings, gaskets, and seals. Always consult a repair manual for precise steps and torque specifications.

Basic Maintenance and Repair Steps

Regular fluid checks and replacements are essential for maintaining the transmission’s health. Replace the transmission filter every 30,000 miles and inspect gaskets for signs of leaks. Clean the shifter mechanism and lubricate components to ensure smooth operation. Addressing worn bearings or synchros early can prevent costly repairs. Always use the recommended Dextron III fluid for optimal performance.

Rebuilding the Transmission: A Step-by-Step Guide

Rebuilding the manual transmission involves disassembling the unit, cleaning, and inspecting components. Replace worn bearings, seals, and synchros with OEM or aftermarket parts. Reassemble using proper torque specifications and fill with Dextron III fluid. Test the transmission by shifting through gears to ensure smooth operation. This process restores functionality and extends the lifespan of the transmission.

Aftermarket Support and Accessories

The 2002 Mustang GT manual transmission has strong aftermarket support. Companies like Steeda offer parts like short shift kits and lightweight flywheels, enhancing performance and durability for restoration or upgrades.

Popular Aftermarket Parts for the 2002 Mustang GT

Popular aftermarket parts for the 2002 Mustang GT include short shift kits, performance clutch kits, and lightweight flywheels. These upgrades enhance shifting precision and reduce throw distance. Companies like Steeda and Pro 5.0 offer high-quality components designed to improve transmission performance. Additionally, aftermarket transmission mounts and shifters are sought after for their durability and ability to handle increased power output, making them ideal for both street and track use.

Companies Specializing in Mustang Transmission Upgrades

Companies like Steeda, Pro 5.0, and Zumbrota Bearing and Gear specialize in Mustang transmission upgrades. They offer high-performance components such as short shift kits, heavy-duty clutches, and rebuilt transmissions. These companies cater to enthusiasts seeking enhanced durability and performance for their 2002 Mustang GT manual transmissions, ensuring optimal driving experiences for both daily use and racing applications.

The manual transmission remains a beloved legacy component in Mustangs, offering unparalleled driver engagement. As technology advances, future manual transmissions may integrate improved gearboxes while retaining the classic feel, ensuring their relevance for enthusiasts.

Final Thoughts on the 2002 Mustang GT Manual Transmission

The 2002 Mustang GT manual transmission stands as a testament to driving purity, offering precise control and a direct connection to the engine. With options like the T5 and TR-3650, it catered to both performance and durability. Its enduring appeal lies in the tactile experience it provides, making it a timeless choice for enthusiasts who value the art of shifting gears and the thrill of the drive.

The Role of Manual Transmissions in Modern Mustangs

In modern Mustangs, manual transmissions continue to symbolize the essence of driving engagement. They offer precise control, improved fuel efficiency, and a direct connection to the vehicle, enhancing the overall driving experience. With advancements in technology, modern manuals are smoother and more responsive, appealing to both performance enthusiasts and everyday drivers. This tradition, rooted in models like the 2002 GT, ensures manual transmissions remain a vital part of Mustang heritage.

nj cdl manual

The New Jersey CDL Manual is the official guide for professional drivers‚ covering state and federal regulations‚ licensing requirements‚ and safe driving practices. Published by the NJMVC‚ it ensures compliance with both state and federal standards‚ essential for obtaining and maintaining a Commercial Driver’s License in New Jersey.

Overview of the NJ CDL Manual

The NJ CDL Manual is a comprehensive guide detailing requirements‚ regulations‚ and best practices for commercial drivers in New Jersey. It covers CDL classes‚ endorsements‚ medical standards‚ and vehicle safety. Available in multiple languages‚ the manual also includes state-specific traffic laws and federal regulations. Published by the NJ MVC‚ it is essential for drivers preparing for the CDL exam and maintaining compliance.

Importance of the Manual for Commercial Drivers

The NJ CDL Manual is crucial for commercial drivers as it provides essential information on state and federal regulations‚ safety protocols‚ and licensing requirements. It serves as a study guide for the CDL exam‚ covering topics like endorsements‚ vehicle inspections‚ and medical standards. Adherence to the manual ensures legal compliance and promotes safe driving practices‚ making it indispensable for professional drivers in New Jersey.

CDL Classes in New Jersey

New Jersey offers three CDL classes: A‚ B‚ and C‚ each catering to different vehicle types and weight ratings. Class A covers combination vehicles‚ Class B for heavy straight trucks‚ and Class C for small passenger vehicles or hazardous materials transport.

Class A‚ B‚ and C CDLs: Definitions and Requirements

Class A CDLs are for combination vehicles exceeding 26‚001 lbs‚ requiring a trailer over 10‚001 lbs. Class B CDLs operate heavy straight trucks‚ like buses or dump trucks. Class C CDLs cover smaller passenger vehicles or hazardous materials‚ often requiring endorsements. Each class demands specific skills and knowledge‚ with eligibility starting at 21 years old and a valid NJ driver’s license.

Choosing the Right CDL Class for Your Career

Choosing the right CDL class in New Jersey depends on your career goals and the type of vehicles you intend to operate. Class A is ideal for long-haul trucking or combination vehicles‚ offering high demand and versatility. Class B suits those interested in construction or local transportation‚ while Class C is perfect for passenger or hazardous material transport. Consider job stability‚ salary expectations‚ and work environment when selecting your CDL class.

Eligibility and Requirements for a New Jersey CDL

To obtain a New Jersey CDL‚ applicants must meet age‚ residency‚ and medical requirements. You must be at least 21 years old for interstate commerce or 20 for intrastate. A valid NJ driver’s license‚ proof of residency‚ and medical certification from a DOT-approved examiner are required. Additional documentation and a vision test are also necessary.

Age‚ Residency‚ and Medical Requirements

To apply for a New Jersey CDL‚ you must meet specific eligibility criteria. Applicants must be at least 21 years old for interstate commercial driving or 20 for intrastate operations. Proof of New Jersey residency and a valid driver’s license are required. Additionally‚ a medical examination by a DOT-certified professional is mandatory‚ and applicants must meet federal vision and physical standards to ensure safe driving capabilities.

Application Process and Necessary Documentation

To apply for a New Jersey CDL‚ complete the application form and submit it to the MVC. Required documents include proof of residency‚ identity‚ and Social Security number. A valid medical examiner’s certificate is also needed. Applicants must select their CDL classification and any endorsements‚ then pay the applicable fees. All documents must be originals or certified copies‚ and the application must be submitted in person at an MVC office.

Study Materials and Resources

The NJ CDL Manual is available at MVC agencies or by calling (609) 292-6500. It provides detailed study materials for CDL exams and endorsements.

Where to Obtain the NJ CDL Manual

The New Jersey CDL Manual is available at any MVC agency or by calling (609) 292-6500. It can also be downloaded from the MVC website in English or Spanish.

The manual is free and provides comprehensive details on CDL requirements‚ classes‚ endorsements‚ and testing procedures‚ ensuring drivers are well-prepared for licensure and safe operation of commercial vehicles in New Jersey.

Additional Study Guides and Online Resources

Beyond the NJ CDL Manual‚ drivers can access online resources like practice tests and study guides on the MVC website. Platforms such as CDL Exam Prep 2022-2023 offer detailed test questions and explanations. Additionally‚ interactive study tools and AI chat support are available to help drivers prepare effectively for their exams and master the material.

CDL Application and Testing Process

The CDL application and testing process in New Jersey involves submitting required documents‚ passing a written exam‚ and completing a skills test to ensure compliance with MVC standards.

Steps to Apply for a CDL in New Jersey

To apply for a CDL in New Jersey‚ submit required documents‚ including proof of identity‚ residency‚ and medical certification‚ to the MVC. Pass a vision test and complete a written knowledge exam. Schedule and pass the skills test‚ which includes vehicle inspection‚ basic maneuvering‚ and road driving. Ensure all steps align with MVC guidelines for a smooth application process.

Understanding the CDL Written and Skills Tests

The CDL written test assesses knowledge of traffic laws‚ safety rules‚ and vehicle operation. The skills test evaluates practical abilities‚ including vehicle inspection‚ basic maneuvers like backing and turning‚ and on-road driving. Both tests are designed to ensure drivers meet federal and state standards‚ with the manual serving as the primary study resource to prepare effectively for these assessments.

CDL Endorsements and Restrictions

CDL endorsements and restrictions modify driving privileges. Common endorsements include H‚ N‚ P‚ S‚ and T. Restrictions limit certain operations. Understanding these is crucial for legal compliance.

Types of Endorsements (H‚ N‚ P‚ S‚ T‚ etc.)

CDL endorsements are specialized certifications added to a license‚ enabling drivers to operate specific vehicles. Common endorsements include H (hazardous materials)‚ N (tank vehicles)‚ P (passenger vehicles)‚ S (school buses)‚ and T (double/triple trailers). Each endorsement requires additional testing and allows drivers to handle specialized cargo or vehicles‚ ensuring they meet safety and regulatory standards for their intended operation.

How to Obtain and Maintain Endorsements

To obtain CDL endorsements in New Jersey‚ drivers must pass specific written tests and background checks‚ depending on the endorsement type. For example‚ the H endorsement requires a federal background check. Applications must be submitted through the NJ MVC‚ and additional fees may apply. To maintain endorsements‚ drivers must adhere to renewal requirements and stay compliant with federal and state regulations.

Test Preparation and Tips

To excel on the NJ CDL exam‚ focus on mastering general knowledge‚ vehicle inspection‚ and road skills. Regular study and practice tests ensure readiness.

Key Topics to Focus On for the CDL Exam

The NJ CDL exam covers general knowledge‚ combination vehicles‚ air brakes‚ tank vehicles‚ hazmat‚ doubles/triples‚ passenger vehicles‚ school bus‚ vehicle inspection‚ and road skills. Mastering these sections ensures readiness. Understanding New Jersey traffic laws and safety guidelines is also crucial. Focus on pre-trip inspections‚ braking techniques‚ and load management to excel in both written and practical tests.

Practical Tips for Passing the Skills Test

Focus on pre-trip inspections‚ ensuring brakes‚ tires‚ and mirrors are checked. Practice basic vehicle control‚ such as backing and turning‚ in a safe area. During the on-road test‚ maintain consistent speeds and use signals. Pay attention to lane positioning and following distance. Complete post-trip inspections to demonstrate thoroughness. Regular practice and familiarity with the vehicle will enhance your performance.

Vehicle Inspection and Safety

The NJ CDL Manual emphasizes pre-trip and post-trip inspections‚ covering brakes‚ tires‚ and mirrors. It ensures adherence to safety standards for responsible and safe commercial driving practices.

Pre-Trip and Post-Trip Inspection Requirements

The NJ CDL Manual outlines detailed pre-trip and post-trip inspection requirements to ensure commercial vehicles are roadworthy. Drivers must check brakes‚ tires‚ lights‚ and mirrors before and after trips. These inspections are critical for safety‚ compliance‚ and preventing potential accidents on the road.

Safety Guidelines for Commercial Vehicles

The NJ CDL Manual emphasizes strict safety guidelines for commercial vehicles‚ including adherence to traffic laws‚ proper load securement‚ and regular maintenance. Drivers must maintain safe following distances‚ use seatbelts‚ and avoid distractions. The manual also covers hazard management‚ emergency procedures‚ and the importance of staying alert to ensure road safety for both drivers and other road users.

State-Specific CDL Regulations

The NJ CDL Manual outlines New Jersey’s specific regulations‚ including intrastate commerce definitions‚ weight restrictions‚ and local operating requirements. These rules ensure compliance with state laws.

New Jersey Traffic Laws and CDL Compliance

Understanding New Jersey traffic laws is crucial for CDL holders‚ as they must comply with both state and federal regulations. The NJ CDL Manual details specific rules‚ including speed limits‚ right-of-way laws‚ and weight restrictions. Violations can result in penalties‚ fines‚ or license suspension. Adhering to these laws ensures safe operation of commercial vehicles and maintains compliance with CDL requirements.

FMCSA Regulations and Their Impact

The Federal Motor Carrier Safety Administration (FMCSA) regulations are critical for CDL holders in New Jersey. These rules‚ adopted by the state‚ govern hours of service‚ vehicle inspections‚ and driver qualifications. Compliance ensures safety and avoids penalties. The NJ CDL Manual outlines these regulations‚ emphasizing their importance in maintaining CDL compliance and operational safety standards.

Frequently Asked Questions

Common questions about the CDL process include manual availability‚ application steps‚ required documents‚ fees‚ and class distinctions. These are addressed in detail within the NJ CDL Manual.

Common Questions About the NJ CDL Process

Drivers often inquire about manual availability‚ application steps‚ required documents‚ fees‚ and class distinctions. These questions are addressed in detail‚ ensuring clarity on the process and requirements for obtaining a New Jersey CDL. Additional inquiries include endorsement specifics‚ medical requirements‚ and testing procedures‚ all of which are thoroughly covered in the official NJ CDL Manual.

Miscellaneous Topics and Clarifications

The NJ CDL Manual includes updates like the 2023 Skills Test Modernization‚ rewriting key chapters. It’s available in multiple languages‚ including Spanish and Tagalog. The MVC provides customer support for inquiries. Additional resources like study guides and online tools aid preparation. Clarifications on state-specific traffic laws and FMCSA regulations ensure compliance‚ supporting drivers in understanding and meeting all requirements effectively.

« Older posts Newer posts »