Author: baron (Page 4 of 18)

sbc manual transmission

The SBC (Small Block Chevy) manual transmission offers precision control and enhanced driving performance, making it a popular choice for enthusiasts and racers alike. Its reliability and versatility ensure seamless integration with various engine setups, providing a thrilling yet manageable driving experience.

SBC Engine Basics

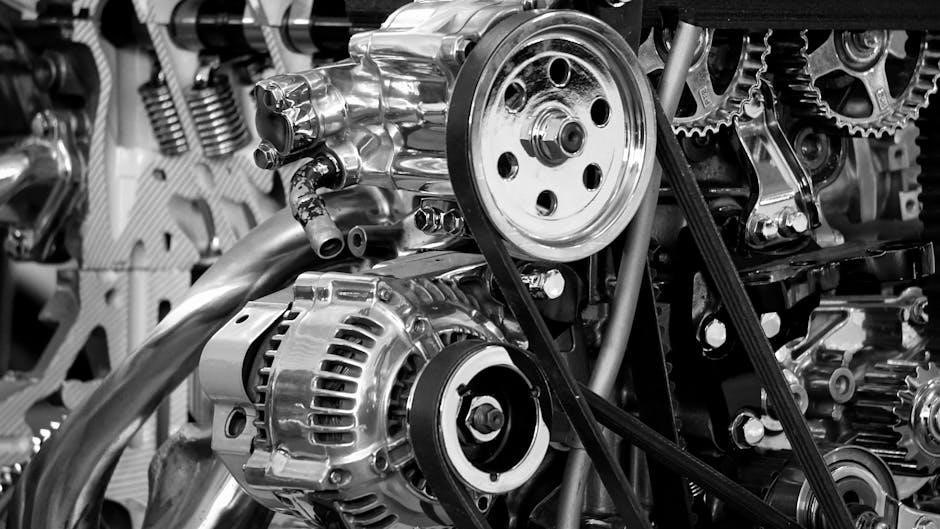
The Small Block Chevy (SBC) engine is renowned for its reliability, power, and lightweight design, making it a cornerstone in automotive performance. Its compatibility with manual transmissions enhances drivetrain efficiency and driver control.

Engine Specifications

The Small Block Chevy (SBC) engine is available in various displacements, including 262, 283, 305, 327, 350, and 400 cubic inches. Known for its durability, the SBC features a compact, lightweight design with a robust cast-iron or aluminum block. It utilizes overhead valves (OHV) with a pushrod-actuated valvetrain, offering excellent power and efficiency. Horsepower ranges from approximately 150 to 400, depending on the configuration, with torque outputs that provide strong low-end and mid-range performance. The engine supports both carbureted and fuel-injected systems, making it versatile for different applications. These specifications ensure the SBC is a reliable and adaptable powerplant, ideal for pairing with manual transmissions in high-performance and racing environments.

Common Applications

The SBC manual transmission is widely used in various automotive applications, including classic cars, racing vehicles, and high-performance street machines. It is a popular choice for enthusiasts seeking precise control and durability. Many classic Chevrolet models, such as the Camaro and Chevelle, often feature SBC manual transmissions for their simplicity and reliability. In racing environments, these transmissions are valued for their strength and ability to handle high torque outputs. Additionally, off-road vehicles and custom builds frequently utilize SBC manual transmissions due to their versatility and compatibility with a wide range of engines; This transmission is also a favorite among street rod builders, who appreciate its lightweight design and ease of installation, making it a versatile option for both everyday driving and performance-oriented projects.

Key Features

The SBC manual transmission is renowned for its durability, lightweight design, and compact size, making it ideal for high-performance applications. It features a robust gear set capable of handling high torque outputs, ensuring reliability under demanding conditions. The transmission is designed with a mechanical clutch system, offering precise control and smooth shifting. Its compatibility with a variety of engine configurations, including classic and modern SBC engines, adds to its versatility. Additionally, the SBC manual transmission is known for its ease of installation and maintenance, making it a popular choice for both professional builders and DIY enthusiasts. With a range of available gear ratios, it can be tailored to suit specific driving needs, whether for racing, off-road use, or everyday driving, providing a balance of performance and efficiency.

How Manual Transmissions Work with SBC

The SBC manual transmission operates by disconnecting the engine via a clutch, enabling smooth gear shifts. It relies on mechanical linkage and driver input for precise control and torque transfer.

Gear Ratios

Gear ratios in SBC manual transmissions are critical for optimizing performance, fuel efficiency, and drivability. Common ratios range from 3.00:1 for highway cruising to 4.10:1 or higher for racing applications. The T-5 transmission, often paired with SBC engines, features ratios like 2.95:1 (first gear) and 0.68:1 (fifth gear), ideal for balanced acceleration and overdrive efficiency. The T-56, with its wider range, offers ratios such as 2.66:1 (first gear) and 0.50:1 (sixth gear), catering to high-performance needs. Proper gear ratio selection ensures the engine operates within its power band, enhancing responsiveness and reducing strain during acceleration or towing. For street driving, lower numerical ratios (e.g., 3.08:1) are preferred, while higher ratios (e.g., 4.30:1) are better suited for drag racing or heavy loads. Matching the gear ratio to the vehicle’s intended use maximizes the SBC’s potential.

Clutch Operation

The clutch in an SBC manual transmission setup is essential for smooth gear shifts and engine disengagement. It operates by pressing the clutch pedal, which releases the clutch disc from the flywheel, allowing the driver to change gears without grinding. Hydraulic or cable-actuated systems are commonly used, with hydraulic systems offering easier modulation and less maintenance. Proper clutch adjustment ensures optimal performance, preventing premature wear and ensuring smooth engagement. The mechanical fuel pump and manual transmission combination requires careful synchronization of the clutch and throttle for seamless acceleration. Over-revving or aggressive clutch use can lead to wear, emphasizing the need for a well-balanced setup tailored to the vehicle’s power output and intended use. Regular maintenance, such as checking fluid levels and pedal play, ensures reliable clutch operation and enhances the driving experience.

Compatibility Considerations

When pairing a manual transmission with an SBC engine, compatibility is crucial for optimal performance. The bellhousing must match the SBC’s bolt pattern, and the flexplate or flywheel should align with the transmission’s input shaft. For LS-based SBC engines, additional adapters or spacers may be required to ensure proper fitment. The mechanical fuel pump setup should be considered to avoid conflicts with the transmission’s hydraulic system. Gear ratios and torque capacity of the transmission must align with the engine’s power output to prevent premature wear. Ensuring compatibility involves checking bolt patterns, input shaft length, and clutch alignment. Proper adapter plates or bellhousing modifications may be necessary for certain setups. Always verify specifications to guarantee a seamless integration between the SBC engine and the chosen manual transmission, ensuring reliability and peak performance.

Popular Manual Transmission Options for SBC

The T-5 and T-56 transmissions are widely used with SBC engines, offering reliable performance. The T-5 is ideal for lower torque applications, while the T-56 handles higher torque outputs effectively.

T-5 Transmission

The T-5 transmission is a popular choice for SBC engines, known for its lightweight and compact design. It offers a five-speed manual option with close-ratio gearing, making it suitable for street driving and moderate performance needs. Typically sourced from vehicles like the Chevrolet Camaro or Pontiac Firebird, the T-5 is compatible with the SBC when paired with the correct bellhousing and clutch system. Its durability is sufficient for lower torque applications, but it may not withstand the demands of high-performance or heavy-duty use. Proper installation and compatibility checks are essential to ensure smooth operation with the SBC engine. This transmission is a cost-effective and reliable option for enthusiasts seeking a manual driving experience without the need for extreme power handling.

T-56 Transmission

The T-56 transmission is a robust six-speed manual gearbox designed for high-performance applications. It features a strong, rugged design, making it ideal for SBC engines producing higher torque and horsepower. Originally used in vehicles like the Chevrolet Camaro SS and Pontiac GTO, the T-56 offers a wide range of gear ratios, including overdrive, for both performance and fuel efficiency. Its durability and capability to handle heavy-duty use make it a preferred choice for racing and high-powered builds. Compatibility with the SBC requires specific adapters and modifications, but the T-56 is well-suited for those seeking a reliable, high-performance manual transmission. Its increased strength and versatility ensure it meets the demands of both street and track driving, making it a top contender for enthusiasts upgrading their SBC-powered vehicles.

Installation and Special Considerations

Installing a manual transmission with an SBC requires careful planning and precision. Key considerations include adapter plates, crossmembers, and clutch linkages to ensure compatibility and smooth operation. Special attention must be paid to the bellhousing and flywheel setup to avoid mechanical issues. Proper alignment and mounts are crucial for preventing vibration and wear. Additionally, the hydraulic or mechanical clutch system must be configured correctly for optimal performance. Professional expertise is often recommended to handle complex configurations and ensure reliability. These considerations are vital for a successful and durable installation, ensuring the transmission operates seamlessly with the engine. Proper planning and execution are essential to avoid costly repairs and maintain peak performance. Always consult a trusted manual for specific instructions tailored to your setup.

Necessary Components

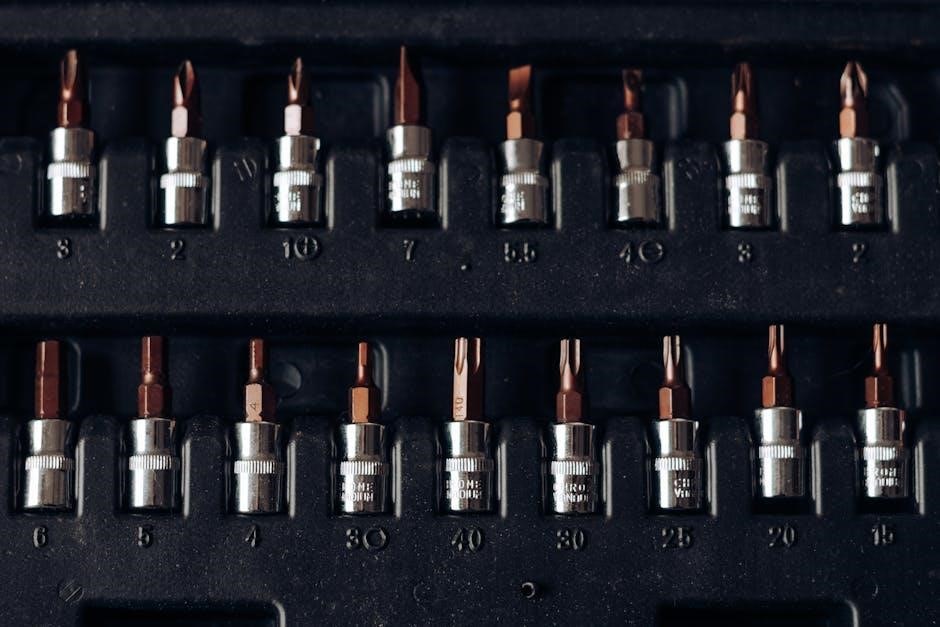
When setting up a manual transmission with an SBC engine, several key components are essential for proper functionality. These include a compatible bellhousing designed to mate the transmission with the engine block, ensuring proper alignment and clearance. A flywheel or flexplate is required, depending on whether a mechanical or hydraulic clutch system is used. The clutch assembly itself, including the pressure plate, disc, and release bearing, must be selected to handle the engine’s torque output. A transmission crossmember and mounts are needed to secure the manual transmission to the chassis, while an adapter plate or swap kit may be necessary to facilitate the connection. Additionally, a clutch pedal assembly and hydraulic or mechanical linkage system are critical for engaging and disengaging the clutch smoothly. These components must be carefully selected and matched to ensure compatibility and optimal performance. Proper installation of these parts is crucial for a reliable and smooth-shifting manual transmission setup.

Special Considerations

When installing a manual transmission with an SBC engine, several factors must be carefully considered to ensure compatibility and performance. The engine’s torque output must be matched with the transmission’s capacity to handle it, especially in high-performance applications. Additionally, the bellhousing and adapter plate must be precisely aligned to avoid mechanical damage. Older SBC engines may require modifications to accommodate modern manual transmissions, such as the T-5 or T-56, which were originally designed for LS engines. The clutch system must also be properly configured, with a mechanical or hydraulic setup tailored to the engine’s specifications. Furthermore, the transmission crossmember and mounts should be reinforced to handle the added stress of manual shifting. In some cases, custom drivetrain components may be necessary to achieve optimal performance. Consulting with a qualified mechanic or transmission specialist is highly recommended to address these considerations effectively. Proper planning ensures a seamless and reliable setup.

d14 bus schedule pdf

Overview of the D14 Bus Schedule PDF

The D14 Bus Schedule PDF is a comprehensive guide offering detailed route maps‚ bus stops‚ and timetables for weekdays and weekends․ Available on Moovit and WMATA‚ it aids passengers in planning trips efficiently‚ providing real-time tracking and offline access for daily commuters․ It covers the Oxon Hill-Suitland route‚ operated by WMATA‚ ensuring convenient travel planning․

The D14 bus route is a key transit service operated by the Washington Metropolitan Area Transit Authority (WMATA)‚ connecting Southern Ave Station to Suitland․ It serves 101 stops‚ offering reliable transportation across Oxon Hill and Suitland․ This route is part of the Oxon Hill-Suitland Line‚ ensuring connectivity to major hubs and Metrorail stations․ The D14 bus is essential for commuters in the Washington‚ D․C․ area‚ providing efficient travel options and linking to other transit lines for seamless journeys․

1․2 Importance of the Schedule PDF

The D14 Bus Schedule PDF is a vital resource for passengers‚ offering detailed timetables‚ route maps‚ and bus stop listings․ It helps commuters plan trips efficiently‚ ensuring punctuality and reducing travel stress․ The PDF is accessible offline‚ making it ideal for areas with limited internet connectivity․ Additionally‚ it supports environmental sustainability by reducing paper usage․ This document is essential for both regular and occasional riders‚ providing clear and concise information to navigate the D14 route effectively․

How to Access the D14 Bus Schedule PDF

The D14 Bus Schedule PDF can be downloaded via the Moovit App‚ accessed on the WMATA website‚ or saved for offline use through Google Maps․

2․1 Downloading from Moovit App

Downloading the D14 Bus Schedule PDF from the Moovit App is straightforward․ Open the app‚ search for the D14 route‚ and navigate to the “Schedule” section․ Select the desired timetable‚ and the PDF will be available for download․ This feature allows users to access the schedule offline‚ ensuring convenience even without internet connectivity․ The app also provides real-time updates‚ making it easier to track bus arrivals and plan journeys efficiently․ This method is ideal for daily commuters seeking reliable and up-to-date information․

2․2 Availability on WMATA Website

The D14 Bus Schedule PDF is readily accessible on the WMATA website․ Visit the site‚ navigate to the “Schedules & Maps” section‚ and select the D14 route․ From there‚ download the PDF‚ which includes detailed timetables‚ route maps‚ and bus stop listings․ This resource is particularly useful for planning trips in advance and ensures that users have all necessary information at their fingertips․ WMATA’s official website guarantees accurate and updated schedules‚ making it a reliable source for commuters․

2․3 Offline Access via Google Maps

Google Maps offers offline access to the D14 Bus Schedule PDF‚ enabling users to download and view the document without an internet connection․ To access it‚ open Google Maps‚ search for the D14 route‚ and select the offline map option; This feature allows commuters to review schedules‚ route maps‚ and bus stops even in areas with limited connectivity․ By downloading the PDF through Google Maps‚ passengers can ensure they have essential transit information readily available‚ enhancing their travel planning experience․

Key Features of the D14 Bus Schedule PDF

The D14 Bus Schedule PDF includes a detailed route map‚ timetables for weekdays and weekends‚ and a comprehensive list of bus stops‚ aiding seamless travel planning․

3․1 Detailed Route Map

The detailed route map in the D14 Bus Schedule PDF provides a visual representation of the entire journey‚ highlighting key stops‚ major landmarks‚ and connections to Metrorail stations․ This feature allows passengers to understand the route layout easily‚ helping them identify boarding and alighting points efficiently․ The map is color-coded and includes street names‚ ensuring clarity and aiding users in navigating unfamiliar areas․ It is particularly useful for first-time riders or those planning trips across different neighborhoods․

3․2 Timetable for Weekdays and Weekends

The D14 Bus Schedule PDF includes a clear timetable with departure and arrival times for both weekdays and weekends․ The weekday schedule operates on a consistent frequency‚ ensuring reliable service for daily commuters․ Weekend timetables are adjusted to accommodate lighter traffic‚ with detailed intervals between buses․ The PDF also highlights the first and last bus times‚ making it easy to plan trips․ Real-time tracking via the Moovit app complements the static schedule‚ offering dynamic updates for improved travel planning․

3․3 List of Bus Stops

The D14 Bus Schedule PDF provides a detailed list of all bus stops along the route‚ ensuring passengers can identify their desired stop easily․ The list includes major stops such as Southern Avenue Station‚ Suitland Station‚ and intermediate points like Southern Avenue SE and Wheeler Road․ Each stop is clearly labeled in the order they appear on the route‚ making it simple to plan travel from start to end․ This comprehensive list is essential for navigating the Oxon Hill-Suitland route efficiently‚ helping commuters and travelers alike․

Understanding the D14 Bus Route

The D14 bus route operates between Southern Avenue Station and Suitland Station‚ covering key areas in Washington‚ D․C․‚ and Maryland․ Managed by WMATA‚ it runs daily‚ connecting residential and commercial zones․ The route includes major stops like Southern Avenue SE and Suitland‚ ensuring accessibility for commuters․ It also links to Metrorail stations‚ providing seamless transit options for travelers․ This route is essential for those navigating the Oxon Hill-Suitland corridor‚ offering reliable transportation in the region․

4․1 Start and End Points

The D14 bus route begins at Southern Avenue Station / Bay Q and concludes at Suitland / Bay J․ This route‚ operated by WMATA‚ serves the Oxon Hill and Suitland areas‚ offering daily service for commuters․ The route spans from Southern Avenue in Washington‚ D․C․‚ to Suitland in Maryland‚ providing essential connectivity for residents and travelers․ With its start and end points clearly defined‚ the D14 route ensures reliable transportation between these key locations‚ making it a vital link in the regional transit network․

4․2 Major Stops Along the Route

The D14 bus route includes several key stops‚ such as Southern Avenue Station‚ United Medical Center‚ and Wheeler Road․ These stops provide access to essential services‚ medical facilities‚ and residential areas; The route also connects to major transit hubs‚ ensuring seamless transfers for passengers․ Regular stops along the way include Southern Avenue SE‚ 13th Street SE‚ and Suitland Road‚ making the D14 route a convenient option for both locals and visitors․ These stops are strategically located to serve high-demand areas‚ enhancing the route’s overall utility․

4․3 Connection to Metrorail Stations

The D14 bus route connects seamlessly with Metrorail stations‚ providing convenient transfer options for passengers․ Key stops like Southern Avenue Station and Suitland Station serve as major transfer points‚ linking bus and rail services․ This integration allows commuters to easily switch between modes of transportation‚ enhancing the overall efficiency of their journey․ The D14 route’s alignment with Metrorail stations ensures that passengers can access broader transit networks‚ making it a vital connection for daily travel․

How to Use the D14 Bus Schedule PDF

Download the PDF from Moovit or WMATA‚ then review the route map to identify stops and plan your trip using the timetable․ Use the app for real-time tracking․
This helps optimize travel time and ensures punctuality‚ making your commute seamless and efficient with the D14 bus schedule guide․

5․1 Planning Your Trip

The D14 Bus Schedule PDF simplifies trip planning by providing detailed route maps and timetables․ Identify your start and end points using the map‚ then match them with the corresponding timetable․ Calculate travel time by aligning your departure time with the nearest bus schedule․ Use the list of bus stops to ensure accuracy․ For added convenience‚ the PDF includes real-time tracking options‚ allowing you to adjust plans based on current bus locations․ This feature ensures a seamless and efficient travel experience for daily commuters․
Plan your route with precision using the D14 Bus Schedule PDF․

5․2 Tracking Real-Time Bus Information

The D14 Bus Schedule PDF enhances your travel experience by allowing real-time tracking of bus arrivals․ Use the PDF to identify your bus stop and time‚ then cross-reference with live updates from the Moovit App․ Track the exact location of your bus and receive notifications for arrival times․ This feature ensures you never miss your bus‚ even with unexpected delays․ Real-time tracking integrates seamlessly with the PDF schedule‚ providing a reliable and efficient way to stay informed during your journey․
Stay connected with real-time updates for a stress-free commute․

5․3 Navigating the Route Map

The D14 Bus Schedule PDF includes a detailed route map‚ making it easy to visualize your journey․ Identify your starting and ending points‚ and locate major stops along the way․ Use the map to plan your route‚ ensuring you board and disembark at the correct stops․ Key landmarks and transfer points are highlighted‚ helping you navigate seamlessly․ The map also shows connections to Metrorail stations‚ simplifying transfers․ By understanding the route layout‚ you can plan your trip efficiently and avoid missing your stop․
Use the map to explore the entire D14 route visually․

Benefits of the D14 Bus Schedule PDF

The D14 Bus Schedule PDF offers convenience for daily commuters‚ offline accessibility‚ and is an environmentally friendly option for planning trips efficiently without paper waste․

6․1 Convenience for Daily Commuters

The D14 Bus Schedule PDF provides unparalleled convenience for daily commuters‚ offering real-time tracking and detailed timetables․ It enables seamless trip planning and reduces wait times by providing accurate bus schedules․

Commuters can access the PDF anytime‚ even without internet‚ ensuring they stay informed about route changes or delays․ This feature is especially beneficial for those with tight schedules‚ making their daily travel hassle-free and efficient․

6․2 Offline Accessibility

The D14 Bus Schedule PDF is designed for offline use‚ allowing commuters to access essential information without internet connectivity․ This feature is particularly useful in areas with poor network coverage‚ ensuring uninterrupted access to bus timetables‚ route maps‚ and stop details․ Offline access enhances the overall user experience‚ making it a reliable tool for planning journeys even when online services are unavailable․ It supports daily commuting by providing consistent and readily available transit data․

6․3 Environmentally Friendly Option

The D14 Bus Schedule PDF offers an eco-friendly alternative to printed materials‚ reducing paper waste․ By providing a digital format‚ it minimizes the environmental impact associated with printing schedules and maps․ This option aligns with sustainability goals while ensuring users have easy access to necessary information․ The PDF format also reduces the carbon footprint typically linked to distributing physical copies‚ making it a responsible choice for environmentally conscious commuters․

singer sewing machine operation manual

Singer sewing machines are renowned for their durability and versatility, offering a wide range of models to suit both beginners and experienced sewists. The operation manual serves as a comprehensive guide to understanding machine components, troubleshooting, and maintaining optimal performance. It ensures safe and effective use, helping users unlock the full potential of their Singer sewing machine.

1.1 Brief History and Evolution of Singer Sewing Machines

Singer sewing machines have a rich history dating back to the mid-1800s, revolutionizing the sewing industry with their innovative designs. Founded by Isaac Singer, the company introduced the first practical sewing machine, making sewing accessible to households and industries. Over the years, Singer has evolved, offering advanced features and diverse models while maintaining its reputation for quality and durability. The operation manual reflects this legacy, guiding users through timeless sewing techniques and modern advancements.

1.2 Importance of the Operation Manual

The operation manual is essential for understanding the Singer sewing machine’s features, proper usage, and maintenance. It provides step-by-step guidance for setup, threading, and troubleshooting, ensuring safe and efficient operation. By following the manual, users can maximize the machine’s performance, prevent damage, and extend its lifespan. It serves as a vital resource for both beginners and experienced sewists, offering clear instructions tailored to specific models and tasks.

Safety Precautions

Always unplug the machine before cleaning or servicing. Use only recommended attachments and keep loose clothing tied back. Ensure the work area is clear and well-lit.

2.1 General Safety Guidelines

Always unplug the sewing machine before cleaning, lubricating, or making adjustments. Use only manufacturer-recommended attachments and keep loose clothing tied back. Ensure the work area is clear and well-lit. Avoid operating the machine when fatigued or distracted. Keep children and pets away while sewing. Never touch electrical components with wet hands. Follow all safety instructions in the manual to prevent accidents and ensure safe operation.

2.2 Electrical Safety Tips

Always unplug the sewing machine when not in use or before cleaning. Avoid operating the machine near water or in humid environments. Never use damaged cords or plugs, as they can cause electrical hazards. Ensure the machine is grounded properly to prevent shocks. Keep the power cord away from hot surfaces or sharp objects. Follow all electrical safety guidelines in the manual to maintain safe operation and prevent potential risks.

Understanding Machine Components

Understanding your Singer sewing machine’s components is essential for effective use. Key parts include the needle, presser foot, bobbin case, and stitch selector, each vital for proper operation.

3.1 Major Parts of the Singer Sewing Machine

The Singer sewing machine features key components like the needle, presser foot, bobbin case, stitch selector, and thread take-up lever. These parts work together to ensure smooth fabric handling, consistent stitching, and precise control. The needle bar and hook mechanism are crucial for forming stitches, while the bobbin holds the lower thread. Understanding these components is vital for proper machine operation and troubleshooting common issues efficiently.

3.2 Functions of Key Components

The needle creates stitches by moving up and down, while the bobbin holds the lower thread, ensuring proper stitch formation. The presser foot keeps fabric in place, and the stitch selector allows users to choose stitch types. The thread take-up lever regulates thread tension, and the hook mechanism loops the thread around the bobbin thread. These components work together to ensure smooth fabric feeding, consistent stitching, and precise control during sewing operations.

Threading and Bobbin Setup

Threading and bobbin setup are crucial for smooth stitching. Properly guide the thread through the machine’s spool pin and take-up lever, then install the bobbin correctly to ensure consistent and proper stitching.

4.1 Step-by-Step Guide to Threading the Machine

Switch off the machine before threading. Locate the spool pin and guide the thread through it. Pass the thread through the take-up lever and tension discs. Gently pull the thread to remove slack. Insert the thread into the needle’s eye, leaving a small tail. Ensure the thread is taut but not overly tight. Refer to the manual for specific model variations and guidelines for proper threading techniques.

4.2 Proper Bobbin Installation Techniques

Switch off the machine and locate the bobbin case. Insert the bobbin, ensuring the thread unwinds counterclockwise. Pull the thread gently to seat the bobbin correctly. Guide the thread through the bobbin tension slot. Replace the bobbin case, ensuring it clicks into place. Test the bobbin by gently tugging the thread to confirm proper tension. Always refer to the manual for model-specific bobbin installation instructions.

Basic Operation Guide

Plug in the machine, raise the presser foot, and ensure the bobbin is correctly installed. Place fabric under the needle, lower the presser foot, and start sewing. Use the speed control for consistent stitching and monitor thread tension for even seams.

5.1 Starting the Sewing Machine

Plug in the machine, ensuring it is turned off. Raise the presser foot and ensure the needle area is clear. Install the bobbin correctly and thread the machine as per the manual. Lower the presser foot, turn it on, and start sewing with a test stitch to ensure proper function. Always consult the manual for model-specific startup procedures.

5.2 Selecting Stitches and Sewing Techniques

Selecting the right stitch is crucial for achieving desired results. Refer to the manual for stitch options, such as straight, zigzag, or decorative stitches. Choose stitches based on fabric type and sewing purpose. Adjust stitch length and width as needed for optimal results. Practice on scrap fabric to ensure settings are correct. Advanced models like the C430 and C5200 offer additional stitch variations for specialized techniques.

Troubleshooting Common Issues

Common issues like thread breakage or improper stitch formation can be resolved by referring to the manual. Ensure proper threading, bobbin installation, and stitch selection for smooth operation.

6.1 Solving Thread Breakage Problems

Thread breakage often occurs due to incorrect threading, improper tension, or using low-quality thread. To resolve this, switch off the machine, rethread following the manual’s guide, and ensure the take-up lever is at its highest point. Check bobbin installation and thread tension settings. Using the correct needle size for your fabric can also prevent breakage. Regularly cleaning the machine and lubricating it helps maintain smooth operation and reduces thread issues.

6.2 Fixing Improper Stitch Formation

Improper stitch formation can be caused by incorrect thread tension, a wrong needle size, or misaligned bobbin. Check the thread tension settings and adjust as per the manual. Ensure the needle is suitable for the fabric type and properly installed. Reinstall the bobbin correctly, ensuring it’s seated and threaded properly. Test stitches on scrap fabric before sewing to confirm resolution; Keep the machine clean and lubricated to prevent such issues.

Maintenance and Care

Regular maintenance ensures optimal performance. Clean the machine, lubricate moving parts, and store it properly. Always unplug before servicing to maintain safety and extend the machine’s lifespan.

7.1 Cleaning the Sewing Machine

Regular cleaning is essential for maintaining your Singer sewing machine. Turn it off and unplug it before cleaning. Use a soft brush to remove lint and debris from the bobbin area, feed dogs, and stitch plate. Avoid harsh chemicals; instead, dampen a cloth with water for wiping surfaces. Compressed air can help reach tight spaces. Dry thoroughly to prevent rust. Clean after each use to ensure smooth operation and longevity.

7.2 Lubricating and Servicing the Machine

Regular lubrication is crucial for smooth operation. Use Singer-approved sewing machine oil, applying a few drops to the specified parts as outlined in the manual. Avoid over-lubrication to prevent dust and lint buildup. For thorough servicing, consult a Singer-authorized service center every 12-18 months, even if the machine is not heavily used. Proper servicing ensures longevity and optimal performance.

Accessories and Attachments

Singer offers a variety of accessories and attachments to enhance your sewing experience; These include zipper feet, buttonhole makers, and specialized presser feet for specific tasks. Using genuine Singer attachments ensures compatibility and optimal performance, allowing you to explore advanced sewing techniques with ease and precision.

8.1 Essential Accessories for Singer Sewing Machines

Singer sewing machines come with a variety of essential accessories to enhance your sewing experience. These include zipper feet, buttonhole makers, and specialized presser feet. Additional accessories like extension tables, carrying cases, and thread sets are also available. Using genuine Singer accessories ensures optimal performance and compatibility, allowing you to tackle various sewing projects with ease and precision. These tools expand your machine’s capabilities, making sewing more efficient and enjoyable.

8.2 Using Attachments for Specific Tasks

Singer sewing machine attachments are designed to simplify specific sewing tasks. For example, the zipper foot is ideal for sewing zippers, while the buttonhole maker creates perfect buttonholes. Other attachments, like the blind hem foot, are great for invisible hems. Using the right attachment for the job ensures professional results and enhances your sewing efficiency. Always refer to the manual for guidance on attachment installation and usage.

Downloading and Using the Manual

The Singer sewing machine manual is readily available for download in PDF format, ensuring easy access to guidance for setup, troubleshooting, and maintenance. Models like 15-91 and 15K are covered, with detailed instructions to help users optimize their sewing experience and resolve common issues effectively.

9.1 Finding the Correct Manual for Your Model

To find the correct Singer sewing machine manual, visit the official Singer website or trusted sources like ManualsLib or Singer’s support page. Enter your model number (e.g., 15-91, 15K, or 28K) to download the corresponding PDF manual. Ensure the manual matches your machine’s specific features for accurate guidance on operation, maintenance, and troubleshooting. Always verify the model number to avoid confusion and ensure compatibility.

9.2 Tips for Reading and Following the Manual

Read the manual thoroughly before using your Singer sewing machine. Pay attention to safety precautions and step-by-step guides for threading, bobbin installation, and stitch selection. Familiarize yourself with diagrams and component labels to understand machine parts better. Always follow recommended maintenance routines and lubrication instructions. For clarity, refer to the troubleshooting section if issues arise. This ensures safe and efficient operation, helping you maximize your machine’s performance and longevity.

cafe dishwasher manual pdf

Welcome to the Café Dishwasher Manual PDF, your comprehensive guide to safe installation, operation, and maintenance. Explore features, troubleshooting, and care tips for optimal performance.

Overview of the Manual’s Importance

This manual is an essential guide for Café dishwasher owners, providing critical information for safe operation, installation, and maintenance. It details safety precautions, key features, and troubleshooting solutions to ensure optimal performance. By following the manual, users can prolong the appliance’s lifespan, prevent damage, and maintain efficiency. It also serves as a reference for registering the product and accessing customer support, making it a vital resource for all Café dishwasher users.

Key Features of the Cafe Dishwasher

The Café dishwasher offers advanced features like customizable wash cycles, energy-efficient settings, and WiFi connectivity for smart control. It includes multiple wash options, quiet operation, and a stainless steel interior for durability. The dishwasher also has leak detection, child safety locks, and adjustable racks for flexibility. These features ensure superior cleaning, energy savings, and a seamless user experience, making it a top choice for modern kitchens.

Downloading and Accessing the Manual

Access the Café dishwasher manual PDF by visiting the official website, entering your model number, or using the provided links for a digital copy easily.

Where to Find the Cafe Dishwasher Manual PDF

The Café dishwasher manual PDF is available on the official Café Appliances website. Visit the support section, enter your dishwasher model number, and download the PDF. Additionally, user manual platforms like ManualsLib or ManualsOnline host digital copies. Check the product packaging for a registration card, which may include a link or instructions to access the manual online. Ensure you verify the source for authenticity.

Steps to Download the Manual

To download the Café dishwasher manual PDF, visit the official Café Appliances website or authorized platforms like ManualsLib. Click on the “Support” section, enter your dishwasher model number in the search bar, and select the appropriate manual. Review the document details, then click “Download” to save the PDF. Ensure the source is verified for authenticity to avoid counterfeit versions. Follow on-screen instructions to complete the download process successfully.

Understanding the Manual’s Key Sections

Explore safety guidelines, operating instructions, troubleshooting tips, and maintenance advice. This manual ensures efficient use and longevity of your Café dishwasher with clear, detailed information.

Safety Information and Precautions

Ensure safe operation by reading the manual thoroughly. Avoid using abrasive materials or bleach, as they may damage surfaces. Keep children away from hot dishes and sharp utensils. If a leak is detected, the dishwasher will alert you and stop the cycle. Regularly check detergent levels and avoid overloading. Always unplug during maintenance. Follow guidelines to prevent burns and electrical hazards, ensuring a secure and efficient cleaning experience.

Operating Instructions and Controls

The Café dishwasher features an intuitive control panel with buttons for selecting wash cycles, options, and starting/stopping the machine. Indicator lights provide feedback on the cycle status and detergent levels. Choose from various cycles like Heavy Duty, Normal, and Light/China for tailored cleaning. Use the delay start option for convenient operation. Always ensure the door is securely closed before starting. Refer to the manual for detailed guidance on optimizing your dishwasher’s performance and settings.

Troubleshooting Common Issues

If your Café dishwasher detects a leak, it will stop the cycle and display “LEAK DETECTED.” Ensure the door is closed securely and check for loose connections. Low water pressure or improper detergent use can affect performance. If issues persist, refer to the manual or contact Café support. Regular maintenance, like checking filters, can prevent common problems. Always follow the troubleshooting guide in the manual for specific error solutions and optimal functionality.

Installation and Setup Guide

Ensure proper power supply, water connections, and leveling before installation. Follow the manual’s step-by-step guide for a seamless setup and optimal dishwasher performance from the start.

Pre-Installation Requirements

Before installation, ensure a stable power supply, proper water connections, and a level surface. Verify the site meets electrical and plumbing requirements. Clear the area of obstructions and ensure all necessary tools are available. Check local codes and regulations. If unsure, consult a qualified professional to ensure compliance with safety standards and manufacturer guidelines for a smooth setup process.

Step-by-Step Installation Process

Position the dishwasher in its designated area, ensuring it is level and secure. Connect the water supply lines to the inlet valves, tightening firmly with a wrench. Verify proper drainage by installing the drain hose correctly. Secure the dishwasher to adjacent surfaces to prevent movement. Connect the electrical supply, ensuring it is grounded. Test the dishwasher by running a short cycle to check for leaks and proper function. Refer to the manual for detailed diagrams and specific instructions.

Maintenance and Care Tips

Regularly clean filters, check for blockages, and maintain detergent levels. Wipe down surfaces and ensure the door seals are free of debris for optimal performance and longevity.

Cleaning and Regular Maintenance

Regular cleaning ensures optimal performance. Clean filters monthly and check for blockages. Refill rinse aid when indicated. Wipe down surfaces with a soft cloth to prevent grease buildup. Inspect and clean door seals to maintain a watertight seal. Avoid using abrasive materials that could damage finishes. Regular maintenance prevents issues and extends the dishwasher’s lifespan, ensuring efficient and hygienic cleaning cycles.

Optimizing Dishwasher Performance

To maximize performance, use high-quality detergent in tablet or packet form for effective cleaning. Ensure rinse aid levels are sufficient, as indicated by the dishwasher. Properly load dishes, avoiding overcrowding, and face soiled surfaces toward the center. Regularly clean filters and check for blockages. Select the appropriate wash cycle for load size and soil level. These steps enhance cleaning efficiency, reduce energy use, and maintain your dishwasher’s effectiveness over time.

Advanced Features and Settings

Explore advanced features like WiFi Connect for remote control, customizable wash cycles, and energy-saving modes. These settings enhance convenience, efficiency, and personalized cleaning experiences for your Café dishwasher.

Customizing Wash Cycles and Options

Customize your Café dishwasher with adjustable wash cycles, temperature settings, and drying options. Tailor cycles for heavy-duty loads, delicate items, or eco-friendly washing. Utilize smart integration to schedule washes remotely and optimize energy use. Adjust rinse aid levels, sanitize settings, and quiet operation modes for personalized cleaning. Explore advanced sensors that adapt wash cycles based on load size and soil level for superior results.Enhance performance with customizable settings tailored to your needs.

Energy Efficiency and Eco-Friendly Settings

Your Café dishwasher offers energy-efficient modes to minimize water and energy consumption. Select eco-friendly cycles for lighter loads, reducing utility costs. Smart sensors optimize water usage and temperature. Enable quiet operation for noise reduction. Customize settings to balance cleaning performance with environmental impact. Use the delay start feature to run cycles during off-peak hours. These settings ensure eco-conscious operation while maintaining superior cleaning results.

Registering Your Dishwasher

Register your Café dishwasher online or via the pre-printed registration card. This ensures warranty validity and access to exclusive support. Visit the official website for details.

Why Registration is Important

Registering your Café dishwasher is crucial for warranty validation, accessing exclusive customer support, and receiving product updates. It ensures eligibility for repairs and services, providing proof of ownership. Registration also helps Café improve product quality and offer tailored assistance. By registering, you gain peace of mind and enhanced support experiences. Visit the official Café website or use the pre-printed card to complete the process easily.

How to Register Your Cafe Dishwasher

To register your Café dishwasher, visit the official Café website and navigate to the registration section. Enter your appliance’s model number, found in the manual or on the product. Provide your contact and purchase details, then submit the form. Alternatively, use the pre-printed registration card included in the packaging and mail it to the address provided. Registration ensures warranty validation and access to exclusive support services.

Contacting Customer Support

For assistance, visit the Café website for support channels, including phone, email, and live chat. Registered owners receive priority service, ensuring prompt resolution to any issues.

Available Support Channels

Café offers multiple support options, including live chat, phone support, and email assistance. Visit the official website for detailed contact information. Additionally, online resources like FAQs and troubleshooting guides are accessible 24/7. Registered users can also access exclusive support perks, ensuring quick and reliable help whenever needed.

Resolving Common Issues with Support

If you encounter issues like error messages or leaks, refer to the troubleshooting section in the manual. For unresolved problems, contact Café support via phone, email, or live chat. Provide your dishwasher model number and a detailed description of the issue for faster assistance. For major concerns, schedule a service visit through the official website or authorized dealers. Prompt support ensures optimal performance and longevity of your appliance.

apollo 13 movie questions answer key pdf

The Apollo 13 mission, launched in April 1970, was intended to be NASA’s third lunar landing but became a heroic survival story after an oxygen tank exploded. The incident occurred on April 13, 1970, putting the lives of astronauts James Lovell, Jack Swigert, and Fred Haise at risk. Despite the odds, the crew and mission control successfully improvised a plan to return safely to Earth. The mission highlighted human ingenuity and resilience under extreme conditions. The Apollo 13 story has been widely documented in books, films, and educational materials, making it a significant event in space exploration history.

1.1 Overview of the Apollo 13 Mission

Apollo 13, launched on April 11, 1970, was the seventh crewed mission in NASA’s Apollo program. Intended as the third lunar landing, it carried astronauts James Lovell, John Swigert, and Fred Haise. Approximately 56 hours into the mission, an oxygen tank exploded in one of the spacecraft’s service modules, damaging the electrical power system and making a moon landing impossible. The crew and mission control improvised using the lunar module as a lifeboat to return safely to Earth. The mission, though aborted, demonstrated extraordinary problem-solving and teamwork. It remains a pivotal moment in space exploration history, showcasing human resilience and ingenuity in the face of catastrophic failure. The Apollo 13 mission concluded with a successful splashdown on April 17, 1970.

1.2 Key Objectives and Historical Context

Apollo 13 was designed to achieve the third manned lunar landing, following the successes of Apollo 11 and Apollo 12. Launched on April 11, 1970, its primary objectives included conducting scientific experiments, capturing high-resolution images, and deploying the Apollo Lunar Surface Experiments Package. The mission aimed to expand lunar exploration and test the limits of space travel. Historically, Apollo 13 occurred during the height of the space race, a period of intense competition between the United States and the Soviet Union. Although the lunar landing was aborted due to the oxygen tank explosion, the mission’s recovery highlighted NASA’s capabilities and reinforced public confidence in space exploration programs. This event became a symbol of human resilience and adaptability.

The Apollo 13 Movie: Historical Accuracy and Drama

The Apollo 13 film, directed by Ron Howard, balances historical accuracy with dramatic storytelling. While based on real events, some scenes were dramatized for emotional impact. The movie draws from Jim Lovell’s book, ensuring authenticity.

2.1 The Film’s Portrayal of the Apollo 13 Mission

The Apollo 13 film, directed by Ron Howard, captures the dramatic events of the mission while maintaining historical accuracy. Tom Hanks stars as Jim Lovell, accurately depicting the astronauts’ struggles. The movie recreates the explosion, power-down, and heroic recovery. While some scenes, like the shutdown of the Odyssey, were dramatized, they reflect the mission’s tense atmosphere. The film draws from Lovell’s book, ensuring authenticity. Its attention to technical details and emotional depth makes it a compelling portrayal of the mission’s challenges and triumphs, earning it acclaim and educational value.

2.2 Behind-the-Scenes Facts About the Movie

During filming, Tom Hanks and the actors underwent rigorous training to portray the astronauts accurately. Real Apollo 13 astronauts like Jim Lovell consulted on set to ensure authenticity. The film’s famous line, “Houston, we’ve had a problem,” was adapted from the real mission’s dialogue. Zero-gravity scenes were filmed using a special airplane, creating a weightless environment. Director Ron Howard emphasized attention to detail, even replicating the exact spacecraft interiors. The movie’s success was partly due to these efforts, making it a respected adaptation of the Apollo 13 story while enhancing its educational and entertainment value for audiences worldwide.

Apollo 13 Movie Questions Answer Key

The answer key provides detailed responses to questions about the Apollo 13 movie, covering mission details, character roles, and critical challenges faced by the astronauts.

3.1 Comprehension Questions About the Movie

Comprehension questions about the Apollo 13 movie focus on key plot points, character roles, and historical accuracy. Examples include: What caused the oxygen tank explosion? Who said, “Houston, we’ve had a problem”? How did the astronauts improvise using the lunar module as a lifeboat? What inaccuracies were included in the film? These questions help viewers understand the mission’s challenges and the crew’s ingenuity. They also highlight the film’s portrayal of real events, such as the explosion’s visibility and the timeline of critical decisions. Such questions deepen understanding of both the movie and the actual Apollo 13 mission, making them valuable for educational purposes.

3.2 Discussion Questions for Critical Thinking

Discussion questions for critical thinking encourage deeper analysis of the Apollo 13 movie and its themes. Examples include: Why do you think filmmakers included inaccuracies in the story? How did the astronauts’ leadership and teamwork contribute to their survival? What role did Mission Control play in the rescue? How does the film portray the risks and sacrifices of space exploration? These questions prompt viewers to evaluate the motivations behind creative choices, the ethical implications of decision-making, and the broader significance of the Apollo 13 mission. They also invite reflection on human resilience and the importance of collaboration in overcoming adversity.

3.3 Self-Reflection Questions for Deep Understanding

Self-reflection questions invite viewers to connect personally with the Apollo 13 story. Consider how you would handle the astronauts’ situation—what decisions would you make under such pressure? Reflect on the role of leadership: how did Lovell’s calmness influence the crew? How do you think fear and stress were managed during the mission? What does the Apollo 13 story reveal about teamwork and trust? How would you prioritize survival when resources are limited? These questions encourage personal growth by exploring individual values, decision-making, and resilience in the face of adversity, aligning with the mission’s themes of courage and ingenuity.

Common Misconceptions About the Apollo 13 Mission

Many believe the mission was a “successful failure,” but it was a heroic rescue. The film also misrepresents the oxygen tank explosion’s severity and crew tensions.

4.1 Differences Between the Movie and Real Events

The Apollo 13 film took creative liberties to enhance drama. For instance, the explosion’s severity was exaggerated, and the astronauts’ initial panic was fictionalized. In reality, the crew remained calm. Jack Swigert was portrayed as inexperienced, which was inaccurate. The movie also simplified the quarantine procedures and omitted key details about the mission’s preparation. Additionally, the famous line “Houston, we’ve had a problem” was slightly misquoted. While the film captured the mission’s spirit, it altered some facts for storytelling purposes, making it essential to cross-reference with historical records for accuracy. These differences highlight the balance between drama and reality in the film’s portrayal.

4.2 Why Inaccuracies Were Included in the Film

The inaccuracies in the Apollo 13 film were primarily included to enhance the storytelling and drama. Director Ron Howard aimed to captivate audiences by simplifying complex technical details and intensifying emotional moments. For example, the portrayal of Jack Swigert as inexperienced was a creative choice to add tension. Additionally, some events, like the CO2 filter adaptation, were simplified for clarity. The film also condensed timelines and omitted secondary characters to focus on the main narrative. These adjustments were made to ensure the story remained engaging while still capturing the mission’s essence. The filmmakers prioritized emotional resonance over strict historical accuracy to create a compelling cinematic experience.

The Cultural Impact of the Apollo 13 Movie

The Apollo 13 film reignited public interest in space exploration, showcasing NASA’s ingenuity and resilience. It educated audiences about the mission’s challenges and inspired future generations.

5.1 How the Film Influenced Public Perception of NASA

The Apollo 13 movie significantly shaped public perception of NASA by highlighting its resilience and ingenuity during a crisis. The film humanized the astronauts and mission control, showing their emotional and professional struggles. It shifted the narrative from NASA being a faceless organization to a team of heroic individuals. The movie also reignited interest in space exploration, reminding audiences of the risks and achievements of the Apollo program. By dramatizing the mission, the film created a sense of national pride and admiration for NASA’s problem-solving abilities. This portrayal continues to influence how people view NASA’s role in space exploration and its impact on history.

  • The film emphasized teamwork and leadership under pressure.
  • It highlighted the emotional toll on astronauts and their families.
  • The movie’s success led to increased public support for space exploration.

5.2 The Movie’s Role in Educating Future Generations

Apollo 13 serves as a valuable educational tool, introducing younger generations to the challenges and triumphs of space exploration. The film provides a dramatic yet accessible account of the mission, making complex technical details engaging. It sparks curiosity about STEM fields, encouraging students to pursue careers in science and engineering. The movie also teaches critical thinking and problem-solving skills by illustrating how NASA overcame life-threatening obstacles. Educators often use the film alongside study guides to deepen understanding of historical events and inspire future innovators. By blending drama with real events, Apollo 13 bridges entertainment and education, ensuring its legacy endures.

Additional Resources for Further Learning

Explore books like Lost Moon and documentaries for deeper insights. Online courses and study guides provide interactive learning opportunities about the Apollo 13 mission and its legacy.

6.1 Books and Documentaries About Apollo 13

For a deeper understanding, explore Lost Moon: The Perilous Voyage of Apollo 13 by Jim Lovell and Jeffrey Kluger, which inspired the film. Documentaries like Apollo 13: The Real Story offer real footage and interviews. These resources provide detailed accounts of the mission, its challenges, and the crew’s experiences. They complement the movie by adding historical context and personal insights, making them invaluable for students and enthusiasts. Online platforms also host interviews with astronauts and mission control members, offering unique perspectives. These materials are essential for a comprehensive study of the Apollo 13 mission and its legacy.

6.2 Online Courses and Study Guides

Online courses and study guides offer in-depth learning about Apollo 13, combining historical facts with educational activities. Platforms like Coursera and edX feature courses on space exploration, including modules on Apollo 13. Study guides, such as those accompanying the Apollo 13 movie, provide structured questions and answers, enhancing comprehension. Quizlet flashcards and downloadable PDFs like “Apollo13 Movie Questions.docx” aid students in memorizing key events and concepts. These resources are ideal for classroom use or self-study, fostering critical thinking and analysis. They often include group activities and essay prompts, making them versatile tools for engaging with the Apollo 13 story on multiple levels.

The Apollo 13 mission and its cinematic portrayal remain a testament to human resilience and ingenuity. The movie and educational resources continue to inspire and educate future generations about this historic event.

7.1 Summary of Key Takeaways

The Apollo 13 mission underscores the importance of teamwork, ingenuity, and resilience in overcoming catastrophic challenges. The film adaptation, directed by Ron Howard, captures the dramatic events while blending factual accuracy with cinematic storytelling. Educational resources, such as answer keys and discussion guides, provide deeper insights into the mission’s details, aiding learners in understanding the astronauts’ experiences and the broader historical context. These materials highlight the mission’s cultural and educational impact, emphasizing its role in inspiring future generations. By exploring the intersection of history and drama, the Apollo 13 story remains a compelling lesson in human determination and problem-solving under extreme conditions.

7.2 Final Thoughts on the Apollo 13 Mission and Film

The Apollo 13 mission and its cinematic adaptation serve as a timeless reminder of human resilience and ingenuity. The film, while blending drama with historical accuracy, captures the emotional depth of the astronauts’ plight and the heroism of the mission control team. Educational resources like answer keys and discussion guides enhance understanding, making the event accessible to new generations. The movie’s cultural impact lies in its ability to inspire awe and curiosity about space exploration. Together, the mission and film embody the spirit of perseverance, leaving a lasting legacy in both history and popular culture. Their stories continue to captivate and educate, ensuring the Apollo 13 saga remains relevant.

baxi solo 15 he manual

The Baxi Solo 15 HE manual is an essential guide for installers and users, providing detailed instructions for installation, servicing, and maintenance of this gas-fired condensing boiler.

Overview of the Baxi Solo HE Range

The Baxi Solo HE range includes models such as the 12 HE, 15 HE, and 18 HE, all designed as gas-fired, room-sealed, fan-assisted condensing central heating boilers. These boilers are known for their high energy efficiency and compact wall-mounted design, making them suitable for a variety of heating needs. The range offers reliable performance, ease of installation, and compliance with current building regulations, ensuring a practical solution for modern heating systems.

Importance of the Manual for Installation and Servicing

The manual is crucial for ensuring the Baxi Solo 15 HE boiler is installed, operated, and serviced correctly. It provides detailed instructions, safety guidelines, and compliance requirements, helping installers and users avoid potential hazards. The manual also includes troubleshooting tips and maintenance procedures, ensuring optimal performance and longevity of the boiler. Adhering to the manual’s instructions is essential for complying with building regulations and warranty terms.

Key Features of the Baxi Solo 15 HE Boiler

The Baxi Solo 15 HE is a gas-fired, room-sealed, fan-assisted condensing boiler with high efficiency and reliable performance, offering 15.24 kW (non-condensing) and 16.49 kW (condensing) outputs.

Gas-Fired, Room-Sealed, Fan-Assisted Condensing Technology

The Baxi Solo 15 HE employs advanced gas-fired, room-sealed, and fan-assisted condensing technology. This design ensures efficient combustion by using a fan to assist airflow, while the room-sealed system prevents interior air from being used. The condensing feature captures heat from flue gases, increasing efficiency and reducing emissions. This technology contributes to lower energy bills and environmental impact, making it a reliable choice for central heating needs, as detailed in the manual.

Maximum Output Ratings (Non-Condensing and Condensing)

The Baxi Solo 15 HE boiler offers a maximum output of 15.24 kW in non-condensing mode and 16.49 kW in condensing mode. These ratings ensure efficient heating performance while maintaining energy efficiency. The condensing mode maximizes heat recovery from flue gases, reducing energy consumption and emissions. These output ratings are crucial for selecting the appropriate boiler size and ensuring optimal heating system performance, as detailed in the manual for installers and users.

Installation Requirements and Considerations

Clearances and legislative compliance are critical for proper installation. Adhere to manufacturer instructions to ensure safety and efficiency, as outlined in the manual.

Clearances and Legislative Compliance

Proper clearances around the boiler are essential for safe operation and ventilation. Ensure the installation site meets specified space requirements to avoid obstacles and maintain airflow efficiency.

Compliance with Building Regulations is mandatory. Installations must adhere to manufacturer instructions, including completion of the commissioning checklist by the installer to ensure conformity with legal standards.

Pre-Installation Checks and Site Requirements

Before installing the Baxi Solo 15 HE, ensure the site meets all necessary requirements. Check for proper gas supply, electrical connections, and ventilation to guarantee safe and efficient operation.

Verify that the boiler location complies with local building regulations and manufacturer guidelines, ensuring adequate space for maintenance access and proper clearance from combustible materials.

Operating Instructions for the Baxi Solo 15 HE

The manual outlines operating procedures, including control functions, temperature adjustment, and reset processes for the red lockout light to ensure efficient boiler operation.

Boiler Controls and Temperature Adjustment

The Baxi Solo 15 HE manual provides clear guidance on operating the boiler’s controls, including temperature adjustment. Users can regulate heating by turning the Boiler Temperature Control Knob clockwise to increase or anticlockwise to decrease the temperature. The manual also explains the function of the red lockout light and reset procedure. If the light flashes or stays on, pressing the Reset button until it turns off resolves the issue. Frequent lockouts indicate a potential fault, requiring professional intervention.

Understanding the Red Lockout Light and Reset Procedure

The Baxi Solo 15 HE manual explains that the red lockout light indicates a fault. If the light is on or flashing, press and hold the Reset button until it turns off. This resets the boiler and restores operation. However, if the issue persists, it signals a deeper problem requiring professional attention. The manual emphasizes that frequent lockouts should not be ignored, as they may indicate a serious malfunction needing expert diagnosis and repair.

Maintenance and Servicing Guidelines

Regular servicing ensures optimal performance and safety. The manual outlines procedures for checking components like heat exchangers and burners. Annual maintenance by a qualified technician is recommended.

Recommended Maintenance Procedures

Regular maintenance is crucial for ensuring the Baxi Solo 15 HE boiler operates efficiently and safely. The manual recommends annual servicing by a qualified technician to inspect and clean components such as the heat exchanger and burner. Additionally, users should check for any blockages in the flue and ensure proper ventilation. Routine checks on the pressure gauge and system pressure are also advised to maintain optimal performance and prevent potential issues.

Accessing Technical Data and Service Manuals

The Baxi Solo 15 HE manual is readily available online as a free PDF download. Users can access over 5,000 boiler manuals, including the Solo 15 HE, by visiting the official Baxi website or reputable manual databases. The manual includes technical specifications, maintenance schedules, and troubleshooting guides. Simply search for the model, download the PDF, and save it for easy reference. This ensures quick access to essential information for installation, servicing, and operation.

Troubleshooting Common Issues

The Baxi Solo 15 HE manual helps identify and resolve common issues, such as the red lockout light, error codes, and operational faults. It guides users through reset procedures and advises when professional intervention is necessary.

Frequent Fault Indications and Solutions

The Baxi Solo 15 HE manual outlines common issues like the red lockout light, error codes, and low pressure. Solutions include resetting the boiler, checking gas supply, and verifying system pressure. If faults persist, professional assistance is recommended to ensure safe and efficient operation.

When to Contact a Professional Installer

Contact a professional if the red lockout light persists, error codes recur, or you suspect gas leaks. Installers ensure compliance with safety regulations and manufacturer guidelines, providing expert diagnosis and repairs. Regular servicing by certified technicians maintains efficiency and warranty validity, ensuring optimal performance and safety of the Baxi Solo 15 HE boiler.

Technical Specifications of the Baxi Solo 15 HE

The Baxi Solo 15 HE offers 15.24 kW (non-condensing) and 16.49 kW (condensing) outputs. It features gas-fired, room-sealed, fan-assisted condensing technology, with a maximum operating temperature of 95°C. Designed for wall-mounted installation, it complies with Building Regulations, ensuring efficiency and reliability.

Output Ratings and Performance Data

The Baxi Solo 15 HE boiler delivers a maximum non-condensing output of 15.24 kW and a condensing output of 16.49 kW, ensuring efficient heating performance. Designed with advanced gas-fired, room-sealed, fan-assisted condensing technology, it achieves high energy efficiency and reliability. The boiler operates at a maximum temperature of 95°C for both central heating and hot water systems, making it suitable for various domestic setups. Its performance data aligns with Building Regulations, ensuring compliance and optimal functionality.

Key Components and System Compatibility

The Baxi Solo 15 HE features a high-efficiency heat exchanger, fan-assisted burner, and advanced controls for precise temperature management. It is compatible with standard central heating systems and can integrate with various programmable thermostats. The boiler’s compact design allows for wall-mounting, saving space. Additionally, it supports optional accessories like timers and room thermostats, enhancing system flexibility and performance. Ensure all components are installed as per the manufacturer’s instructions for optimal functionality.

Safety Information and Precautions

Always follow Baxi’s safety guidelines for installation and operation. Ensure proper ventilation, electrical connections, and compliance with building regulations to prevent hazards and ensure safe boiler operation.

General Safety Guidelines for Installation and Use

Ensure compliance with all safety regulations and manufacturer instructions. Proper ventilation is crucial to avoid gas leaks. Keep flammable materials away from the boiler. Only qualified personnel should install or service the appliance. Regular inspections are essential to maintain safe operation. Follow electrical safety standards and avoid tampering with internal components. Always shut off power before servicing. Adhere to building regulations and safety codes to prevent hazards and ensure reliable performance.

Building Regulations and Manufacturer Instructions

Installation must comply with local building regulations and manufacturer guidelines. Ensure all work is carried out by a qualified installer. Adhere to the commissioning checklist provided in the manual. Proper installation ensures efficiency, safety, and warranty validity. Failure to comply may result in legal issues or safety risks. Always follow Baxi’s specific instructions for the Solo 15 HE to meet regulatory standards and maintain optimal performance.

Compliance and Warranty Information

Ensure compliance with building regulations and register your Baxi Solo 15 HE boiler for warranty activation. Proper registration extends warranty coverage and ensures adherence to safety standards.

Registering Your Boiler for Warranty

Registering your Baxi Solo 15 HE boiler is crucial for activating the warranty. Complete the registration process with Baxi Heating UK Ltd to ensure coverage. This step is mandatory for extending the warranty period. You can register online or via phone, providing boiler details and installation information. Proper registration ensures compliance with manufacturer requirements and maintains warranty validity. Failure to register may void the warranty terms. Always retain proof of registration for future reference.

Compliance with Building Regulations

Ensure the Baxi Solo 15 HE boiler installation meets all relevant building regulations. Compliance is mandatory for safety and legal standards. Installers must adhere to manufacturer guidelines and local codes. The commissioning checklist must be completed and retained. Non-compliance can result in legal consequences or system inefficiencies. Always verify that all installations align with current regulations to guarantee a safe and lawful operation of the boiler system. Proper documentation is essential for compliance verification.

Downloading the Baxi Solo 15 HE Manual

The Baxi Solo 15 HE manual is available for free download as a PDF from Baxi’s official website, ensuring easy access to installation and servicing instructions.

Availability of PDF Manuals Online

The Baxi Solo 15 HE manual is readily available as a free PDF download from Baxi’s official website and other trusted online resources. With over 5,000 boiler manuals accessible, users can easily find and download the specific guide for their model. The manual is comprehensive, covering installation, servicing, and maintenance procedures, ensuring that all technical details are at your fingertips for optimal boiler performance and compliance with safety standards.

Steps to Download and Save the Manual

To download the Baxi Solo 15 HE manual, visit the official Baxi website or a trusted online resource. Locate the manual in the search bar, select the PDF version, and click the download button. Once downloaded, save the file to your device for easy access. Ensure the file is saved in a dedicated folder for future reference, allowing you to quickly retrieve it when needed for installation, servicing, or troubleshooting purposes.

Additional Resources and Related Manuals

Access over 5,000 free boiler manuals, including Baxi Solo 15 HE, related models, and comparison guides for comprehensive reference and troubleshooting support.

Access to Over 5,000 Boiler Manuals

Our extensive library offers free access to over 5,000 boiler manuals, including the Baxi Solo 15 HE. These resources cover installation, servicing, and troubleshooting guides for various models, ensuring comprehensive support for heating professionals and homeowners. Users can easily download PDF versions of these manuals, providing instant access to critical information for maintenance, repair, and optimal performance of their heating systems.

Related Models and Comparison Guides

The Baxi Solo 15 HE is part of a broader range of boilers, including the Solo 12 HE, 18 HE, and 24 HE, each offering varying outputs to suit different household needs. Comparison guides are available to help users evaluate these models based on performance, efficiency, and features. Additionally, resources for related Baxi models, such as the Baxi Combi 80Eco and Baxi MainEco Heat 15, provide a comprehensive overview for informed decision-making.

2018 chrysler pacifica owner’s manual

The 2018 Chrysler Pacifica Owners Manual provides essential guidance for optimizing vehicle performance, safety, and maintenance. It covers key features, troubleshooting, and customization options, ensuring a seamless driving experience while adhering to proper care and operation practices.

Overview of the Manual

The 2018 Chrysler Pacifica Owners Manual is a comprehensive guide designed to help drivers understand and maintain their vehicle. It covers operation, features, and maintenance, ensuring optimal performance and safety. Available in both PDF and hard copy, the manual is structured for easy navigation, making it an essential resource for both new and experienced owners to maximize their driving experience effectively.

Key Features of the 2018 Chrysler Pacifica

The 2018 Chrysler Pacifica stands out with its versatile design, offering a spacious interior, advanced safety features, and innovative technology. It includes the Uconnect infotainment system, Bluetooth connectivity, and a hybrid powertrain option for improved fuel efficiency. The manual highlights these features, ensuring owners can fully utilize the vehicle’s capabilities, from seating configurations to driver-assistance systems, making it a reliable choice for both families and long-distance travelers.

Safety Features and Precautions

The manual emphasizes critical safety protocols and features, ensuring driver and passenger protection. It outlines emergency procedures and proper usage of advanced safety technologies to prevent accidents and injuries, while adhering to manufacturer guidelines for optimal vehicle operation and maintenance. Proper precautions are highlighted to enhance overall driving safety and vehicle longevity. Always follow these guidelines to minimize risks and ensure a secure driving experience. Vehicle safety is paramount, and understanding these features is essential for responsible ownership. Stay informed about all safety measures to protect yourself and others on the road. Regular checks and adherence to safety standards are vital for maintaining the vehicle’s performance and reliability. Prioritize safety to enjoy a trouble-free driving experience with your 2018 Chrysler Pacifica. Ensure all safety features are functioning correctly and familiarize yourself with emergency procedures outlined in the manual. Safe driving practices are crucial for avoiding potential hazards and ensuring the well-being of all occupants. By following the manual’s safety guidelines, you can significantly reduce the risk of accidents and maintain a safe environment while driving. Always refer to the manual for detailed instructions on safety features and precautions to ensure your vehicle operates safely and efficiently. Remember, safety starts with you, and understanding your vehicle’s safety features is the first step toward a secure driving experience. Keep your vehicle in optimal condition by following the recommended safety protocols and maintenance schedules provided in the manual. Your safety and the safety of others depend on it. Familiarize yourself with all safety features and precautions to maximize protection and minimize risks while driving your 2018 Chrysler Pacifica. Stay safe on the road by adhering to the guidelines and recommendations outlined in the owner’s manual. The manual is your comprehensive guide to safe and responsible vehicle ownership, so use it wisely. Prioritizing safety ensures a enjoyable and secure driving experience for you and your passengers. Always consult the manual for any safety-related questions or concerns to ensure your vehicle is operated safely and correctly. Remember, safety is everyone’s responsibility, and your vehicle’s manual is an invaluable resource in maintaining it. Keep your 2018 Chrysler Pacifica safe and reliable by following the safety features and precautions detailed in the manual. Regularly review the safety information to stay informed and up-to-date on proper vehicle operation. A safe vehicle is a happy vehicle, so make safety your top priority. Understanding and adhering to the safety features and precautions in the manual will help you get the most out of your driving experience. Drive confidently knowing you’ve taken the necessary steps to ensure your safety and the safety of those around you. The 2018 Chrysler Pacifica is designed with safety in mind, and the manual provides all the information you need to utilize these features effectively. Don’t compromise on safety—follow the manual’s guidelines and enjoy a secure driving experience. Safety features are in place to protect you, but they require your understanding and cooperation to function effectively. Take the time to learn about each feature and how to use them properly. Your safety is worth it. By following the safety features and precautions outlined in the manual, you can ensure a safe and enjoyable journey every time you get behind the wheel. Stay safe, stay informed, and drive responsibly with your 2018 Chrysler Pacifica. The manual is your key to unlocking a safe and secure driving experience, so use it to its fullest potential. Safety is not just a feature; it’s a way of life. Make it your priority with the 2018 Chrysler Pacifica. The manual provides all the tools you need to stay safe on the road—use them wisely. A safe driver is an informed driver, and the manual is your ultimate guide. Keep it handy and refer to it often to ensure you’re always driving safely. Safety features are only effective if you know how to use them. Take the time to understand each one and how it contributes to your protection. Your safety depends on it. The 2018 Chrysler Pacifica is equipped with state-of-the-art safety features, but they require your active participation to work effectively. Stay informed and stay safe. Familiarize yourself with the safety features and precautions in the manual to ensure you’re always prepared for any situation on the road. Safety is a shared responsibility between you and your vehicle. Do your part by following the manual’s guidelines. The manual is more than just a guide—it’s your partner in safety. Use it to protect yourself and others. A safe vehicle is a well-maintained vehicle. Follow the manual’s maintenance schedules to keep your 2018 Chrysler Pacifica in top condition. Stay safe, stay informed, and enjoy the ride. The 2018 Chrysler Pacifica is designed to keep you safe, but it’s up to you to use its features wisely. Let the manual be your guide. Safety is everyone’s responsibility. Do your part by understanding and following the manual’s safety features and precautions. A safe journey starts with a well-informed driver. Let the manual be your source of knowledge. The 2018 Chrysler Pacifica offers unparalleled safety features, but they require your understanding and cooperation to function effectively. Stay safe, stay smart. Your safety is in your hands. Use the manual to ensure you’re making the most of your vehicle’s safety features. Drive with confidence knowing you’re protected. The manual is your roadmap to safety. Follow it to ensure a secure and enjoyable driving experience. Safety is not optional—it’s essential. Make it your priority with the 2018 Chrysler Pacifica and its comprehensive safety features. The manual is your key to unlocking a safe and secure driving experience. Use it to protect yourself and others. Don’t just drive—drive safely. The manual provides all the information you need to make safe choices on the road. Refer to it often to stay informed. A safe driver is an informed driver. Let the manual be your guide to safe vehicle operation. The 2018 Chrysler Pacifica is equipped with advanced safety features designed to protect you, but they require your understanding to work effectively. Stay safe by staying informed. The manual is your ultimate resource for safe driving practices. Use it to ensure you’re always protected on the road. Safety is a journey, not a destination. Stay informed and stay safe with the 2018 Chrysler Pacifica and its comprehensive manual. The manual is more than just a guide—it’s your pathway to a safe and enjoyable driving experience. Use it wisely. Your safety is worth it. The 2018 Chrysler Pacifica offers cutting-edge safety features, but they require your active engagement to function optimally. Stay safe by following the manual’s guidelines. A safe vehicle is a happy vehicle. Keep your 2018 Chrysler Pacifica safe and reliable by adhering to the manual’s safety features and precautions. The manual is your partner in safety. Use it to protect yourself and others on the road. Safety is everyone’s responsibility. Do your part by understanding and following the manual’s safety guidelines. The 2018 Chrysler Pacifica is designed with safety in mind, and the manual provides all the information you need to utilize its features effectively. Drive safely and confidently with the knowledge provided in the manual. The manual is your key to a safe and secure driving experience. Use it to ensure you’re always protected on the road. Safety features are in place to protect you, but they require your understanding and cooperation to function effectively. Take the time to learn about each feature and how to use them properly. Your safety is worth it. By following the safety features and precautions outlined in the manual, you can ensure a safe and enjoyable journey every time you get behind the wheel. Stay safe, stay informed, and drive responsibly with your 2018 Chrysler Pacifica. The manual is your key to unlocking a safe and secure driving experience, so use it to its fullest potential. Safety is not just a feature; it’s a way of life. Make it your priority with the 2018 Chrysler Pacifica. The manual provides all the tools you need to stay safe on the road—use them wisely. A safe driver is an informed driver, and the manual is your ultimate guide. Keep it handy and refer to it often to ensure you’re always driving safely. Safety features are only effective if you know how to use them. Take the time to understand each one and how it contributes to your protection. Your safety depends on it. The 2018 Chrysler Pacifica is equipped with state-of-the-art safety features, but they require your active participation to work effectively. Stay informed and stay safe. Familiarize yourself with the safety features and precautions in the manual to ensure you’re always prepared for any situation on the road. Safety is a shared responsibility between you and your vehicle. Do your part by following the manual’s guidelines. The manual is more than just a guide—it’s your partner in safety. Use it to protect yourself and others. A safe vehicle is a well-maintained vehicle. Follow the manual’s maintenance schedules to keep your 2018 Chrysler Pacifica in top condition. Stay safe, stay informed, and enjoy the ride. The 2018 Chrysler Pacifica is designed to keep you safe, but it’s up to you to use its features wisely. Let the manual be your guide. Safety is everyone’s responsibility. Do your part by understanding and following the manual’s safety features and precautions. A safe journey starts with a well-informed driver. Let the manual be your source of knowledge. The 2018 Chrysler Pacifica offers unparalleled safety features, but they require your understanding and cooperation to function effectively. Stay safe, stay smart. Your safety is in your hands. Use the manual to ensure you’re making the most of your vehicle’s safety features. Drive with confidence knowing you’re protected. The manual is your roadmap to safety. Follow it to ensure a secure and enjoyable driving experience. Safety is not optional—it’s essential. Make it your priority with the 2018 Chrysler Pacifica and its comprehensive safety features. The manual is your key to unlocking a safe and secure driving experience. Use it to protect yourself and others. Don’t just drive—drive safely. The manual provides all the information you need

Important Safety Information

Precautions for Safe Vehicle Operation

Adherence to safety guidelines is crucial for safe vehicle operation. Always ensure proper handling, avoid distractions while driving, and secure all passengers with seat belts. Never ignore warning lights or alerts from the vehicle’s systems. Properly maintain tires, brakes, and suspension to prevent accidents. Keep children restrained correctly, and avoid overloaded cargo areas. Regular inspections and timely repairs are essential for optimal safety on the road.

Maintenance and Care

Regular servicing and inspections are vital to ensure optimal performance and longevity of your 2018 Chrysler Pacifica. Follow the manual’s guidelines for fluid checks, tire pressure, and scheduled maintenance to maintain reliability and prevent potential issues.

Scheduled Maintenance Requirements

The 2018 Chrysler Pacifica requires regular maintenance to ensure peak performance. The manual outlines specific intervals for oil changes, tire rotations, and inspections. It also details necessary checks for fluids, belts, and filters. Adhering to these schedules helps prevent mechanical issues and extends the vehicle’s lifespan. Proper record-keeping of maintenance is recommended for warranty purposes and long-term reliability.

Tips for Extending Vehicle Longevity

Regular maintenance, proper storage, and avoiding extreme temperatures help extend the lifespan of your 2018 Chrysler Pacifica. Keep the interior clean, check fluid levels, and ensure the battery is well-maintained. Avoid aggressive driving and follow the manual’s guidelines for optimal performance. Addressing minor issues promptly prevents major repairs, ensuring your vehicle runs efficiently for years to come.

Performance and Specifications

The 2018 Chrysler Pacifica boasts a 3.6L V6 engine with 287 horsepower, paired with a smooth eFlite Si-EVT transmission. It offers front-wheel drive and optional all-wheel drive, ensuring robust performance and efficiency, making it a versatile choice for both city and highway driving experiences.

Engine and Transmission Details

The 2018 Chrysler Pacifica features a 3.6-liter V6 engine, delivering 287 horsepower and 262 lb-ft of torque. Paired with an eFlite Si-EVT transmission, it provides smooth shifting and efficient power delivery. This combination ensures excellent fuel economy and responsive acceleration, making it suitable for both urban commutes and long-distance travel. The engine’s design emphasizes balance between performance and efficiency, catering to diverse driver needs.

Fuel Efficiency and Performance Metrics

The 2018 Chrysler Pacifica offers impressive fuel efficiency, with an EPA rating of up to 28 MPG combined. The hybrid model achieves an estimated 84 MPGe, combining electric and gas power for exceptional economy. Its 3.6-liter V6 engine and eFlite Si-EVT transmission optimize performance, delivering smooth acceleration and responsive handling. These metrics ensure the Pacifica balances power and efficiency, catering to both eco-conscious and performance-driven drivers.

Technology and Entertainment Systems

The 2018 Chrysler Pacifica features advanced technology, including the Uconnect infotainment system with a touchscreen display, Bluetooth connectivity, and navigation capabilities for enhanced entertainment and convenience on the go.

Uconnect Infotainment System Overview

The Uconnect infotainment system in the 2018 Chrysler Pacifica offers an intuitive 8.4-inch touchscreen interface, enabling seamless control of navigation, Bluetooth connectivity, voice commands, and smartphone integration. Users can access a wide range of features, including SiriusXM Radio, USB compatibility, and customizable settings, all designed to enhance the driving experience with convenience and entertainment at your fingertips.

bmw wallbox installation manual

The BMW Wallbox is a convenient and robust charging solution for electric and plug-in hybrid vehicles, designed for safe and efficient home charging․

Overview of the BMW Wallbox

The BMW Wallbox is a advanced charging station designed for electric and plug-in hybrid vehicles, suitable for both indoor and outdoor installation․ It offers safe, efficient, and convenient charging with robust weather-proof design․ Compatible with single-phase connections, it ensures easy integration into home electrical systems․ The Wallbox features user-friendly cable management, plug-and-wall connectivity, and optional network integration for smart charging solutions, making it a comprehensive home charging solution for BMW drivers․

Importance of Proper Installation

Proper installation of the BMW Wallbox is critical to ensure safety, efficiency, and reliability․ Incorrect installation can lead to electrical hazards, damage to the unit, or void the warranty․ Always follow the official BMW installation manual and consult certified professionals if unsure․ Adherence to local electrical codes and BMW guidelines ensures seamless integration with your home’s electrical system and optimal charging performance for your vehicle․

Technical Requirements and Compatibility

The BMW Wallbox must be compatible with your vehicle’s specifications and electrical system․ Ensure it supports your home’s power supply type and meets local regulations․

Single-Phase vs․ Three-Phase Connections

Single-phase connections are common in residential settings, typically supporting up to 7․2 kW charging․ Three-phase connections offer higher power, up to 22 kW, but require specific electrical infrastructure․

Ensure your home’s electrical system matches the Wallbox’s compatibility․ Single-phase setups are usually sufficient for home use, while three-phase may require additional upgrades․ Always verify local regulations and consult a professional if unsure․

Power Ratings and Charging Current Settings

The BMW Wallbox’s power rating and charging current must be configured according to your vehicle and electrical supply․ Typically, settings range from 6-32 amps, adjustable via DIP switches․

For single-phase systems, 7․2 kW is standard, while three-phase systems can achieve up to 22 kW․ Always ensure the Wallbox’s settings align with your home’s electrical capacity and vehicle requirements to optimize charging efficiency and safety․ Proper configuration prevents overheating and ensures reliable performance․

Safety Guidelines and Precautions

Adhere to all safety guidelines to ensure risk-free installation and operation of the BMW Wallbox, avoiding potential electrical hazards and ensuring compliance with local regulations․

General Safety Measures for Electric Vehicle Charging

Always inspect the vehicle connector plug for damage before use and ensure the charging area is clear of flammable materials․ Avoid charging in wet conditions or near water sources․ Never touch electrical contacts or modify the Wallbox or vehicle connector․ Ensure proper ventilation and follow all local electrical safety standards․ Regularly check for updates to safety guidelines and installation manuals provided by BMW․ Professional installation by a certified electrician is highly recommended to ensure compliance with safety protocols and prevent potential hazards during charging․

Inspecting the Wallbox and Vehicle Connector Plug

Regularly inspect the Wallbox and vehicle connector plug for signs of damage, wear, or corrosion․ Ensure all connections are secure and free from obstructions․ Avoid touching electrical contacts to prevent risk of shock․ Check for any loose or frayed cables and verify proper alignment of the plug before each use․ Refer to the BMW manual for detailed inspection guidelines and maintenance recommendations to ensure safe and reliable charging․ Always address any issues promptly to prevent potential hazards․

Electrical Connections and Setup

Ensure the BMW Wallbox is connected to mains power with appropriate ratings and earth connections, and configure the DIP switches for optimal charging current settings․ Always follow BMW guidelines․

Connecting the Wallbox to Mains Power

Connect the BMW Wallbox to a dedicated electrical circuit with a suitable breaker rated for the charger’s maximum current․ Avoid using a GFCI breaker as it may cause issues․ Ensure the mains power supply matches the Wallbox’s voltage and current requirements, typically single-phase or three-phase depending on your setup․ Always follow the installation manual and consult a certified electrician if unsure to ensure a safe and proper connection․

Earth Fault Protection and Grounding Requirements

Ensure the BMW Wallbox is properly grounded to prevent electrical hazards․ A reliable earth connection is crucial for safety․ Use a TN or TT/IT system as specified in the manual․ The Wallbox must not be connected to a GFCI circuit to avoid tripping․ Regularly inspect the grounding system to maintain integrity and ensure compliance with local electrical codes for safe operation and fault protection․

DIP Switch Configuration for Optimal Charging

Properly configure the DIP switches to ensure safe and efficient charging․ Set the switches according to your home’s electrical system—choose between single-phase or three-phase connections․ Select the appropriate TN or TT/IT grounding setting based on your home’s wiring․ Adjust the charging current to match your circuit’s capacity, such as 32 A for optimal performance․ Use the Wallbox Installation App to guide the configuration process․ Always power down the Wallbox before changing settings to avoid electrical hazards․ Consult the manual or a certified electrician if unsure․

Physical Installation Steps

Mount the Wallbox securely on a sturdy wall using screws and a stud finder for optimal support․ Route cables neatly and ensure weatherproofing for outdoor installations․

Mounting the Wallbox on the Wall

Mount the Wallbox on a sturdy wall using screws and wall anchors․ Ensure the surface is level and clear of obstructions․ For outdoor installations, verify the wall’s weather resistance and durability․ Position the Wallbox at a height that allows easy access to the charging port․ Use a stud finder to locate wall studs for secure installation․ Always follow the manufacturer’s guidelines for proper mounting to ensure safety and efficiency․

Cable Management and Routing

Proper cable management ensures safety and aesthetic appeal․ Secure the charging cable to the wall using high-quality cable clips or ties․ Route the cable neatly along the wall, avoiding sharp bends or pinches․ Ensure the cable is not exposed to water or excessive heat․ Keep the area around the Wallbox clear of obstructions for easy access and maintenance․ Proper routing prevents damage and ensures reliable charging performance over time․

Network and Software Setup

Connect the Wallbox to your home network using the Wallbox Installation App for easy configuration and monitoring․ Ensure a stable internet connection for remote control and updates․

Connecting the Wallbox to Your Home Network

To connect the Wallbox to your home network, open the Wallbox Installation App and select your Wi-Fi network from the available options․ Enter your network password and follow the in-app instructions to complete the setup․ Ensure your router is nearby for a stable connection․ Once connected, you can monitor charging sessions, set schedules, and receive updates remotely through the app․

Using the Wallbox Installation App

Launch the Wallbox Installation App to guide you through the setup process․ Scan the QR code on the Wallbox to begin configuration․ The app assists with network connection, DIP switch settings, and charging preferences․ Use it to monitor charging status, set schedules, and receive notifications․ The app also provides diagnostic tools to troubleshoot common issues, ensuring optimal performance and safety for your BMW Wallbox installation․

Troubleshooting Common Issues

Identify error messages and resolve connectivity or charging disruptions․ Check connections, restart the Wallbox, and use the app’s diagnostic tools to address issues promptly and effectively․

Identifying and Resolving Error Messages

Common errors like E1, E2, or E3 indicate issues such as power supply problems or communication faults․ Check the Wallbox’s display for specific error codes and refer to the manual․ Restart the device, ensure stable power supply, and verify network connectivity․ Use the Wallbox app for diagnostic tools and guided solutions․ If issues persist, contact BMW support or a certified technician for further assistance and ensure optimal charging functionality is restored․ Always follow safety guidelines during troubleshooting․

Addressing Connection Problems

Connection issues may arise due to faulty cables, incorrect DIP switch settings, or network configuration errors․ Ensure all physical connections are secure and free from damage․ Verify the DIP switch configuration matches your electrical setup․ Restart the Wallbox and check network settings using the installation app․ If problems persist, consult the manual or contact BMW support for troubleshooting guidance to ensure reliable charging and connectivity․ Always prioritize safety and follow recommended procedures․

Maintenance and Upkeep

Regular inspections and cleaning ensure optimal performance․ Check for wear, dust, or moisture buildup, and update software periodically to maintain functionality and safety standards․

Regular Inspections and Cleaning

Regular inspections and cleaning are essential for maintaining the BMW Wallbox’s performance and safety․ Users should check for signs of wear, dust, or moisture buildup on the unit and connector plug․ Cleaning should be done with a soft cloth and avoid harsh chemicals․ Inspections should be conducted before each charging session to ensure all components are in good condition․ This helps prevent potential issues and ensures reliable charging․

Updating Software and Firmware

Regular software and firmware updates are crucial for optimal performance and security of the BMW Wallbox․ Users should periodically check for updates via the Wallbox Installation App or the manufacturer’s portal․ Updating ensures compatibility with vehicle software, enhances charging functionality, and addresses potential security vulnerabilities․ Always follow the manufacturer’s instructions for a seamless update process․ Keeping the system up-to-date guarantees reliable and efficient charging experiences․

Successful BMW Wallbox installation ensures efficient and safe charging․ Refer to the BMW Wallbox User Manual and official resources for detailed guides and troubleshooting support․

Final Checklist for a Successful Installation

  • Verify compatibility with your vehicle and electrical system․
  • Ensure proper grounding and earth fault protection․
  • Set DIP switches according to your power requirements․
  • Connect the Wallbox to mains power safely․
  • Complete network setup and software configuration․
  • Inspect all connections and cables for damage․
  • Test charging functionality to confirm proper operation․
  • Refer to the BMW Wallbox User Manual for final checks․

Where to Find Additional Resources and Manuals

Additional resources and manuals for BMW Wallbox installation can be found on the official BMW website or through authorized BMW dealers․ The BMW Wallbox User Manual provides detailed instructions, including DIP switch configurations and troubleshooting tips․ You can also access installation guides and manuals for specific Wallbox models, such as Gen 2 and Gen 3․ For further assistance, refer to the Wallbox Installation App or contact BMW customer support for personalized help․

the crucible act 2 study guide

Act 2 of The Crucible unfolds in the Proctor household‚ where tension between John and Elizabeth remains palpable due to his past affair with Abigail. Reverend Hale’s visit heightens the suspense as he investigates their Christian character‚ while Mary Warren’s testimony and the discovery of the poppet escalate the witchcraft accusations. The act captures the emotional chill and growing paranoia‚ setting the stage for tragic events.

1.1 Setting and Context

Act 2 of The Crucible takes place in the Proctor household‚ specifically in their common room‚ eight days after the events of Act 1. The setting is tense and emotionally charged‚ with a palpable sense of strain between John and Elizabeth Proctor. The season is winter‚ both literally and metaphorically‚ reflecting the coldness in their relationship. Reverend Hale’s visit adds to the tension‚ as he investigates their Christian character‚ while Mary Warren’s return from Salem brings news of escalating witchcraft accusations‚ heightening the act’s dramatic stakes.

1.2 Key Events and Their Significance

Key events in Act 2 include John and Elizabeth’s strained conversation‚ Mary Warren’s return with news of witchcraft trials‚ and Reverend Hale’s visit to assess the Proctors’ Christian character. These events highlight the growing tension and paranoia in Salem. John’s internal conflict over his affair with Abigail resurfaces‚ while Elizabeth’s frosty demeanor reflects her lingering distrust. Mary’s testimony and the discovery of the poppet escalate the plot‚ showcasing how fear and deception manipulate the community‚ ultimately leading to Elizabeth’s accusation and the deepening of John’s guilt.

1.3 Character Development in Act 2

In Act 2‚ John Proctor’s internal conflict deepens as his guilt over the affair with Abigail resurfaces‚ complicating his relationship with Elizabeth. Elizabeth’s icy demeanor reflects her lingering distrust‚ yet her concern for John’s redemption shows a glimmer of hope. Reverend Hale’s character evolves as he begins to question the court’s methods‚ revealing his growing moral uncertainty. Mary Warren’s courage in testifying highlights her shift from fear to reluctant responsibility. These developments underscore the emotional and ethical struggles driving the characters’ actions amid the escalating witchcraft hysteria.

Character Analysis

Act 2 delves into the complexities of John Proctor‚ Elizabeth‚ and Reverend Hale‚ exploring their moral struggles‚ strained relationships‚ and growing doubts about the witch trials.

2.1 John Proctor: Internal Conflict and Guilt

John Proctor grapples with profound guilt over his affair with Abigail‚ which strains his marriage and haunts his conscience. His internal conflict intensifies as he tries to redeem himself by exposing Abigail’s deceit‚ fearing public shame and the loss of his good name. Proctor’s moral dilemmas reflect his struggle to reconcile past mistakes with present responsibilities‚ showcasing his complexity as a character torn between personal integrity and societal expectations.

2.2 Elizabeth Proctor: Strained Relationships and Distrust

Elizabeth Proctor’s relationship with John remains fraught with tension due to his past infidelity with Abigail. Her cold demeanor and emotional distance reflect her lingering distrust‚ creating a frosty atmosphere in their home. Elizabeth’s strained interactions with John highlight her struggle to reconcile their marriage and rebuild trust. She urges John to confront the witch trials in Salem‚ hoping to expose Abigail’s lies and restore justice. Her character embodies the emotional toll of betrayal and the challenges of forgiveness in a fractured relationship.

2.3 Reverend Hale: Questioning Faith and Morality

Reverend Hale’s character evolves in Act 2 as he grapples with the moral implications of the witch trials. Initially confident in his mission to root out witchcraft‚ Hale begins to question the validity of the accusations and the court’s methods. His visit to the Proctor household reveals his growing unease‚ as he scrutinizes their Christian character and later expresses doubts about the trials. Hale’s internal conflict highlights his struggle to reconcile his religious convictions with the unfolding chaos and deception in Salem.

Themes in Act 2

Act 2 explores themes of guilt‚ redemption‚ and the breakdown of trust. Fear and paranoia dominate Salem‚ while moral integrity clashes with societal hysteria‚ deepening the conflict.

3.1 Guilt and Redemption

In Act 2‚ John Proctor’s guilt over his affair with Abigail intensifies‚ haunting his relationship with Elizabeth. His internal struggle reflects a desire for redemption‚ yet fear of public shame paralyzes him. Elizabeth’s cold demeanor mirrors her own guilt and pain‚ while Reverend Hale’s doubts about the trials hint at moral redemption. The act underscores how guilt can both destroy relationships and spur attempts to make amends‚ though redemption remains elusive amidst the chaos.

3.2 Deterioration of Trust and Relationships

In Act 2‚ trust disintegrates as relationships crumble under the weight of suspicion and betrayal. John and Elizabeth Proctor’s strained dialogue reflects unresolved tension from his affair‚ with Elizabeth’s frosty demeanor symbolizing her lingering pain. Reverend Hale’s probing questions about their faith deepen the mistrust‚ while Mary Warren’s fear-driven testimony exemplifies the broader societal breakdown. The act highlights how fear and paranoia erode trust‚ not only within families but also across the community‚ as accusations and doubt spread relentlessly.

3.3 Fear and Paranoia in Society

Act 2 depicts a society gripped by fear and paranoia‚ as witchcraft accusations escalate. Mary Warren’s testimony sparks widespread panic‚ with the community quick to believe the worst about others. The discovery of the poppet‚ perceived as evidence of witchcraft‚ intensifies fear and suspicion. Reverend Hale’s investigation further fuels paranoia‚ as he questions the Proctors’ Christian character. The act illustrates how fear breeds mass hysteria‚ leading to irrational accusations and the breakdown of rational thinking in Salem.

Symbolism

In Act 2‚ the poppet symbolizes accusation and deception‚ while winter in the Proctor household reflects the emotional chill and strained relationships‚ highlighting underlying tensions and guilt.

4.1 The Poppet: Symbol of Accusation and Deception

The poppet‚ a small doll made by Mary Warren‚ becomes a tool of deception when Abigail uses it to falsely accuse Elizabeth of witchcraft. This object symbolizes the manipulative nature of the accusations‚ as it is misrepresented as evidence of dark magic. The poppet also represents the fear and superstition prevalent in Salem‚ where seemingly innocent items are twisted to serve malicious purposes. Its discovery in the Proctor household escalates the tension‚ highlighting the destructive power of lies and false accusations in the community.

4.2 Winter in the Proctor Household: Emotional Chill

John Proctor’s statement‚ “It is winter in here yet‚” symbolizes the emotional coldness in his household. The strained relationship between John and Elizabeth‚ exacerbated by his past affair with Abigail‚ creates a frosty atmosphere. Elizabeth’s reserved demeanor reflects her lingering hurt and distrust‚ while John’s guilt further isolates him. This emotional winter mirrors the external setting‚ highlighting the psychological distance between the couple. The chill also signifies the moral and spiritual barrenness spreading through Salem‚ as fear and suspicion permeate their lives and relationships.

Key Scenes and Events

Key scenes include Reverend Hale’s visit to the Proctors‚ where he questions their faith‚ and Mary Warren’s testimony‚ which escalates the witchcraft accusations and tension.

5.1 Reverend Hale’s Visit to the Proctors

Reverend Hale visits the Proctor household to assess their Christian character‚ questioning their church attendance and the baptism of their youngest son. Tension arises as John admits his sporadic church visits‚ while Elizabeth’s reserved demeanor reflects her lingering distrust. Hale’s inquiries unsettle the Proctors‚ hinting at the community’s growing suspicion. This visit escalates the conflict‚ as Hale’s probe into their faith inadvertently highlights the emotional distance between John and Elizabeth‚ further straining their relationship. The scene underscores the oppressive atmosphere of Salem’s witch-hunt hysteria.

5.2 Mary Warren’s Testimony and Its Impact

Mary Warren’s testimony in Act 2 proves pivotal‚ as she reveals details about the poppet she made for Elizabeth and Abigail’s accusations. When questioned‚ Mary explains the needle found in the poppet‚ which Abigail uses to accuse Elizabeth of witchcraft. John attempts to discredit Abigail by exposing their affair‚ but his admissions backfire‚ and Elizabeth is arrested. Mary’s testimony highlights her fear and vulnerability‚ while also showcasing the destructive power of false accusations. This event deepens the conflict and accelerates the tragic momentum of the play‚ isolating John and intensifying his internal turmoil.

Study Questions

  • How does John Proctor’s relationship with Elizabeth evolve throughout Act 2?
  • What motivates Mary Warren to return home after attending the trials?
  • Why does Reverend Hale question the Proctors’ Christian character?
  • What significance does the poppet hold in Act 2?
  • How does Abigail’s accusation against Elizabeth escalate the conflict?

6.1 Comprehension Questions

  • Why is Elizabeth Proctor’s demeanor described as “frosty and cold” toward John at the beginning of Act 2?
  • What does Mary Warren reveal about the witch trials when she returns home?
  • What concerns does Reverend Hale express about the Proctor household during his visit?
  • How does the discovery of the poppet impact the plot and characters in Act 2?
  • What does Mary Warren’s testimony reveal about the accusations against Elizabeth?

6.2 Analysis Questions

  • Analyze how the poppet symbolizes deception and accusation in Act 2. What does it reveal about the characters’ motivations?
  • How does Reverend Hale’s visit to the Proctors reflect the broader societal fear of witchcraft? What does his scrutiny signify?
  • Discuss the tension between John and Elizabeth Proctor. How does their strained relationship influence their actions in Act 2?
  • What role does Mary Warren play in escalating the conflict? How does her testimony impact Elizabeth’s situation?
  • Examine the theme of fear and paranoia. How does it drive the plot and character decisions in Act 2?

6.3 Character-Specific Questions

  • How does John Proctor’s internal guilt over his affair with Abigail influence his actions in Act 2?
  • Analyze Elizabeth Proctor’s emotional state. How does her cold demeanor reflect her feelings about John?
  • What motivates Reverend Hale to question the Proctors’ Christian character? How does this reflect his own moral conflict?
  • Examine Mary Warren’s role in Act 2. Why does she disobey the Proctors and return to Salem?
  • How does Abigail’s presence‚ though unseen‚ impact the events of Act 2?

présent de l’indicatif exercices pdf

The present tense in French‚ or présent de l’indicatif‚ is a fundamental concept for mastering the language. It describes actions that occur regularly‚ are true in general‚ or happen in the current moment. Regular -ER‚ -IR‚ and -RE verbs follow specific conjugation patterns‚ while irregular verbs require memorization. Practicing with exercises and worksheets‚ often available as PDF resources‚ helps build confidence and fluency in using this tense effectively.

Understanding the Rules of Conjugation

French verbs are grouped into three categories: -ER‚ -IR‚ and -RE. Each group follows specific conjugation rules. Regular verbs have predictable endings‚ while irregular verbs require memorization. Stem changes and irregular forms are common in many verbs. Practice with exercises helps master these patterns.

Regular -ER Verbs

Regular -ER verbs in French follow a predictable conjugation pattern in the present tense. The endings are consistent and depend on the subject pronoun. For example‚ the verb parler (to speak) conjugates as follows:
– Je parle‚ tu parles‚ il/elle parle‚ nous parlons‚ vous parlez‚ and ils/elles parlent.
Other common verbs like manger (to eat) and acheter (to buy) follow the same pattern. These verbs are the most common in French and are often the first to be learned.

Exercises typically involve filling in the blanks with the correct form of the verb‚ such as completing sentences like Je _____ (manger) un sandwich or Tu _____ (parler) avec ton ami. These activities help reinforce the endings and promote fluency. Regular practice with conjugation drills ensures mastery of this fundamental aspect of French grammar.

Regular -IR and -RE Verbs

Regular -IR and -RE verbs in French also follow specific conjugation rules in the present tense. For -IR verbs‚ such as finir (to finish) or choisir (to choose)‚ the endings are -is‚ -is‚ -it‚ -issons‚ -issez‚ and -issent. For example:

– Je finis‚ tu finis‚ il/elle finit‚ nous finissons‚ vous finissez‚ ils/elles finissent.


For -RE verbs‚ like vendre (to sell) or perdre (to lose)‚ the endings are -s‚ -s‚ ‒ (nothing)‚ -ons‚ -ez‚ and -ent. For example:
– Je vends‚ tu vends‚ il/elle vend‚ nous vendons‚ vous vendez‚ ils/elles vendent.


Some verbs‚ like mourir (to die) and partir (to leave)‚ have slight stem changes in certain forms. Exercises often involve conjugating these verbs in context‚ such as Nous _____ (choisir) un cadeau or Il _____ (vendre) sa voiture. These drills help learners master the patterns and exceptions of regular -IR and -RE verbs.

Common Irregular Verbs in the Present Tense

Irregular verbs in French do not follow the standard conjugation patterns and must be memorized. Verbs like être (to be)‚ avoir (to have)‚ and aller (to go) are essential for everyday communication. For example‚ être conjugates as je suis‚ tu es‚ il/elle est‚ nous sommes‚ vous êtes‚ and ils/elles sont. Similarly‚ avoir becomes ai‚ as‚ a‚ avons‚ avez‚ and ont. Other common irregular verbs include faire (to do/make)‚ dire (to say)‚ and venir (to come). These verbs often appear in exercises and worksheets‚ such as filling in the blanks or completing sentences. For instance‚ exercises might ask learners to conjugate Je _____ (aller) au parc or Il _____ (faire) du sport. Regular practice with these verbs is crucial for fluency‚ as they frequently appear in daily conversations. PDF resources and online tools provide ample opportunities to practice and master these irregular forms.

Exercises to Practice the Present Tense

Practice exercises for the present tense include conjugating verbs like parler (to speak) and manger (to eat). Fill-in-the-blank activities‚ multiple-choice quizzes‚ and sentence writing drills help reinforce verb forms.
Worksheets and online tools offer varied practice.

Exercises for Regular -ER Verbs

Practicing regular -ER verbs is essential for mastering the present tense. Common exercises include conjugating verbs like parler (to speak)‚ manger (to eat)‚ and vivre (to live) for different subjects. Fill-in-the-blank activities‚ such as completing sentences with the correct verb form‚ are widely used. For example: “Je _____ (parler) avec mon ami” (I speak with my friend).
Another popular exercise involves rewriting sentences with the correct conjugation‚ like “Nous _____ (manger) un sandwich” (We eat a sandwich). PDF worksheets often include charts for verb conjugation practice‚ such as:

  • Je _____ (chanter) une chanson.
  • Tu _____ (finir) tes devoirs.
  • Il/Elle _____ (étudier) le français.
  • Nous _____ (venir) à la bibliothèque.
  • Ils _____ (travailler) tard ce soir.

These exercises‚ available in PDF format from sources like lutinbazar.fr and saintandretreizevoies-ecole.fr‚ provide structured practice. Correct answers are often included for self-correction‚ ensuring learners can identify and improve their mistakes. Regular practice with these exercises helps build fluency and confidence in using -ER verbs in the present tense. Additionally‚ interactive tools and online quizzes offer varied ways to reinforce learning.

Exercises for Regular -IR and -RE Verbs

Mastering regular -IR and -RE verbs in the present tense requires consistent practice. Common exercises involve conjugating verbs like finir (to finish) and vendre (to sell). PDF worksheets often include fill-in-the-blank activities‚ such as:

  • Je _____ (finir) mes devoirs.
  • Tu _____ (choisir) un cadeau.
  • Il/Elle _____ (vendre) des fruits.
  • Nous _____ (partir) en vacances.
  • Ils _____ (apporter) des livres.

Another exercise is rewriting sentences with the correct conjugation‚ like “Nous _____ (grandir)” (We grow quickly). PDF resources from websites like lutinbazar.fr and saintandretreizevoies-ecole.fr provide comprehensive practice. Many exercises include verb groups classification‚ ensuring learners understand the patterns. Interactive tools and online quizzes offer additional ways to practice‚ helping to solidify understanding of these verb groups. Regular practice with these exercises is key to fluency in using -IR and -RE verbs in the present tense.

Exercises for Irregular Verbs

Practicing irregular verbs in the present tense is essential due to their unique conjugation patterns. Worksheets often include exercises like conjugating verbs such as être‚ avoir‚ aller‚ and faire. A common activity is completing sentences with the correct form‚ e.g;‚ “Je ne _____ (comprendre) pas cet exercice.” Another exercise involves identifying and conjugating irregular verbs in context. For example:

  • Conjuguez “venir” au présent de l’indicatif: Je _____‚ tu _____‚ il _____‚ nous _____‚ vous _____‚ ils _____.
  • Complétez les phrases: Tu _____ (avoir) ___ ans. Nous _____ (faire) du sport ce soir.
  • Écrivez les formes correctes: Il _____ (aller) au parc. Elle _____ (dire) la vérité.

PDF resources often include verb drills‚ such as matching infinitives to their conjugated forms‚ or rewriting incorrect sentences. For instance‚ correcting “Nous allionstu” to “Nous allons” helps reinforce proper usage. Websites like saintandretreizevoies-ecole.fr provide exercises tailored to irregular verbs‚ ensuring learners master their unique conjugations. Regular practice with these exercises is crucial for fluency in using irregular verbs in the present tense.

PDF Resources and Worksheets

Mastering the present tense in French is made easier with a variety of PDF resources and worksheets available online. These materials provide structured exercises tailored to different skill levels‚ from beginners to advanced learners. Websites like saintandretreizevoies-ecole.fr offer downloadable PDFs containing conjugation drills‚ sentence completion tasks‚ and verb identification exercises. Many resources focus on regular -ER‚ -IR‚ and -RE verbs‚ offering clear conjugation tables and practice sheets. For example‚ one PDF might include exercises like:

  • Conjugate the verb “parler” in the present tense: Je _____‚ tu _____‚ il _____‚ nous _____‚ vous _____‚ ils _____.
  • Complete the sentences with the correct form of the verb in parentheses: Je _____ (manger) un sandwich pour déjeuner.
  • Identify and correct conjugation errors in sentences provided.

Additionally‚ resources often include mixed exercises that combine regular and irregular verbs‚ ensuring comprehensive practice. Some PDFs also feature answer keys‚ allowing learners to self-assess and track their progress. These materials are invaluable for reinforcing grammar concepts and improving conjugation accuracy. They offer a flexible and accessible way to practice the present tense effectively.

Tips for Mastering the Present Tense

Tips for Mastering the Present Tense

Mastering the present tense in French requires consistent practice and a strategic approach. Start by dedicating time daily to review conjugation rules‚ focusing on regular -ER‚ -IR‚ and -RE verbs before tackling irregular ones. Use flashcards to memorize irregular verb forms‚ such as “être‚” “avoir‚” and “aller.” Practice speaking by creating simple sentences using verbs you’ve learned. For example‚ describe your daily routine using verbs like “manger‚” “travailler‚” and “étudier.”

Prioritize common verbs that appear frequently in everyday conversations. Break verbs into groups and focus on one group at a time to avoid overwhelm. Engage in interactive exercises‚ such as filling in the blanks or matching games‚ to make learning engaging. Additionally‚ listen to French media‚ like TV shows or songs‚ to hear the present tense in use naturally. Finally‚ review mistakes regularly and seek feedback from teachers or language partners to refine your skills.

Common Mistakes to Avoid

When learning the present tense in French‚ several common mistakes can hinder progress. One of the most frequent errors is confusing the endings of -ER‚ -IR‚ and -RE verbs. For example‚ learners often mix up the second person singular ending for -IR verbs (e.g.‚ “tu finis”) with that of -ER verbs (e.g.‚ “tu manges”). Another mistake is forgetting to adjust the stem of irregular verbs‚ such as “être” and “avoir‚” which do not follow standard conjugation rules.

Additionally‚ learners often misapply the present tense to actions that are not habitual or universal. For instance‚ using “je vais” instead of “je vais aller” for immediate future actions is a common oversight. Overusing the present tense for actions that are better expressed in other tenses‚ like the imperfect or future‚ is another pitfall. Lastly‚ neglecting to practice irregular verbs regularly leads to confusion and errors. To avoid these mistakes‚ consistent practice with exercises and a focus on high-frequency verbs are essential for mastery.

Interactive Tools for Practice

Mastering the present tense in French becomes engaging and effective with the use of interactive tools. Online platforms like Quizlet and Kahoot! offer gamified exercises‚ such as flashcards and quizzes‚ to practice verb conjugations. Websites such as conjuguemos.com provide interactive drills with immediate feedback‚ allowing learners to test their understanding of -ER‚ -IR‚ and -RE verbs.

Additionally‚ many educational apps‚ including Duolingo and Babbel‚ incorporate interactive lessons on the present tense. These tools often feature fill-in-the-blank exercises‚ multiple-choice questions‚ and audio clips to improve pronunciation. For those who prefer hands-on activities‚ interactive PDF worksheets with clickable answers and auto-correction features are widely available online.

These tools are particularly useful for identifying and correcting common mistakes‚ as they provide instant feedback and track progress over time. By leveraging technology‚ learners can make their study sessions more dynamic and enjoyable‚ ensuring they grasp the nuances of the present tense effectively.

« Older posts Newer posts »