Author: baron (Page 1 of 18)

lazy guy workout plan pdf

The Lazy Guy Workout Plan is designed for individuals who prefer low-effort, high-result fitness routines. This 28-day program helps tone muscles, burn fat, and boost confidence without intense workouts or gym memberships. Perfect for those who value relaxation, it offers a simple, structured weekly schedule requiring minimal equipment, making it ideal for busy, laid-back lifestyles.

1.1 Understanding the Concept of a Lazy-Friendly Workout

A lazy-friendly workout redefines fitness for those who prefer minimal effort. It focuses on short, effective sessions, often combining exercises with daily activities like watching TV or working from home. This approach emphasizes simplicity, requiring little to no equipment, and fits seamlessly into a relaxed lifestyle, proving that fitness doesn’t have to be time-consuming or intense.

1.2 Benefits of a Low-Effort, High-Result Fitness Routine

A low-effort, high-result fitness routine offers numerous benefits, including improved physical health, increased energy levels, and enhanced mental well-being. It promotes consistency without burnout, fitting seamlessly into busy schedules. This approach also fosters a sustainable lifestyle, helping individuals maintain long-term fitness goals without sacrificing comfort or free time, making it ideal for those prioritizing relaxation and convenience.

Weekly Routine Overview

This plan features a balanced mix of full-body circuits, upper and lower body workouts, core sessions, and rest days, totaling just 85 minutes weekly, perfect for a laid-back lifestyle.

2.1 Day 1: Full Body Circuit (30 Minutes)

Start with bodyweight squats (3 sets of 12-15 reps), followed by push-ups (3 sets of 10-12 reps), seated leg raises (3 sets of 15-20 reps), and finish with a 20-30 second plank hold (3 sets). This circuit activates all major muscle groups, kick-starting your fitness journey with minimal effort and time commitment.

2.2 Day 2: Upper Body Focus (20 Minutes)

Focus on push-ups (3 sets of 10-12 reps), modified push-ups, and seated leg raises (3 sets of 15-20 reps). Incorporate light arm circles and shoulder shrugs using water bottles as weights. End with a plank (20-30 seconds) to engage the core. This routine targets chest, shoulders, and triceps, requiring minimal effort and time while maximizing results.

2.3 Day 3: Rest or Active Recovery

Rest or engage in light activities like stretching, yoga, or a leisurely walk. Active recovery enhances muscle repair and prevents stiffness. Gentle exercises improve circulation and promote relaxation. This day ensures your body recovers while keeping you active without exertion, maintaining consistency in the Lazy Guy Workout Plan.

2.4 Day 4: Lower Body Focus (20 Minutes)

Focus on strengthening your lower body with exercises like bodyweight squats, seated leg raises, and glute bridges. These movements target your legs, calves, and glutes, improving muscle tone and posture. The short 20-minute session ensures effectiveness without strain, keeping it manageable for a low-effort fitness routine. Perfect for maintaining strength and mobility with minimal time investment.

2.5 Day 5: Core and Flexibility (15 Minutes)

This shorter session focuses on core strength and flexibility, essential for posture and balance. Planks, gentle stretches, and seated leg raises are key exercises. These movements improve core stability and enhance flexibility without requiring high intensity, making it easy to maintain consistency and relaxation in your fitness journey. Perfect for unwinding while strengthening your core and improving mobility.

2.6 Days 6 & 7: Rest or Leisure Activities

Dedicate these days to complete rest or leisurely activities like light walking, reading, or spending time with friends. Rest allows muscles to recover, while leisure activities promote mental relaxation. This approach ensures sustainability, enabling consistency in the workout plan without burnout, aligning perfectly with the laid-back lifestyle it supports.

Key Exercises for the Lazy Guy Workout Plan

Bodyweight squats, push-ups, seated leg raises, and planks are core exercises. They require minimal effort, no equipment, and fit seamlessly into a relaxed daily routine.

3.1 Bodyweight Squats: 3 Sets of 12-15 Reps

Bodyweight squats are an excellent full-body exercise that activates the legs, glutes, and core. Perform 3 sets of 12-15 reps, keeping form simple and easy. Perfect for those who prefer low-effort, high-result workouts. No equipment needed, making it ideal for home routines. Keep movements controlled to maximize effectiveness and prevent strain, fitting seamlessly into a relaxed fitness plan.

3.2 Push-Ups: 3 Sets of 10-12 Reps

Push-ups are a classic upper-body exercise targeting the chest, shoulders, and triceps. Perform 3 sets of 10-12 reps with proper form for maximum effectiveness. This simple, equipment-free movement is perfect for a low-effort routine. Modify by dropping knees if needed, ensuring accessibility for all fitness levels while maintaining the benefits of a strong, toned upper body in minimal time.

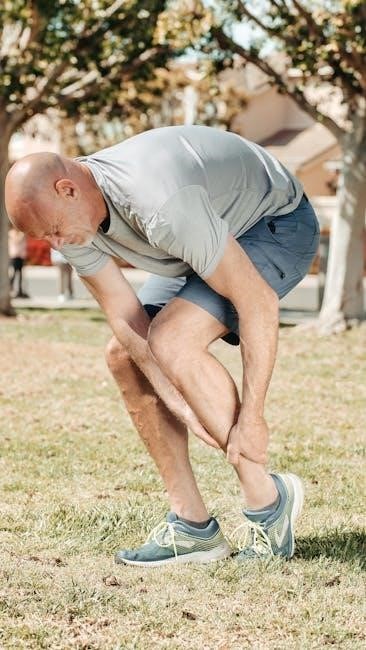
3.3 Seated Leg Raises: 3 Sets of 15-20 Reps

Seated leg raises target the lower abdominals, strengthening the core with minimal effort. Sit comfortably, lift legs straight or bent, and lower slowly. Perfect for a low-effort routine, this exercise enhances posture and reduces back strain. Aim for 3 sets of 15-20 reps, adjusting as needed to maintain form and progress over time.

3.4 Plank: 3 Sets of 20-30 Seconds Hold

The plank is a simple yet effective exercise for core strength and stability. Hold a straight line from head to heels, engaging your abs. Aim for 3 sets of 20-30 seconds, gradually increasing duration as you build endurance. This low-effort exercise improves posture and reduces back pain, fitting seamlessly into a relaxed fitness routine.

Nutrition Tips for the Lazy Guy

Focus on simple, balanced meals and meal prepping to save time. Incorporate healthy snacks like nuts and fruits, and stay hydrated to boost energy levels effortlessly.

4.1 Meal Prep Ideas for Minimal Effort

Meal prepping saves time and ensures healthy eating. Try overnight oats for breakfast, one-pot meals like stir-fries, and slow cooker recipes. Portion meals in advance, freeze leftovers, and reuse ingredients creatively. Keep snacks like nuts and fruits handy for quick energy boosts, and stay hydrated with water throughout the day.

4.2 Snacking Strategies to Stay Fit

Smart snacking keeps energy levels steady without derailing fitness goals. Opt for protein-rich snacks like nuts, yogurt, or hard-boiled eggs. Pair snacks with light exercises, such as leg raises while waiting for popcorn or bicep curls with a water bottle. Avoid sugary treats and stay hydrated to maintain focus and support your lazy fitness journey.

4.3 Hydration Tips to Boost Energy

Staying hydrated is key for energy and fitness. Start your day with a glass of water, keep a refillable bottle handy, and sip throughout the day. Incorporate water-rich foods like fruits and vegetables to stay hydrated effortlessly. Avoid sugary drinks and opt for herbal teas or infused water for a refreshing, low-effort hydration boost.

Motivation and Consistency

Stay motivated by setting small, achievable goals and celebrating progress. Consistency is key—focus on showing up, even for short workouts. Avoid burnout by balancing effort with rest and keeping routines enjoyable.

5.1 How to Stay Motivated as a Lazy Guy

Stay motivated by embracing simplicity: set small, achievable goals and celebrate progress. Focus on short, enjoyable workouts, like 2-minute exercises or multitasking fitness with Netflix. Schedule rest days strategically to avoid burnout and maintain consistency. Use a workout buddy or app for accountability, and reward yourself for sticking to the plan.

5.2 The Importance of Small, Achievable Goals

Small, achievable goals make fitness manageable and sustainable for the laid-back individual. Breaking routines into short, simple tasks prevents overwhelm and builds confidence. Celebrating each milestone, no matter how minor, fosters a sense of accomplishment, keeping motivation high and progress steady without requiring intense effort or dedication.

The 28-Day Lazy Guy Workout Program

This innovative 28-day program is designed for the laid-back individual, offering a simple, structured weekly routine to tone, lose fat, and build confidence without sacrificing relaxation time.

6.1 Weekly Progression and Adjustments

The plan includes gradual intensity increases, allowing participants to adjust exercises based on comfort and progress. Each week introduces slight modifications, such as additional reps or varied routines, ensuring steady improvement without overwhelming effort. This flexible approach keeps the workouts engaging and tailored to individual fitness levels, making it sustainable for the laid-back lifestyle.

6.2 Incorporating Relaxation and Fun

The plan emphasizes blending relaxation with fitness, suggesting activities like yoga or light stretching. It encourages multitasking, such as exercising while watching TV, to make workouts enjoyable. Incorporating fun elements like dancing or leisurely walks ensures the routine remains stress-free and enjoyable, aligning with the laid-back philosophy of the Lazy Guy Workout Plan.

Downloadable PDF Guide

The Lazy Guy Workout Plan PDF offers a free, comprehensive guide with customizable routines, nutrition tips, and motivational strategies. Download it easily to kickstart your fitness journey.

7.1 Features of the Lazy Guy Workout Plan PDF

The PDF guide includes a detailed 28-day workout schedule, easy-to-follow exercise instructions, nutrition advice, and motivation tips. It’s designed for minimal effort, requiring no gym equipment, making it perfect for home workouts. The plan emphasizes consistency and gradual progress, ensuring a sustainable fitness journey tailored for a relaxed lifestyle.

7.2 Where to Find the Free Download

The Lazy Guy Workout Plan PDF is available for free download on various fitness websites and platforms. Simply search for “Lazy Guy Workout Plan PDF” on your preferred search engine or fitness app. It’s also accessible via the official website, ensuring easy access for iOS and Android users. Start your fitness journey today with just one click!

Minimal Equipment Requirements

The Lazy Guy Workout Plan requires minimal equipment, focusing mainly on bodyweight exercises. Water bottles or light weights can substitute for dumbbells, making it perfect for home workouts.

8.1 Using Water Bottles as Weights

Water bottles are a convenient substitute for dumbbells in the Lazy Guy Workout Plan. Fill them with water to your desired weight for bicep curls, shoulder presses, or tricep extensions. This simple hack keeps you hydrated and fit without needing expensive equipment, making home workouts easy and efficient. Stay hydrated and stay fit the lazy way.

8.2 Bodyweight Exercises: No Equipment Needed

Bodyweight exercises are the cornerstone of the Lazy Guy Workout Plan, requiring zero equipment. Squats, push-ups, leg raises, and planks work multiple muscle groups efficiently. These exercises are perfect for home workouts, ensuring convenience and effectiveness without any gym gear. They fit seamlessly into the 28-day plan, promoting strength and flexibility with minimal effort.

Tracking Progress

Tracking progress involves monitoring fitness improvements and using a workout journal to log exercises and results. This helps maintain accountability and motivation throughout the program.

9.1 How to Monitor Fitness Improvements

Monitor fitness improvements by tracking workout consistency, reps, and sets. Use a journal to note progress, and take weekly body measurements. Celebrate small achievements to stay motivated and ensure gradual, sustainable results.

9.2 The Role of a Workout Journal

A workout journal serves as a motivational tool, helping track progress and maintain accountability. It allows reflection on past workouts, identifying patterns and areas for improvement. Regular entries can reveal increases in strength or endurance, while celebrating small milestones boosts morale and encourages consistency in the fitness journey.

Avoiding Common Mistakes

Common mistakes include overexertion and skipping rest days. Listen to your body and maintain a balanced routine to prevent burnout and ensure steady progress;

10.1 Overexertion and Burnout

Overexertion can lead to burnout, causing physical and mental fatigue. It’s crucial to balance effort with rest to avoid injuries and maintain motivation. The Lazy Guy Workout Plan emphasizes gradual progression, ensuring sustainable fitness without overwhelming the body. Prioritize consistency over intensity to achieve long-term success and prevent burnout.

10.2 Skipping Rest Days

Skippping rest days can hinder progress and lead to overtraining, increasing the risk of injury and burnout. Rest allows muscles to recover and rebuild, ensuring sustained energy and motivation. The Lazy Guy Workout Plan prioritizes recovery, making it essential to adhere to scheduled rest days for long-term success and overall well-being.

Additional Tips for Success

Incorporate daily activities into your routine, like turning chores into exercises. Use household items as weights, and stay consistent without overexerting. Balance productivity with relaxation to maintain motivation and achieve sustainable fitness goals effortlessly.

11.1 Combining Workouts with Daily Activities

Transform daily tasks into fitness opportunities: do squats while brushing teeth, lunges during commercial breaks, or use water bottles as weights while watching TV. Multitask by adding exercises to chores, like calf raises while folding laundry or planks during meal prep. This approach keeps workouts effortless and seamlessly integrated into your routine.

11.2 Staying Consistent Without Losing Motivation

Stay consistent by setting small, achievable goals and celebrating progress, no matter how minor. Incorporate workouts into daily routines, like exercising during commercial breaks or doing desk exercises. Reward yourself for completing sessions and remind yourself of the long-term benefits. Make fitness enjoyable by choosing activities you like, ensuring sustained motivation without pressure.

The Lazy Guy Workout Plan offers a sustainable path to fitness, blending minimal effort with effective results. Embrace relaxation while achieving a healthier, toned physique through simple, consistent routines.

12.1 Embracing the Lazy Fitness Lifestyle

Embracing a lazy fitness lifestyle means prioritizing relaxation while still achieving wellness goals. This approach focuses on simplicity, convenience, and enjoyment, allowing individuals to stay active without sacrificing their love for comfort. By incorporating small, manageable exercises into daily routines, one can maintain a healthy balance between rest and fitness effortlessly.

12.2 Long-Term Benefits of the Lazy Guy Workout Plan

The Lazy Guy Workout Plan offers long-term benefits like improved muscle tone, sustained weight loss, and enhanced overall health. Its low-effort, consistent approach prevents burnout, fostering a sustainable fitness routine. By incorporating simple exercises and minimal equipment, it helps maintain a healthy lifestyle effortlessly, ensuring lasting results without compromising on comfort or free time.

arizona drivers license manual pdf download

The Arizona Driver License Manual is essential reading for new and experienced drivers, offering detailed insights into traffic laws, road signs, and safe driving practices. Available as a free PDF download, it provides a comprehensive guide to understanding Arizona’s driving regulations and preparing for license tests. This manual ensures drivers are well-informed and confident on the road.

Overview of the Arizona Driver License Manual

The Arizona Driver License Manual is a comprehensive guide designed to help drivers understand the rules of the road, traffic laws, and safe driving practices in Arizona. Available in both English and Spanish, the manual is organized into clear sections, making it easy to navigate. It covers essential topics such as road signs, driving etiquette, and legal requirements for operating a vehicle in the state. The manual is regularly updated to reflect changes in traffic laws and regulations, ensuring drivers have the most accurate information. Whether you’re a new driver or an experienced one, this resource provides a thorough understanding of Arizona’s driving standards and expectations.

Importance of the Arizona Driver License Manual for New Drivers

The Arizona Driver License Manual is a vital resource for new drivers, offering a detailed guide to the state’s traffic laws, road signs, and driving regulations. It serves as the primary study material for the written knowledge test, ensuring new drivers understand safe driving practices and legal requirements; By reading the manual, new drivers can gain confidence behind the wheel and reduce the risk of accidents. The manual also helps familiarize drivers with Arizona-specific rules, such as sharing the road with cyclists and handling emergency situations. Its clear and concise content makes it an indispensable tool for anyone preparing to obtain an Arizona driver’s license.

How to Download the Arizona Driver License Manual PDF

The Arizona Driver License Manual PDF is available for free download from the official Arizona Department of Transportation website. Visit azdot.gov/mvd to access the manual in PDF format.

Step-by-Step Guide to Downloading the Manual

  1. Visit the official Arizona Department of Transportation (AZDOT) website at azdot.gov/mvd.
  2. Navigate to the “Driver Services” section and select “Driver License Manual.”
  3. Choose the desired language (English or Spanish) and click the PDF download link.
  4. Save the file to your device for easy access and printing.

This process ensures quick and secure access to the manual, helping you prepare for your driver’s license application.

Official Sources for the Arizona Driver License Manual PDF

The Arizona Driver License Manual PDF is available for download from official sources to ensure authenticity and accuracy. Visit the Arizona Department of Transportation (AZDOT) website at azdot.gov/mvd for the most reliable access. Additionally, the manual can be downloaded from Arizona Motor Vehicle Division (MVD) offices or trusted third-party platforms that partner with AZDOT. Always verify the source to avoid outdated or incorrect information. The manual is available in both English and Spanish, catering to a diverse audience. Downloading from official sources guarantees you receive the latest updates and revisions, essential for proper test preparation and compliance with state driving regulations.

Content Overview of the Arizona Driver License Manual

The Arizona Driver License Manual covers essential topics like traffic laws, road signs, and driving safety. It also includes detailed instructions for obtaining a driver’s license and requirements.

Key Topics Covered in the Manual

The Arizona Driver License Manual provides detailed information on traffic laws, road signs, and safe driving practices. It covers rules of the road, pedestrian and cyclist safety, and emergency procedures. The manual also includes sections on driver responsibilities, vehicle safety inspections, and the consequences of traffic violations. Additionally, it addresses special driving conditions such as nighttime driving and operating vehicles in adverse weather. The 2025 edition includes updated content on interactions with law enforcement and new traffic regulations. This comprehensive guide ensures drivers are well-prepared to navigate Arizona’s roads safely and legally, making it an essential resource for both new and experienced drivers.

New Updates and Additions to the 2025 Edition

The 2025 Arizona Driver License Manual includes new sections on best practices for interactions with law enforcement, updated traffic regulations, and expanded road safety guidelines. It features enhanced content on emergency procedures and driving in adverse conditions. Additionally, there are new resources for commercial drivers and a revised chapter on vehicle safety inspections. The manual also incorporates updated information on pedestrian and cyclist safety, reflecting current safety standards. These updates ensure drivers are well-informed about recent changes in traffic laws and safe driving practices, making the 2025 edition a valuable resource for both new and experienced drivers in Arizona.

Eligibility Requirements for an Arizona Driver License

To apply for an Arizona driver license, you must meet specific eligibility criteria, such as age requirements, proof of identity, residency, and legal status. Additional documentation may be required for certain applicants, and a vision test is mandatory. Understanding these requirements ensures a smooth application process.

Documentation Needed for Applying

To apply for an Arizona driver license, specific documents are required to verify identity, residency, and legal status.licants must provide proof of identity, such as a valid passport or birth certificate; Residency documents, like a utility bill or bank statement, are also necessary. Legal status verification may include a Social Security card or immigration documents. For minors under 18, parental consent is required. The Arizona Driver License Manual outlines these requirements in detail, ensuring applicants are prepared. Proper documentation ensures a smooth application process and compliance with state regulations. For more details, refer to the official Arizona Driver License Manual, available for download online.

Types of Driver Licenses Available in Arizona

Arizona offers several types of driver licenses tailored to different needs. The most common is the Class D license for passenger vehicles. Commercial Driver Licenses (CDLs) are required for operating heavy vehicles and are categorized into Class A, B, and C based on vehicle weight and type. Motorcycle licenses are available for those who complete a motorcycle safety course. Additionally, Arizona provides specialized licenses for minors, including instruction permits and restricted licenses. The state also offers enhanced driver licenses for border residents and REAL ID-compliant licenses for domestic air travel and federal access. Each license type has specific requirements outlined in the Arizona Driver License Manual.

Benefits of Reading the Arizona Driver License Manual

Reading the Arizona Driver License Manual provides a comprehensive understanding of traffic laws, road signs, and safe driving practices. It aids in preparing for both written and driving tests, ensuring drivers are well-informed and confident on the road.

Understanding Traffic Laws and Road Signs

The Arizona Driver License Manual provides essential information on traffic laws and road signs, helping drivers recognize and interpret regulatory, warning, and guide signs. It details legal requirements for speed limits, right-of-way rules, and proper lane usage. The manual also covers specific Arizona traffic laws, such as DUI regulations, seatbelt requirements, and cell phone usage restrictions. Understanding these laws and signs is crucial for safe driving and avoiding violations. By studying the manual, drivers can gain a clear understanding of their responsibilities on the road, ensuring compliance with state laws and promoting safe driving practices for themselves and others.

Preparation for the Written and Driving Tests

The Arizona Driver License Manual is a vital resource for preparing for both the written and driving tests. The manual includes practice questions that simulate the actual written exam, covering topics such as traffic laws, road signs, and safe driving practices. It also provides detailed instructions on what to expect during the driving test, including specific maneuvers and evaluator criteria. By thoroughly reviewing the manual, applicants can identify areas for improvement and build confidence in their abilities. Additionally, the manual offers tips for staying calm and focused during the tests, ensuring a smooth and successful licensing process for all applicants in Arizona.

Additional Resources for Driver License Applicants

Besides the manual, applicants can access practice tests, study guides, and online courses to enhance their preparation; Visit the official Arizona MVD website for more details.

Practice Tests and Study Materials

In addition to the Arizona Driver License Manual, applicants can access a variety of practice tests and study materials to aid in their preparation. These resources are designed to simulate real test conditions, helping individuals familiarize themselves with the format and content of the written and driving exams. Practice tests cover topics such as traffic laws, road signs, and safe driving practices, ensuring a comprehensive understanding of the material. Study guides and online courses are also available, offering interactive learning experiences. These tools are particularly useful for new drivers or those seeking to refresh their knowledge. By utilizing these resources, applicants can build confidence and improve their chances of success.

Where to Find More Information

For additional details about the Arizona Driver License Manual and related resources, visit the official Arizona Department of Transportation Motor Vehicle Division (MVD) website at azdot.gov/mvd. Here, you can download the latest version of the manual in PDF format, access practice tests, and explore study guides. Local MVD offices also provide hard copies of the manual and can answer specific questions. Furthermore, online platforms offer supplementary study materials, such as interactive quizzes and driver education courses, to help applicants prepare thoroughly. Stay informed by regularly checking these official and trusted sources for the most up-to-date information.

The Arizona Driver License Manual is an indispensable resource for anyone seeking to obtain or renew a driver’s license in the state. By downloading the PDF version, applicants can access comprehensive information on traffic laws, road signs, and safe driving practices at their convenience. Regular updates ensure the manual reflects the latest regulations, making it a reliable study guide for both written and driving tests. Utilizing this manual, along with practice tests and additional resources, significantly enhances readiness and confidence. Whether you’re a new driver or an experienced one, the Arizona Driver License Manual is a valuable tool for ensuring safety and compliance on the road.

bench pdf

Bench PDF plans provide detailed guides for constructing various benches, offering step-by-step instructions, diagrams, and material lists. Perfect for DIY enthusiasts, these plans cater to both beginners and experienced crafters, ensuring efficient and cost-effective projects for garden or workbench needs.

What Are Bench PDF Plans?

Bench PDF plans are comprehensive guides designed to help individuals construct their own benches. These plans are typically available in downloadable PDF format, making them easily accessible and printable.

They often include detailed blueprints, step-by-step instructions, cut lists, and material lists, ensuring that users have everything they need to complete their projects successfully. Many bench PDF plans are free and cater to both beginners and experienced DIY enthusiasts.

These plans cover a wide range of bench types, from simple garden benches to more complex workbenches. Some plans feature 3D diagrams and are print-friendly, allowing users to follow along with ease. The simplicity of certain designs, requiring minimal tools and time, makes them highly approachable even for those new to woodworking.

Material lists and cutting lists are often included, helping users prepare accurately and avoid costly mistakes. The plans emphasize durability and practicality, ensuring the finished benches are both functional and long-lasting. Overall, bench PDF plans are an excellent resource for anyone looking to create their own custom bench with ease and precision.

Why Use Bench PDF Plans?

Bench PDF plans are an excellent resource for anyone looking to build a bench, offering numerous benefits that make the process easier and more efficient. These plans provide clear, step-by-step instructions, ensuring that even beginners can achieve professional-quality results. The inclusion of detailed diagrams, cut lists, and material lists helps users prepare accurately, saving time and reducing the risk of costly mistakes.

One of the key advantages of bench PDF plans is their cost-efficiency. Many plans are free to download, making them an affordable option for DIY enthusiasts. Additionally, the ability to print the plans ensures that users can easily follow along during the construction process. The simplicity of some designs, which require minimal tools and time, makes them ideal for quick projects.

Moreover, bench PDF plans are versatile, catering to a wide range of needs. Whether you’re building a garden bench, a workbench, or a decorative storage bench, these plans provide the necessary guidance. They also emphasize durability and practicality, ensuring the finished product is both functional and long-lasting. Overall, bench PDF plans are a valuable tool for anyone looking to create a custom bench with ease and precision.

Types of Bench Plans Available

Bench PDF plans offer a wide variety of designs, from simple garden benches to sturdy workbenches. Each plan caters to different needs, ensuring versatility and adaptability for various projects, making them suitable for both outdoor and indoor settings.

Garden Bench Plans

Garden bench plans are versatile DIY projects perfect for enhancing outdoor spaces. These plans typically include step-by-step instructions, diagrams, and material lists to help you create beautiful and functional seating. Many designs cater to different skill levels, from simple builds for beginners to more complex designs for experienced crafters.

Popular options include classic wooden benches, modern designs with backrests, and even benches with built-in storage. Materials like cedar, teak, or 2×4 lumber are often recommended for durability and aesthetic appeal. Some plans also offer 3D diagrams, making it easier to visualize the project before starting.

For those looking for eco-friendly options, plans like the Leopold bench use reclaimed wood, promoting sustainability while maintaining style. Additionally, many garden bench plans are designed to be completed quickly, with some requiring only basic tools like a drill, saw, and speed square. These plans are ideal for creating a cozy spot to relax and enjoy your garden or patio.

With free PDF downloads available, you can easily access and print your chosen design. Whether you prefer a rustic charm or a sleek, modern look, garden bench plans offer a practical way to add functionality and beauty to your outdoor space. They are perfect for DIY enthusiasts looking to create something meaningful and lasting.

Workbench Plans

Workbench plans are comprehensive guides designed to help you build a sturdy and functional workspace for woodworking or other projects. These plans often include detailed diagrams, material lists, and step-by-step instructions, ensuring you can create a workbench tailored to your needs. Whether you’re a professional or a hobbyist, these plans offer customizable solutions to enhance your workshop’s efficiency.

Many workbench plans feature adjustable designs, allowing you to incorporate drawers, shelves, or vises for added functionality. Materials like 2×4 lumber, plywood, or MDF are commonly recommended for their durability and cost-effectiveness. Some plans also include 3D diagrams, making it easier to visualize and assemble the workbench. These designs cater to various skill levels, from simple builds for beginners to more complex projects for experienced woodworkers.

With free PDF downloads available, you can easily access and print your chosen design. Workbench plans are perfect for maximizing workspace and improving productivity. They are ideal for anyone looking to create a reliable and long-lasting workstation, whether for professional use or personal projects. These plans ensure your workbench is both practical and tailored to your specific needs.

Tools and Materials Required

To build a bench, essential tools include a drill, circular saw, tape measure, and speed square. Materials like 2×4 lumber, plywood, screws, and wood glue are typically needed. Safety gear such as safety glasses and hearing protection is also recommended for safe construction.

  • Tools: Drill/Driver, Circular Saw, Tape Measure, Speed Square
  • Materials: 2×4 Lumber, Plywood, Galvanized Screws, Wood Glue

Essential Tools

Building a bench requires a set of essential tools to ensure precision and efficiency. A cordless drill or drill/driver is crucial for drilling holes and driving screws. A circular saw is necessary for cutting lumber to the required dimensions. A tape measure and speed square are vital for accurate measurements and ensuring proper angles. Sandpaper or a sander is often needed to smooth out wood surfaces for a polished finish. Safety glasses and hearing protection are also important to protect yourself while working with power tools. Additionally, a level ensures the bench is evenly balanced, and clamps can help hold pieces in place during assembly. For more intricate cuts, a miter saw or jigsaw might be useful, though not always essential. These tools are commonly found in most workshops and are fundamental for completing a bench project successfully.

  • Drill/Driver ─ For drilling holes and securing screws
  • Circular Saw ─ For cutting lumber to size
  • Tape Measure ─ For precise measurements
  • Speed Square ⸺ For ensuring accurate angles
  • Sandpaper/Sander ⸺ For smoothing wood surfaces
  • Safety Glasses ⸺ For protecting your eyes
  • Hearing Protection ─ For safeguarding your hearing
  • Level ─ For ensuring even balance
  • Clamps ─ For holding pieces in place

Optional tools like a miter saw or jigsaw can enhance your project but are not always necessary. With these essential tools, you’ll be well-equipped to construct a sturdy and functional bench.

Materials Needed

Constructing a bench requires a variety of materials to ensure durability and aesthetic appeal. Lumber is the primary material, with common choices including 2x4s, 2x6s, or 2x8s for the frame and seating. Cedar, teak, or pressure-treated wood are popular options due to their resistance to weather and pests. Hardware such as galvanized screws, bolts, and wood glue is essential for assembling the pieces securely. Weather-resistant wood screws are ideal for outdoor benches to withstand the elements. Additionally, wood filler may be needed to smooth out imperfections in the lumber.

  • 2×4, 2×6, or 2×8 lumber ⸺ For the frame, seat, and backrest
  • Weather-resistant screws ─ For outdoor durability
  • Wood glue ⸺ For bonding wood pieces together
  • Galvanized bolts ─ For added strength in joints
  • Wood filler ⸺ For smoothing out imperfections
  • Weather-resistant wood finish ⸺ For protection and aesthetics

Optional materials include cushions or upholstery for added comfort and decorative elements like armrests or storage compartments. Always choose materials suitable for the bench’s intended use, whether indoors or outdoors.

asko dishwasher instruction manual

Welcome to the Asko Dishwasher Instruction Manual‚ your comprehensive guide to understanding and optimizing your appliance. This manual covers safety‚ installation‚ operation‚ and maintenance‚ ensuring you get the most out of your dishwasher while maintaining efficiency and performance. Discover key features‚ troubleshooting tips‚ and eco-friendly settings to enhance your experience.

Overview of Asko Dishwashers and Their Features

Asko dishwashers are renowned for their superior cleaning performance‚ advanced features‚ and eco-friendly designs. They offer adjustable racks‚ multiple wash cycles‚ and powerful spray arms for thorough cleaning. With energy-saving modes and quiet operation‚ Asko dishwashers provide convenience and efficiency. Features like customizable programs and child safety locks enhance usability. Sleek designs and durable construction make them a stylish and long-lasting addition to any kitchen. Asko dishwashers are designed to deliver exceptional results while minimizing environmental impact‚ making them a top choice for modern households.

Importance of Reading the Manual for Optimal Performance

Reading the Asko dishwasher manual is essential for optimal performance and safety. It provides detailed instructions on installation‚ operation‚ and maintenance‚ ensuring you understand all features and settings. The manual helps you troubleshoot common issues‚ customize wash programs‚ and utilize eco-friendly modes effectively. By following the guidelines‚ you can extend the lifespan of your dishwasher and enhance cleaning results. Understanding error codes and proper loading techniques also prevents damage and ensures efficient operation. Referencing the manual ensures you make the most of your appliance while maintaining efficiency and performance.

Safety Precautions and Installation Requirements

Ensure proper electrical grounding and follow installation guidelines to prevent hazards. Adhere to safety precautions to avoid accidents and ensure efficient dishwasher operation.

Electrical Grounding and Installation Instructions

Proper electrical grounding is essential for safe operation. Follow the installation guidelines in the manual to ensure your dishwasher is correctly connected and grounded. Ensure all electrical connections comply with local regulations and codes. Refer to the installation instructions for specific details on water supply‚ drainage‚ and leveling. If unsure‚ consult a qualified technician to avoid hazards. Proper installation ensures efficient performance‚ safety‚ and prevents potential damage. Always adhere to the manufacturer’s instructions for a secure and reliable setup.

Child Safety Features and Precautions

Asko dishwashers include child safety features to prevent accidental operation and ensure safe usage. Use the child lock function to secure the control panel‚ preventing unintended program starts. Keep dishwasher detergent and rinse aid out of children’s reach‚ as they can be harmful if ingested. Always supervise children near the dishwasher and teach them to avoid tampering with the appliance. For emergencies‚ refer to the manual for first aid instructions if detergent is swallowed. Ensure all safety precautions are followed to protect your family and maintain a safe kitchen environment.

Operating the Asko Dishwasher

Operating your Asko dishwasher is straightforward with its intuitive control panel. Select a program‚ add detergent‚ and start the cycle for optimal cleaning and energy efficiency.

Understanding the Control Panel and Button Functions

The Asko dishwasher features an intuitive control panel with buttons designed for easy navigation. Each button corresponds to specific functions‚ such as selecting wash programs‚ adjusting settings‚ or activating special modes. The panel typically includes buttons for starting‚ pausing‚ or canceling cycles‚ as well as options for heat drying‚ quiet operation‚ or delayed start. Refer to the user manual for detailed descriptions of each button and its function. Understanding the control panel ensures seamless operation and allows you to customize cycles to suit your needs efficiently.

Selecting the Right Wash Program for Your Needs

Asko dishwashers offer a variety of wash programs tailored to different needs. Choose from options like Heavy Duty for tough stains‚ Normal for everyday cleaning‚ or Delicate for fragile items. Specialized programs such as Quick Wash or Silent Mode provide added convenience. Refer to the user manual to understand each program’s features and select the best option for your load. This ensures optimal cleaning performance while preserving energy and water efficiency‚ making your dishwasher experience both effective and eco-friendly.

Loading the Dishwasher Efficiently

Loading the dishwasher efficiently involves properly arranging dishes‚ placing utensils securely‚ and using adjustable racks for flexibility. Maximize capacity without blocking water jets for optimal cleaning.

Proper Arrangement of Dishes and Utensils

Proper arrangement of dishes and utensils ensures optimal cleaning and prevents damage. Place dirty dishes facing the center‚ utensils in designated holders‚ and avoid nesting items. Larger dishes go on the bottom rack‚ while smaller ones and glassware are ideal for the top rack. Ensure the spray arm is unobstructed for even water distribution. Secure fragile items and avoid overcrowding to allow water and detergent to circulate effectively. This setup ensures better cleaning results and protects your dishes from breakage. Always refer to your manual for model-specific loading recommendations.

Adjustable Racks and Flexible Loading Options

Asko dishwashers feature adjustable racks and flexible loading options for efficient dish arrangement. The upper and lower racks can be adjusted to accommodate various dish sizes‚ while foldable tines allow for customizable spacing. Removable cutlery trays and multi-position holders provide additional flexibility‚ ensuring all items are securely placed. This design maximizes space‚ prevents damage‚ and ensures thorough cleaning. Use the adjustable height settings to fit large pots or delicate glassware‚ and customize your load to suit your needs. Refer to your manual for specific rack configurations and loading tips tailored to your model.

Dishwasher Maintenance and Care

Regular maintenance ensures optimal performance and longevity. Clean filters‚ check spray arms‚ and run cleaning cycles. Proper care preserves energy efficiency and eco-friendly operation‚ as detailed in the manual.

Cleaning the Filter and Spray Arms for Better Performance

Regular cleaning of the filter and spray arms is essential for maintaining your Asko dishwasher’s efficiency. Over time‚ food particles and grease can accumulate‚ reducing water flow and cleaning performance. The filter‚ typically located at the bottom of the dishwasher‚ should be rinsed with warm soapy water and replaced. Spray arms can become clogged with debris; soak them in hot water and scrub gently. Refer to your manual for detailed instructions on disassembling and cleaning these components. Proper maintenance ensures optimal water circulation‚ thorough cleaning‚ and prevents poor wash results.

Troubleshooting Common Issues and Solutions

Troubleshooting common issues with your Asko dishwasher ensures optimal performance and extends its lifespan. If dishes are not cleaning properly‚ check for blocked filters‚ spray arm obstructions‚ or insufficient detergent. Poor drying may result from incorrect detergent dosage or a malfunctioning heating element. Strange noises could indicate loose items or worn parts. If the dishwasher does not start‚ verify power supply‚ child lock activation‚ or faulty sensors. Refer to your manual for detailed solutions and guidance on diagnosing specific problems effectively. Regular inspections and timely repairs help maintain efficiency and reliability.

Energy Efficiency and Eco-Friendly Features

Asko dishwashers are designed with energy efficiency and eco-friendly features‚ minimizing water and energy consumption. Advanced sensors and eco-mode settings optimize performance while reducing environmental impact‚ lowering utility bills and promoting sustainability.

Energy-Saving Modes and Water Consumption Reduction

Asko dishwashers feature advanced energy-saving modes designed to minimize water and energy consumption. These modes use sensors to detect soil levels and optimize water usage‚ ensuring efficient cleaning while reducing waste. The eco-mode setting further lowers energy consumption‚ making it ideal for lighter loads. By adapting to your needs‚ Asko dishwashers help reduce utility bills and promote environmental sustainability. These energy-efficient solutions are part of Asko’s commitment to delivering high-performance appliances with eco-friendly benefits‚ ensuring a greener future for your home and the planet.

Eco-Friendly Programs and Environmental Benefits

Asko dishwashers offer eco-friendly programs designed to minimize environmental impact while delivering superior cleaning results. The eco-mode setting uses less water and energy‚ making it ideal for lighter loads. Additionally‚ silent programs operate with reduced noise and energy consumption‚ perfect for nighttime use. These features not only help reduce your carbon footprint but also lower utility bills. By utilizing eco-friendly programs‚ you contribute to sustainability without compromising on performance. The Asko dishwasher manual provides detailed guidance on activating these modes‚ ensuring eco-conscious operation tailored to your needs.

Advanced Features and Customization Options

Asko dishwashers feature customizable wash programs‚ adjustable racks‚ and quiet operation modes‚ allowing users to tailor settings for optimal cleaning and convenience‚ enhancing overall performance and efficiency.

Customizing Wash Programs and Settings

Asko dishwashers allow you to tailor wash programs to your specific needs. Adjust settings such as temperature‚ water intensity‚ and cycle duration for optimal results. The control panel enables easy customization‚ with options to save preferred settings for future use. Additionally‚ adjustable racks and flexible loading configurations ensure dishes are arranged efficiently‚ maximizing cleaning performance. Silent operation modes reduce noise‚ making them ideal for nighttime use. Explore eco-friendly programs to minimize water and energy consumption while maintaining superior cleaning results. Refer to the manual for detailed guidance on customizing your dishwasher’s settings for enhanced performance and convenience.

Utilizing Quiet Operation and Night Modes

Asko dishwashers feature advanced quiet operation technology‚ ensuring minimal noise during cycles. Night modes further reduce sound levels‚ making them ideal for late-hour use without disturbing household members. These modes are designed to balance performance with noise reduction‚ maintaining thorough cleaning while operating silently. Energy-efficient settings in night modes also contribute to lower power consumption. For optimal results‚ refer to the manual to activate and customize these features‚ ensuring a peaceful kitchen environment while your dishwasher runs efficiently in the background.

Accessing and Downloading the User Manual

Asko dishwasher manuals are readily available online at Manuals.ca and Manua.ls. Simply search by model number (e.g.‚ D3152 or DFI444B/1) to download the PDF guide for free.

Online Resources for Asko Dishwasher Manuals

Asko dishwasher manuals are easily accessible online through platforms like Manuals.ca and Manua.ls. These websites offer a wide range of PDF manuals‚ covering over 500 models‚ including popular ones like the D3152 and DFI444B/1. Users can search by model number or product name to quickly find the specific guide they need. Both sites provide free downloads‚ ensuring convenient access to operating instructions‚ installation guides‚ and troubleshooting tips. These resources are updated regularly‚ making them reliable sources for both new and older Asko dishwasher models.

Popular Models and Their Respective Manuals

Popular Asko dishwasher models like the D3152‚ DFI444B/1‚ and DSD444B/1 have dedicated manuals available for download. The DFI544B‚ recently added‚ is also accessible. These manuals provide detailed instructions tailored to each model‚ ensuring users can optimize performance and troubleshoot issues effectively. By accessing these resources‚ you can fully utilize your dishwasher’s features and maintain its longevity‚ enhancing your overall experience with Asko’s high-quality appliances.

Maximizing the Lifespan of Your Asko Dishwasher

To ensure your Asko dishwasher lasts for years‚ regular maintenance is crucial. Clean the filter and spray arms to maintain performance. Check hoses and connections for leaks. Use dishwasher-specific detergent to prevent damage. Avoid overloading the dishwasher to ensure proper water flow. Run cleaning cycles as recommended in the manual. Properly drying the dishwasher after use can prevent mold growth. Follow the manual’s guidelines for energy-saving modes and quiet operation. By adhering to these tips‚ you’ll extend the lifespan and maintain optimal performance of your eco-friendly Asko dishwasher.

Final Tips for Optimal Performance and Satisfaction

For the best experience with your Asko dishwasher‚ always refer to the manual for updates and maintenance tips. Use genuine parts for repairs to ensure compatibility and performance; Regularly check detergent quality and dosage to avoid residue buildup. Utilize silent modes for noise reduction and explore smart features for convenience. Avoid neglecting filter cleaning‚ as it directly impacts efficiency. By following these guidelines‚ you’ll enjoy reliable performance‚ energy savings‚ and a superior cleaning experience tailored to your needs.

math 1112 formula sheet pdf

The Math 1112 formula sheet is a comprehensive resource for students, providing essential formulas and concepts needed for success in the course. It covers key areas such as number systems, algebraic manipulations, geometry, trigonometry, statistics, and problem-solving strategies. Designed to aid revision and understanding, the formula sheet ensures students have all necessary mathematical tools at their fingertips, helping them approach problems with confidence and accuracy.

Overview of the Formula Sheet

The Math 1112 formula sheet serves as a concise and organized guide for students, providing a structured overview of essential mathematical concepts and formulas; It is designed to cover a wide range of topics, from basic operations and algebraic manipulations to geometry, trigonometry, and statistical measures. The formula sheet is divided into clear sections, making it easy for students to navigate and locate specific information quickly. Each section highlights key formulas, properties, and identities, ensuring that students have a comprehensive reference for problem-solving. Additionally, the formula sheet aligns with the course curriculum, catering to both foundational understanding and advanced problem-solving techniques. Its simplicity and clarity make it an invaluable resource for revision, practice, and exam preparation.

Core Mathematical Concepts in Math 1112

Math 1112 focuses on foundational concepts, including number systems, algebraic manipulations, geometric properties, trigonometric identities, and statistical measures. These core areas provide a solid base for problem-solving and critical thinking.

Number Systems and Basic Operations

The Math 1112 formula sheet begins with number systems, introducing students to natural numbers, integers, rational numbers, and real numbers. These systems form the foundation of mathematical operations. Basic operations include addition, subtraction, multiplication, and division, with properties like commutativity and associativity highlighted. Understanding these concepts is crucial for solving algebraic expressions and equations. The formula sheet provides clear definitions and examples, ensuring students grasp the principles of number systems and operations. Mastery of these basics is essential for progressing to more complex topics in the curriculum. The sheet also includes tips for avoiding common errors in calculations, helping students build a strong mathematical foundation.

Algebraic Manipulations and Equations

The Math 1112 formula sheet covers essential algebraic manipulations, such as expanding and factoring expressions, including the distributive property and factoring trinomials; It also provides formulas for solving linear and quadratic equations, as well as systems of equations. Key concepts like inverse operations and function notation are included to aid in understanding algebraic relationships. The sheet emphasizes problem-solving strategies, such as rearranging formulas to isolate variables and using substitution or elimination methods. Additionally, it highlights common algebraic identities and properties, such as the difference of squares and perfect square trinomials. These tools enable students to simplify and solve equations efficiently, fostering confidence in algebraic problem-solving.

Geometry and Trigonometry Formulas

The formula sheet covers fundamental geometry and trigonometry concepts, including properties of shapes, trigonometric identities, and theorems. It provides essential formulas for calculating angles, sides, and areas, aiding problem-solving in both fields effectively.

Properties of Shapes and Solids

The formula sheet details properties of various geometric shapes and solids, including polygons, circles, and three-dimensional figures. It provides formulas for calculating areas, volumes, and surface areas, along with key theorems like the Pythagorean theorem and properties of congruence and similarity. Essential concepts such as perimeter, radius, and angles are also covered, ensuring a solid understanding of geometric relationships. These properties are fundamental for solving problems involving spatial reasoning and visualization, making them indispensable for students mastering geometry and related applications. The clear presentation of these formulas facilitates quick reference and application during exams and assignments.

Trigonometric Identities and Functions

The formula sheet includes a detailed section on trigonometric identities and functions, covering sine, cosine, and tangent. It lists fundamental identities such as the Pythagorean identity and angle addition formulas. Essential trigonometric laws, including the Law of Sines and Cosines, are also provided. These resources help students simplify expressions, solve equations, and analyze periodic phenomena. The sheet also outlines key properties of trigonometric functions, such as their domains, ranges, and graphs, ensuring a comprehensive understanding for problem-solving in various mathematical contexts. This section is crucial for mastering trigonometric concepts and their applications in geometry, physics, and engineering.

Statistics and Probability Essentials

The formula sheet covers key statistical measures, probability rules, and distributions. It includes formulas for mean, median, mode, and standard deviation, as well as probability principles like conditional probability and Bayes’ theorem. Venn diagrams and probability trees are also highlighted to aid understanding.

Key Statistical Measures and Formulas

The formula sheet provides essential statistical measures, including mean, median, mode, and standard deviation. These formulas help calculate central tendency and data dispersion. The mean is calculated as the sum of all data points divided by the number of points, while the median is the middle value in an ordered dataset. The mode is the most frequently occurring value. Standard deviation measures data spread, with the formula involving the square root of the average squared deviations from the mean. These formulas are crucial for understanding and analyzing data distributions and variability in various mathematical problems.

Probability Rules and Distributions

The formula sheet includes fundamental probability rules such as the addition rule, multiplication rule, and complementary probability. These rules help calculate probabilities of events, including mutually exclusive and independent events. The addition rule states that the probability of either event A or B occurring is the sum of their probabilities minus the probability of both occurring. The multiplication rule applies to independent events, where the probability of both events occurring is the product of their individual probabilities. Additionally, the sheet covers key distributions like the binomial distribution for calculating probabilities of successes in trials and the normal distribution for understanding continuous data sets. These formulas are essential for solving probability-related problems accurately and efficiently.

Problem-Solving Strategies

Effective strategies for solving mathematical problems include understanding the question, breaking it down, and applying appropriate formulas. Critical thinking and logical reasoning are essential tools.

Approaches to Mathematical Problem Solving

Effective problem-solving in Math 1112 involves understanding the question, breaking it down, and applying logical steps. Polya’s Four-Step Method—understand, plan, solve, and verify—is highly recommended. Start by identifying key information and unknowns, then choose the right strategy. Simplify complex problems into manageable parts and use known formulas or theorems. Critical thinking and creativity are essential, as is checking work for accuracy. Practicing past papers and reviewing common mistakes can enhance problem-solving skills. Consistent practice and a systematic approach help build confidence and proficiency in tackling various mathematical challenges.

Common Mistakes to Avoid

Students often overlook simple errors in mathematical problem-solving, such as incorrect formula application or arithmetic mistakes. Forgetting to verify units or misinterpreting question requirements can lead to incorrect answers. Neglecting to check work after completion is another common pitfall. Additionally, assuming prior knowledge without reviewing foundational concepts can hinder understanding. Rushing through problems without careful planning often results in avoidable errors. It’s crucial to approach each problem methodically, ensuring each step is accurate. Regular practice and attention to detail can help minimize these mistakes, improving overall performance in Math 1112.

Resources for Effective Learning

Past papers, study guides, and online tools like COMSOL provide valuable resources for mastering Math 1112. Utilize these to reinforce concepts and improve problem-solving skills effectively.

Past Papers and Study Guides

Past papers and study guides are essential resources for Math 1112 preparation. Cambridge Secondary Checkpoint Mathematics (1112) past papers, available from 2015 to 2022, can be downloaded as PDFs for free. These papers provide students with practical exam experience, helping them familiarize themselves with question formats and content. Study guides offer detailed explanations of key concepts, formulas, and problem-solving strategies, making complex topics more accessible. They include step-by-step solutions to common problems, enabling students to review and understand their mistakes. By combining past papers with study guides, students can systematically prepare for exams, ensuring a strong grasp of the curriculum and improving their overall performance in Math 1112.

Online Tools for Mathematical Practice

Online tools provide invaluable support for mastering Math 1112. Interactive learning platforms offer step-by-step problem-solving guides and video tutorials, while websites like Khan Academy and Wolfram MathWorld host detailed explanations and practice exercises. Simulation software, such as COMSOL, allows students to visualize mathematical concepts in real-world contexts. Additionally, coding tools like Python and GeoGebra enable students to explore algebraic manipulations and geometric constructions dynamically. These resources complement the formula sheet by offering hands-on practice and deeper understanding of complex topics. Regular use of these tools can significantly enhance problem-solving skills and confidence in tackling challenging mathematical problems.

2024 honda pilot owners manual

The 2024 Honda Pilot Owners Manual serves as your comprehensive guide‚ available as a free PDF download‚ covering features‚ maintenance‚ and troubleshooting to enhance your ownership experience effectively.

Overview of the Manual

The 2024 Honda Pilot Owners Manual provides a detailed guide to understanding and maintaining your vehicle. This 805-page document covers features‚ operation‚ and maintenance‚ offering comprehensive insights for optimal performance. Available in English and French‚ it is downloadable as a free PDF‚ ensuring easy access to essential information for owners.

Importance of Reading the Manual

Reading the 2024 Honda Pilot Owners Manual is essential for understanding your vehicle’s features‚ optimizing performance‚ and ensuring safety. It provides critical information on maintenance‚ troubleshooting‚ and proper usage of advanced technologies‚ helping you maximize your ownership experience and prevent potential issues.

How to Navigate the Manual

Navigate the 2024 Honda Pilot Owners Manual by using the table of contents‚ section headers‚ and search functionality. Familiarize yourself with key sections like maintenance schedules‚ troubleshooting guides‚ and feature explanations. Understanding the manual’s structure helps you quickly find information‚ ensuring optimal use of your vehicle’s capabilities and features.

Key Features of the 2024 Honda Pilot

The 2024 Honda Pilot offers a blend of sophisticated design‚ advanced technology‚ enhanced performance‚ and improved efficiency‚ ensuring a superior driving experience with functionality‚ safety‚ and style.

Design and Technology Upgrades

The 2024 Honda Pilot boasts a modern exterior and interior design‚ featuring enhanced comfort and advanced technology. Upgrades include a user-friendly infotainment system‚ improved connectivity options‚ and a digital instrument panel‚ ensuring a seamless and enjoyable driving experience with premium materials and innovative features.

Performance and Capabilities

The 2024 Honda Pilot delivers robust performance with a powerful V6 engine‚ producing ample horsepower and torque. Its advanced all-wheel-drive system ensures superior traction on various terrains. With a maximum towing capacity of up to 5‚000 pounds and improved ground clearance‚ it excels in both daily driving and off-road adventures effortlessly.

Interior and Exterior Features

The 2024 Honda Pilot offers a spacious and luxurious interior with premium materials‚ featuring advanced technology like a touchscreen infotainment system and heated‚ ventilated seats. The exterior boasts a sleek‚ rugged design with LED lighting and alloy wheels‚ combining style with functionality for both on-road and off-road adventures.

Safety Features and Guidelines

The 2024 Honda Pilot offers advanced safety technologies‚ including collision mitigation and lane departure warning systems‚ along with guidelines for proper safety equipment use and emergency procedures.

Advanced Safety Technologies

The 2024 Honda Pilot features cutting-edge safety technologies‚ including Collision Mitigation Braking‚ Lane Departure Warning‚ and Adaptive Cruise Control. These systems enhance driver confidence and vehicle safety‚ offering comprehensive protection for all occupants. Honda’s commitment to innovation ensures a secure driving experience.

Proper Use of Safety Equipment

Ensure correct usage of seat belts‚ airbags‚ and child restraints to maximize safety. Always fasten seat belts and secure children in approved car seats. Familiarize yourself with airbag locations and follow guidelines for proper installation. Regularly inspect safety equipment for damage or wear. Proper use enhances protection and aligns with Honda’s safety standards.

Emergency Procedures

Familiarize yourself with emergency procedures outlined in the manual. In case of an accident‚ secure the scene‚ call emergency services‚ and use safety systems like hazard lights. Understand the Event Data Recorder function and follow guidelines for towing or jump-starting. Proper emergency response ensures safety and minimizes damage to your Honda Pilot.

Maintenance and Care

Regular maintenance ensures your Honda Pilot performs optimally. Follow the recommended schedule‚ check fluids‚ and maintain proper tire pressure. Regular cleaning and protection extend its lifespan and reliability.

Recommended Maintenance Schedule

The 2024 Honda Pilot Owners Manual provides a detailed maintenance schedule‚ outlining regular checks and services. Follow guidelines for oil changes‚ tire rotations‚ and fluid inspections to ensure optimal performance and longevity of your vehicle.

Fluids and Tire Pressure Guidelines

The 2024 Honda Pilot Owners Manual provides detailed guidelines for checking and maintaining proper fluid levels‚ including engine oil‚ coolant‚ and transmission fluid. It also specifies recommended tire pressure levels for optimal performance and fuel efficiency‚ ensuring your vehicle operates safely and efficiently under various driving conditions.

Cleaning and Protecting the Vehicle

The manual provides guidance on cleaning and protecting your 2024 Honda Pilot‚ including recommended cleaning products for the exterior and interior‚ proper washing techniques‚ and tips for maintaining the vehicle’s appearance and longevity. Regular maintenance ensures your Pilot remains in optimal condition and retains its value over time.

Understanding the Instrument Panel

The instrument panel is your central interface‚ providing vital information about your vehicle’s status‚ including speed‚ fuel levels‚ and system notifications‚ to ensure safe and informed driving.

Dashboard Controls and Indicators

The dashboard controls and indicators provide essential information and functionality‚ including buttons‚ knobs‚ and digital displays for climate‚ audio‚ and driver settings. Warning lights and indicators alert you to vehicle status‚ ensuring safe and informed driving by monitoring systems like fuel levels‚ temperature‚ and maintenance needs.

Instrument Panel Customization

The 2024 Honda Pilot allows for extensive customization of the instrument panel‚ enabling drivers to personalize settings such as display brightness‚ layout preferences‚ and feature prioritization. This customization enhances the driving experience by tailoring the interface to individual preferences‚ ensuring optimal convenience and accessibility while maintaining intuitive control over vehicle functions.

Warning Lights and Their Meanings

The 2024 Honda Pilot Owners Manual provides a detailed guide to understanding warning lights on the instrument panel. Each symbol‚ from the check engine light to tire pressure indicators‚ is explained‚ along with recommended actions to ensure driver safety and proper vehicle maintenance‚ helping you respond appropriately to any alert.

Tips for New Honda Pilot Owners

The 2024 Honda Pilot Owners Manual is your key to mastering your vehicle. Familiarize yourself with its features‚ optimize fuel efficiency‚ and explore Honda-specific technologies for a seamless ownership experience.

Getting Familiar with the Vehicle

The 2024 Honda Pilot Owners Manual helps you understand your vehicle’s features‚ controls‚ and technologies. Start by exploring the instrument panel‚ customizable settings‚ and safety systems. Familiarize yourself with the infotainment system‚ navigation‚ and driver-assistance tools to ensure a smooth and confident driving experience from day one.

  • Review the dashboard layout and indicator lights.
  • Customize settings to personalize your driving experience.
  • Understand advanced safety features and their functions.

Optimizing Fuel Efficiency

Maximize your 2024 Honda Pilot’s fuel efficiency by maintaining proper tire pressure‚ driving steadily‚ and utilizing Eco mode. Regular oil changes and air filter replacements also improve performance. Avoid excessive idling and ensure the vehicle is well-maintained as per the manual’s recommendations for optimal fuel economy.

  • Check tire pressure regularly for optimal performance.
  • Drive smoothly and avoid aggressive acceleration.
  • Use Eco mode for improved fuel-saving benefits.

Utilizing Honda-Specific Features

The 2024 Honda Pilot offers advanced features like Honda Sensing‚ which includes adaptive cruise control and lane-keeping assist. Use the multi-angle rearview camera for better visibility and explore the customizable settings in the infotainment system. Refer to the manual for guidance on activating and personalizing these technologies for a seamless driving experience.

  • Activate Honda Sensing for enhanced safety.
  • Adjust the multi-angle rearview camera settings.
  • Customize the infotainment system preferences.

Infotainment and Navigation System

The 2024 Honda Pilot Owners Manual details the operation of the infotainment system‚ including navigation setup and connectivity options‚ ensuring seamless control and enhanced driving convenience.

Operating the Infotainment System

The 2024 Honda Pilot Owners Manual provides detailed guidance on operating the infotainment system‚ including touchscreen navigation‚ voice command functionality‚ and Bluetooth connectivity. It outlines step-by-step instructions for accessing features like audio controls‚ smartphone integration‚ and customizable settings to enhance your driving experience seamlessly.

Navigation Setup and Use

The manual details how to set up and use the navigation system‚ including entering destinations‚ using voice commands‚ and customizing route preferences. It also covers updating maps via Wi-Fi and tips for optimizing navigation accuracy to ensure a smooth and efficient driving experience.

Connecting Devices and Bluetooth

The manual guides you through pairing smartphones‚ tablets‚ or other devices via Bluetooth or USB. It details how to connect devices‚ manage paired devices‚ and troubleshoot common issues for seamless integration with the infotainment system‚ ensuring reliable audio streaming and hands-free functionality on the go.

Accessories and Customization

The 2024 Honda Pilot Owners Manual details recommended accessories for enhancing functionality and appearance‚ with guidelines for installing aftermarket parts and tips for personalizing your vehicle seamlessly.

Recommended Accessories for the 2024 Honda Pilot

The manual highlights recommended accessories like roof rails‚ cargo organizers‚ and all-weather floor mats‚ designed to enhance functionality and style. It also provides installation guidelines and compatibility information to ensure seamless integration with your vehicle.

Installing Aftermarket Accessories

The manual provides detailed guidelines for installing aftermarket accessories‚ emphasizing compatibility and safety. It recommends using genuine Honda parts for optimal performance and outlines step-by-step procedures to ensure proper installation without voiding the warranty.

Customizing Your Vehicle

Your 2024 Honda Pilot manual supports customization through genuine accessories‚ enhancing functionality and style. It provides guidelines for personalizing your vehicle while maintaining performance and safety standards‚ ensuring all modifications align with Honda’s specifications for compatibility and reliability.

Troubleshooting Common Issues

The 2024 Honda Pilot manual offers solutions for common issues‚ such as radio malfunctions or clutch problems‚ ensuring quick resolutions and minimizing downtime effectively always.

Identifying and Solving Common Problems

The 2024 Honda Pilot manual provides detailed guidance for diagnosing and resolving common issues‚ such as infotainment malfunctions or performance concerns‚ with step-by-step solutions and troubleshooting tips to help owners address problems efficiently and effectively at home or before visiting a dealer.

Resetting System Settings

The 2024 Honda Pilot manual provides instructions for resetting system settings‚ such as navigation‚ audio‚ and driver-assist features‚ to factory defaults. This process ensures proper functionality and customization‚ with step-by-step guidance available for easy troubleshooting and system restoration without professional assistance.

When to Contact a Dealer

Contact a certified Honda dealer for issues requiring specialized tools or expertise‚ such as complex repairs‚ system updates‚ or warranty-related services. Dealers can also provide official guidance for troubleshooting and ensure compliance with manufacturer recommendations for maintaining your 2024 Honda Pilot.

Technical Specifications

The 2024 Honda Pilot Owners Manual provides detailed engine specs‚ transmission info‚ dimensions‚ capacities‚ and warranty details to help you understand your vehicle’s capabilities and maintenance needs.

Engine and Transmission Details

The 2024 Honda Pilot features a 3.5L V6 engine with 247 horsepower and 262 lb-ft of torque. Paired with an e-CVT and available i-VTM4 AWD‚ it offers enhanced performance. The hybrid powertrain delivers improved fuel efficiency‚ with an EPA-estimated 36 mpg combined. Towing capacity reaches up to 5‚000 lbs‚ making it versatile for various needs.

Dimensions and Capacities

The 2024 Honda Pilot offers seating for up to 8 passengers‚ with cargo space of 16.5 cubic feet behind the third row and 46.8 cubic feet with the third row folded. Maximum cargo capacity reaches 91.4 cubic feet. The vehicle measures 198.5 inches in length‚ 78.6 inches in width‚ and 70.2 inches in height. Towing capacity is up to 5‚000 lbs‚ with a fuel tank capacity of 19.5 gallons.

Warranty and Service Information

The 2024 Honda Pilot comes with a comprehensive warranty‚ including a 3-year/36‚000-mile basic warranty and a 5-year/60‚000-mile powertrain warranty. Regular maintenance is recommended to ensure optimal performance. Detailed warranty terms and service schedules can be found in the downloadable PDF manual for accurate reference and adherence to Honda’s guidelines.

Downloading the Owners Manual

The 2024 Honda Pilot Owners Manual is available as a free PDF download in English‚ featuring 805 pages. Download it via Wi-Fi for convenience.

How to Download the PDF Manual

Access the official Honda website and navigate to the owner’s manual section. Select the 2024 Honda Pilot model and choose the appropriate trim level. Click on the PDF download link to save the manual. Ensure a stable Wi-Fi connection for smooth downloading. Once downloaded‚ save the file for easy access and reference. You can print or view it digitally at your convenience.

Printing and Storing the Manual

Print the 2024 Honda Pilot Owners Manual on high-quality paper for clarity. Organize the pages in a binder or folder for easy access. Store it in a dry‚ secure location‚ such as your vehicle’s glovebox‚ to ensure it remains accessible and protected from damage. Regularly review and update printed copies if needed.

Updating the Manual

Regularly check the official Honda website for updates to the 2024 Honda Pilot Owners Manual. Download the latest PDF version to ensure you have the most current information on features‚ maintenance‚ and safety guidelines. Updates may include new functionalities or revised procedures‚ keeping your manual accurate and relevant for optimal vehicle operation.

The 2024 Honda Pilot Owners Manual is your key to maximizing ownership satisfaction. Stay informed‚ maintain properly‚ and utilize resources for a safe‚ enjoyable driving experience. Download updates regularly to ensure you always have the latest information at your fingertips.

Final Tips for Maximizing Your Ownership Experience

Download the 2024 Honda Pilot Owners Manual PDF for free to access essential guides. Regularly review the manual for updates and maintenance tips. Utilize Honda-specific features for enhanced performance. Engage with the Honda community for shared experiences and stay informed about the latest updates to ensure a smooth ownership journey.

Staying Informed About Updates

Visit the official Honda website to download the latest version of the 2024 Honda Pilot Owners Manual. Regularly check for updates to ensure you have the most current information. Staying informed about software updates‚ feature enhancements‚ and maintenance guidelines will help you make the most of your vehicle’s capabilities and performance.

Engaging with the Honda Community

Engaging with the Honda community through forums and social media groups connects you with fellow owners‚ sharing tips‚ troubleshooting‚ and optimizing your 2024 Pilot’s features. Join discussions‚ ask questions‚ and access resources to enhance your ownership experience.

rcr003rwd user guide

The RCA RCR003RWD is a 3-device universal remote designed for seamless control of TVs, DVD players, and more. With its backlit buttons and intuitive design, it simplifies home entertainment management.

Overview of the Remote and Its Features

The RCA RCR003RWD is a 3-device universal remote designed to simplify control of multiple electronics. It features a backlit design for easy navigation in low light and an ergonomic layout for comfort. With compatibility across various brands and devices, including TVs, DVD players, and more, it streamlines entertainment control. The remote supports advanced programming options like auto code search, direct code entry, and brand code search. It also includes a macro function for custom command sequences and customizable button functions, allowing users to tailor the remote to their preferences. Its intuitive design and robust feature set make it a versatile solution for home entertainment systems.

Compatibility with Various Devices (TVs, DVD Players, etc.)

The RCA RCR003RWD is compatible with a wide range of devices, including TVs, DVD players, Blu-ray players, and cable boxes. Its extensive database supports multiple brands, ensuring seamless control across different manufacturers. Users can operate up to three devices simultaneously, making it ideal for home theaters and entertainment systems. The remote’s broad compatibility reduces the need for multiple controllers, streamlining your setup. Whether managing a modern smart TV or a legacy DVD player, the RCR003RWD adapts to various device types, offering a unified control experience that enhances convenience and organization in any living room.

Setting Up the RCA RCR003RWD Remote

Setting up the RCA RCR003RWD involves unboxing, installing batteries, and initial configuration. Follow step-by-step guides for a smooth and efficient setup process.

Unboxing and Initial Preparation

Begin by carefully unboxing the RCA RCR003RWD remote, ensuring all components are included. Inspect for any physical damage. Before use, clean the remote with a soft cloth to prevent debris interference. Familiarize yourself with the layout, noting the Code Search, Power, and device-specific buttons. Charge the remote if necessary, though it typically comes with batteries. Ensure you have your devices nearby for quick setup. Proper preparation ensures a seamless experience with your new universal remote.

Installing Batteries and Basic Setup

To power the RCA RCR003RWD, insert two AAA batteries into the remote’s battery compartment. Ensure the + and ⏤ terminals align correctly. Once batteries are installed, the remote is ready for basic setup. Press and hold the Code Search button until the Power key lights up, indicating the remote is in programming mode. This step initializes the remote for device pairing. Proper battery installation is crucial for consistent performance and IR signal strength. Always use fresh batteries to avoid setup issues. Refer to the user guide for detailed instructions on activating the remote’s features post-installation;

Understanding the Remote Layout and Buttons

The RCA RCR003RWD remote features a sleek, user-friendly design with backlit buttons for easy navigation in low-light conditions. The remote is divided into logical sections, including device-specific controls, navigation buttons, and function keys. The Power button is centrally located, while the Code Search button is used for programming. Numbered keys (0-9) allow direct code entry, and the Menu and Guide buttons provide quick access to device menus. Dedicated buttons for playback control (Play, Pause, Stop) and volume adjustment ensure intuitive operation. Familiarizing yourself with the button layout enhances control over connected devices. Refer to the user guide for detailed button functions.

Programming the RCA RCR003RWD Remote

Program the RCA RCR003RWD remote using Auto Code Search, Direct Code Entry, or Brand Code Search methods for efficient device setup and control.

Auto Code Search: Step-by-Step Guide

To program your RCA RCR003RWD remote using Auto Code Search, press and hold the Code Search button until the POWER key lights up. Release it and press the device button (e.g., TV) you want to control. Then, press and hold the PWR button until your device turns off. The remote will automatically search for the correct code. If successful, the POWER light will blink twice. If not, repeat the process. This method is efficient for finding the right code without manual entry.

Direct Code Entry: How to Manually Program the Remote

For direct code entry, press and hold the Code Search button until the POWER key lights up. Release it and press the device button (e.g., TV) you wish to program. Enter the 3-digit code using the number pad. The POWER light will blink once if the code is accepted. Test the remote with your device. If it doesn’t work, try another code. This method is ideal when you have a specific code from the RCA code list or the device’s manual, ensuring quick setup without automatic searching.

Brand Code Search: Troubleshooting and Best Practices

Brand Code Search allows you to program the remote using pre-set codes for specific brands. To troubleshoot, ensure the remote has a clear line of sight to the device. If the search times out (indicated by the POWER key blinking four times and turning off), restart the process. If no codes work, verify the brand code list or try Direct Code Entry. For best results, use a single brand code at a time and avoid interruptions during the search. The remote retains the last programmed code under the device key if the search is unsuccessful.

Advanced Features of the RCA RCR003RWD

The RCA RCR003RWD offers advanced features like macro functions and customizable button controls, enabling users to create personalized commands for enhanced control over their devices.

Using the Macro Function for Custom Commands

The macro function on the RCA RCR003RWD allows users to create custom command sequences. By pressing and holding the MACRO button, you can record a series of actions, such as turning on the TV and adjusting the volume, into a single button press. This feature streamlines multi-step operations, making it easier to control multiple devices simultaneously. To set up a macro, press the MACRO button, input the sequence of commands, and save them. This function enhances convenience and personalizes your remote experience, ensuring smoother control over your home entertainment system.

Customizing Button Functions for Personalized Control

The RCA RCR003RWD allows users to customize button functions, enabling personalized control of their devices. By pressing and holding the Code Search button, followed by the device button and the target key, users can reassign functions to suit their preferences. This feature enhances flexibility, letting you map frequently used commands to easily accessible buttons. For example, you can assign a favorite channel button or volume control to a more convenient location. Customization ensures a tailored experience, making the remote more intuitive and efficient for everyday use. This capability is particularly useful for streamlining control of multiple devices connected to your entertainment system.

Troubleshooting Common Issues

If the remote fails to control devices, check battery strength and ensure correct codes are programmed. Restart devices and reprogram if necessary.

Resolving Code Search Failures and Timeouts

If the remote’s code search times out, ensure batteries are fresh and devices are powered on. Restart the search process, holding the Code Search button until the light activates. If the POWER key blinks four times, the search is complete. If no codes work, try manual entry or brand code search. Ensure device compatibility and close proximity during setup. If issues persist, refer to the RCA support website or contact customer support at 1-800-420-7729 for assistance. Proper troubleshooting ensures optimal remote functionality.

Fixing IR Signal Problems and Device Compatibility

Ensure the remote’s IR signal is unobstructed by direct line of sight to the device. Check for physical obstructions or reflective surfaces that may block the signal. Verify that batteries are installed correctly and not weak, as low power can weaken IR transmission. Test the remote on another device to confirm functionality. If compatibility issues arise, ensure the device brand is supported by the remote. Refer to the RCA website for a list of compatible brands. For persistent issues, contact RCA Customer Support at 1-800-420-7729 for further assistance.

Warranty and Support Information

The RCA RCR003RWD comes with a limited 90-day warranty covering defects in materials and workmanship. For support, visit www.rca.com or call 1-800-420-7729.

Understanding the Limited 90-Day Warranty

The RCA RCR003RWD remote is backed by a limited 90-day warranty from Thomson Multimedia Inc. This warranty ensures that any defects in materials or workmanship will be addressed within this period. If the remote fails due to manufacturing issues, it will be repaired or replaced free of charge. The warranty commences from the date of purchase, providing users with assurance of quality and reliability. For warranty-related inquiries or claims, users can contact RCA’s customer support through their official website or the provided toll-free helpline. This warranty excludes damages caused by misuse or external factors.

Contacting RCA Customer Support and Help Resources

For assistance with the RCA RCR003RWD remote, users can contact RCA’s customer support team through various channels. The toll-free helpline at 1-800-420-7729 is available for immediate support. Additionally, the RCA Help Center at www.rca.com offers comprehensive resources, including user manuals, FAQs, and troubleshooting guides. Users can also submit queries or concerns through the website. The support team is equipped to address setup issues, warranty claims, and technical difficulties, ensuring a smooth experience for all customers. This dedicated support system reflects RCA’s commitment to customer satisfaction and product reliability.

The RCA RCR003RWD universal remote offers a user-friendly solution for controlling multiple devices. With features like backlit buttons, auto code search, and customizable macros, it enhances home entertainment convenience. The remote’s compatibility with various brands and devices ensures versatility. Setup and programming are streamlined, and troubleshooting guides help resolve common issues. RCA’s customer support, including a toll-free helpline and online resources, further supports users. Overall, the RCA RCR003RWD is a reliable choice for simplifying control of your entertainment system, backed by comprehensive support and a 90-day warranty for added peace of mind.

komet w00 10120 pdf

The Komet W00 10120 PDF provides essential technical specifications and guidelines for the Komet W00 10120 product, a carbide insert designed for industrial machining applications.

1.1 Overview of the Komet W00 10120 Product

The Komet W00 10120 is a high-performance carbide insert designed for industrial machining applications. It is part of Komet’s extensive catalog of precision-engineered tools, known for their durability and reliability. This insert is specifically tailored for drilling operations, offering superior cutting edge performance. With a cutting edge length of 11.6 mm and a corner radius of 1.5 mm, it ensures precise and efficient material removal. The product is widely used in manufacturing and production processes, providing versatility and consistency in various industrial settings. Its robust construction and advanced material properties make it a preferred choice for achieving high-quality results.

1.2 Importance of the Komet W00 10120 PDF Document

The Komet W00 10120 PDF document is a vital resource for users, offering detailed technical specifications, guidelines, and product information. It serves as a comprehensive guide for understanding the insert’s features, dimensions, and applications. The document ensures proper installation, usage, and maintenance, maximizing the tool’s performance and longevity. Available for download on official websites and authorized portals, it provides easy access to essential data, enabling manufacturers to optimize their machining processes effectively. This document is crucial for making informed decisions and ensuring the insert’s reliability in industrial environments; Its clarity and conciseness make it an indispensable tool for professionals.

Technical Specifications and Guidelines

The Komet W00 10120 features a cutting edge length of 11.6 mm and a corner radius, crafted from high-quality carbide for durability and precision in machining applications.

2.1 Dimensions and Measurements of Komet W00 10120

The Komet W00 10120 insert has precise dimensions, including a cutting edge length of 11.6 mm and an inscribed circle diameter of 17.6 mm. Its thickness is 6 mm, with a specified corner radius for optimal performance. These measurements ensure compatibility with Komet tools and machines, while the dimensional tolerances are tightly controlled to meet industrial standards. The product’s weight and overall size are designed for efficient handling and installation. Detailed diagrams and specifications are provided in the Komet W00 10120 PDF, ensuring accurate fitting and use across various machining applications.

2.2 Material and Construction Details

The Komet W00 10120 is crafted from high-quality carbide, a material renowned for its durability and resistance to wear. Its robust construction ensures long-lasting performance in demanding industrial environments. The carbide grade used is optimized for machining applications, offering excellent hardness and thermal resistance. The insert’s design incorporates advanced coatings to enhance tool life and reduce friction. Its solid carbide core provides structural integrity, while the precise engineering ensures consistent performance. The material and construction details are thoroughly outlined in the Komet W00 10120 PDF, ensuring users understand its capabilities and limitations.

2.3 Cutting Edge Length and Corner Radius

The Komet W00 10120 features a cutting edge length of 11.6 mm, ensuring precise and efficient machining operations. Its corner radius is specifically designed to optimize tool life and surface finish quality. These measurements are critical for maintaining accuracy and preventing wear during industrial applications. The PDF provides detailed specifications, allowing users to understand the insert’s capabilities and ensure proper installation. The combination of cutting edge length and corner radius makes it suitable for a wide range of machining tasks, enhancing productivity and reliability in industrial settings.

Features and Capabilities

The Komet W00 10120 is a high-performance carbide insert designed for versatile machining applications, offering superior durability and precision. Its advanced material ensures extended tool life.

3.1 Unique Features of Komet W00 10120

The Komet W00 10120 stands out for its advanced carbide composition, designed to maximize wear resistance and maintain sharp cutting edges. Its unique geometry enhances stability during machining, reducing vibrations and ensuring precise finishes. The insert’s specific cutting edge length and corner radius are optimized for a wide range of materials, making it highly versatile. Additionally, its compatibility with Komet’s tooling systems ensures seamless integration into various machining setups, providing users with a reliable and efficient solution for their manufacturing needs. These features contribute to its reputation as a high-performance tool in industrial applications.

3.2 Compatibility with Komet Tools and Machines

The Komet W00 10120 is designed to seamlessly integrate with Komet’s extensive range of tools and machines, ensuring optimal performance and compatibility. Its geometry and mounting systems align perfectly with Komet’s modular tooling solutions, enabling easy setup and operation. The insert is compatible with specific Komet tools, such as boring bars and indexable drills, enhancing its versatility in machining applications. This compatibility ensures that users can leverage the full potential of their Komet equipment, reducing setup times and improving overall productivity. The design emphasizes ease of use and integration, making it a reliable choice for manufacturers.

3.3 Industrial Applications and Versatility

The Komet W00 10120 is widely used in various industrial applications, showcasing its versatility and adaptability. It excels in manufacturing and production processes, particularly in drilling and machining operations. Its ability to perform multiple tasks makes it suitable for both small-scale operations and large industrial settings. The product is ideal for industries requiring precision and durability, such as automotive and aerospace manufacturing. Its compatibility with Komet tools enhances its versatility, allowing it to be used in a broad range of machining tasks. This makes the W00 10120 a reliable and efficient solution for diverse industrial needs.

Industrial Uses and Benefits

The Komet W00 10120 is widely utilized in manufacturing and production processes, offering increased efficiency and durability. Its versatility benefits industries requiring precise and reliable machining solutions.

4.1 Manufacturing and Production Processes

The Komet W00 10120 excels in manufacturing and production processes due to its robust design and precision engineering. It is ideal for high-volume machining tasks, ensuring consistent quality and reducing downtime. With its ability to handle complex materials and operations, this insert is a key component in modern manufacturing workflows. Its compatibility with various Komet tools and machines makes it a versatile choice for optimizing production efficiency. By integrating the W00 10120, manufacturers can achieve superior results, enhance productivity, and maintain high standards of quality in their operations.

4.2 Increased Efficiency and Productivity

The Komet W00 10120 is designed to enhance efficiency and productivity in industrial operations. Its carbide construction ensures durability, reducing downtime and extending tool life. With precise cutting edge lengths and corner radii, it delivers consistent performance, minimizing material waste. The insert’s compatibility with Komet tools and machines streamlines workflows, enabling faster setup and operation. Additionally, its ability to handle high-volume machining tasks ensures superior results, making it a valuable asset for industries seeking to optimize their processes and improve overall productivity. The W00 10120 PDF provides detailed insights to maximize these benefits.

4.3 Durability and Reliability in Industrial Settings

The Komet W00 10120 carbide insert is renowned for its exceptional durability and reliability in demanding industrial environments. Constructed from high-quality carbide, it withstands intense machining stresses and resists wear and tear effectively. Its robust design ensures consistent performance over extended periods, minimizing downtime and enhancing operational continuity. The insert’s precise engineering and materials guarantee reliability, even in high-volume production settings. This makes it a dependable choice for industries requiring consistent and long-lasting tool performance. The W00 10120’s durability is a key factor in its popularity for industrial applications.

Comparison with Other Komet Products

The Komet W00 10120 stands out for its unique features and specifications, offering distinct advantages compared to other Komet products like the A20 10120.

5.1 Differences Between W00 10120 and A20 10120

The W00 10120 and A20 10120 differ in specifications and applications. The W00 10120 features a cutting edge length of 11.6 mm, an inscribed circle diameter of 17.6 mm, and a thickness of 6 mm with a corner radius, making it ideal for drilling applications. In contrast, the A20 10120 may have varying dimensions and material properties, suited for different machining tasks. These distinctions highlight their unique roles in industrial processes, catering to specific manufacturing needs.

5.2 Unique Characteristics of W00 10120

The W00 10120 stands out due to its carbide insert material, offering exceptional hardness and wear resistance. Its cutting edge length of 11.6 mm and corner radius provide versatility in machining processes. Designed for drilling applications, it ensures precise and efficient results. The product’s thickness of 6 mm and inscribed circle diameter of 17.6 mm enhance its stability and performance. Its compatibility with Komet tools and machines makes it a integral part of industrial solutions. These unique characteristics position the W00 10120 as a high-performance tool for demanding manufacturing tasks.

5.3 Application-Specific Comparisons

The W00 10120 excels in drilling and machining applications due to its carbide construction and precise cutting edge. Its compatibility with Komet tools enhances versatility across various industrial tasks. Compared to other inserts, it offers superior surface finish and durability in demanding environments. The product’s dimensions and corner radius make it ideal for specific machining requirements. Its application-specific design ensures optimal performance in manufacturing and production processes, setting it apart from general-purpose tools. This tailored approach makes the W00 10120 a preferred choice for industries seeking reliable and efficient solutions.

Supply and Availability

The Komet W00 10120 is widely available through authorized distributors and online retailers, ensuring easy access for industrial users. Its PDF is downloadable online, providing quick technical reference.

6.1 Authorized Distributors and Retailers

The Komet W00 10120 is available through a network of authorized distributors and retailers, ensuring customers access to genuine products. These partners are vetted by Komet to guarantee authenticity and quality. Purchasing from authorized sources provides peace of mind, as they offer technical support, warranty services, and reliable customer care. The official Komet website provides a comprehensive list of authorized distributors, making it easy for users to locate trusted suppliers. This ensures that customers receive products that meet Komet’s high standards, maintaining performance and reliability in industrial applications.

6.2 Online Availability and Download Options

The Komet W00 10120 PDF is readily available for download on the official Komet website and authorized portals. This document provides detailed product information, including technical specifications, features, and guidelines. Users can easily access the PDF online, ensuring they stay updated with the latest details and instructions. The online availability simplifies the process of obtaining essential information, making it convenient for professionals to reference the document whenever needed. This resource is a reliable way to gain insights into the product’s capabilities and applications, supporting efficient decision-making and implementation.

6.3 Ensuring Authenticity and Quality

To ensure the authenticity and quality of the Komet W00 10120, it is crucial to purchase from authorized distributors or directly through Komet’s official website. These sources guarantee genuine products that meet the manufacturer’s high standards; Additionally, users can verify the product’s authenticity by checking for official packaging, logos, and documentation. Komet implements strict quality control measures to ensure reliability and performance. For further assurance, customers can contact Komet’s support team to validate their products. This commitment to quality ensures that the W00 10120 delivers exceptional results in industrial applications.

si joint pain exercises pdf

The sacroiliac (SI) joint, located at the base of the spine, can cause lower back pain when inflamed or dysfunctional. Symptoms include discomfort in the buttocks or thighs, often worsened by activities like sitting or lifting. Common causes include poor posture, accidents, or repetitive movements, leading to stiffness and limited mobility. Addressing SI joint pain early is crucial to prevent chronic discomfort and improve overall quality of life. Gentle exercises and proper posture can help alleviate symptoms and restore joint function. Always consult a healthcare professional for persistent pain.

1.1 Understanding the Sacroiliac Joint

The sacroiliac (SI) joint connects the sacrum (base of the spine) to the ilium (pelvic bone), playing a key role in weight distribution and movement. It is a synovial joint with limited mobility, providing stability during activities like walking or lifting. The SI joint is supported by strong ligaments and muscles, but inflammation or dysfunction can lead to pain. Symptoms often include discomfort in the lower back, buttocks, or thighs. Factors like poor posture, repetitive movements, or pregnancy can strain the joint, causing misalignment or stiffness. Understanding its structure and function is essential for effective pain management and rehabilitation.

1.2 Common Causes of SI Joint Pain

SI joint pain often arises from inflammation or dysfunction caused by conditions like sacroiliitis, arthritis, or ligament sprains. Poor posture, repetitive movements, or sudden injuries can strain the joint, leading to discomfort. Pregnancy and childbirth may also cause SI joint instability due to hormonal changes and added stress. Additionally, uneven weight distribution from activities like crossing legs or standing on one side can exacerbate pain. Addressing the root cause is crucial for effective treatment, whether through exercises, physical therapy, or lifestyle adjustments.

Gentle Stretches for SI Joint Pain Relief

Gentle stretches can help alleviate SI joint pain by improving flexibility and reducing stiffness. These exercises target the sacroiliac joint and surrounding muscles to promote comfort and mobility.

2.1 Single Knee-to-Chest Stretch

The Single Knee-to-Chest Stretch is a simple yet effective exercise for relieving SI joint pain. Lie on your back with your knees bent and feet flat on the floor. Bring one knee toward your chest while keeping the other foot on the ground. Hold for 20-30 seconds, then gently lower your leg back down. Repeat on the other side. This stretch helps improve flexibility in the sacroiliac joint and reduces tension in the lower back. Perform 2-3 repetitions on each side, ensuring the movement is pain-free. Avoid bouncing or forcing the stretch beyond a comfortable range.

2.2 Pelvic Tilts and Bridging Exercises

Begin by lying on your back with knees bent and feet flat on the floor. Gently tilt your pelvis upward, flattening your lower back against the floor, and hold for 5 seconds. Slowly release and repeat 10-15 times. For bridging, lift your hips toward the ceiling, squeezing your glutes at the top, then lower back down. Perform 10-12 repetitions, resting briefly between sets. These exercises strengthen pelvic muscles and improve SI joint stability. Ensure movements are slow and controlled, avoiding pain. If discomfort occurs, modify the range of motion or consult a therapist.

Strengthening Exercises for the Sacroiliac Joint

Strengthening exercises target the muscles around the SI joint, improving stability and reducing pain. Focus on hip thrusts, core workouts, and pelvic stabilizers to enhance joint support and function.

3.1 Hip Thrusts (Supine Bridge)

Hip thrusts, also known as supine bridges, are effective for strengthening the muscles around the SI joint. Lie on your back with knees bent and feet flat. Slowly lift your hips towards the ceiling, squeezing your glutes at the top, then lower back down. Perform 10-15 repetitions, ensuring movement is pain-free. This exercise targets the glutes and core, improving pelvic stability and reducing SI joint strain. It’s essential to maintain proper form to avoid discomfort and maximize benefits.

3.2 Core Strengthening Exercises

Strengthening the core muscles is essential for stabilizing the sacroiliac joint. Exercises like planks, bird-dog, and pelvic tilts target the abdominals and lower back muscles. Planks help build isometric strength, while bird-dog exercises improve balance and coordination. Perform these exercises with controlled movements, avoiding any pain. Strengthening the core reduces SI joint strain by providing better pelvic stability; Start with gentle repetitions and gradually increase intensity. Proper form is crucial to avoid injury. Consulting a physical therapist can help tailor exercises to individual needs, ensuring safety and effectiveness.

Physical Therapy and Mobilization Techniques

Physical therapy and mobilization techniques, such as joint massage and gentle exercises, can improve sacroiliac joint mobility and reduce stiffness. Professional guidance ensures safe and effective treatment.

4.1 Role of a Physical Therapist

A physical therapist plays a crucial role in managing SI joint pain by designing personalized exercise programs and using manual techniques like massage and joint mobilization. They assess the patient’s condition, identify limitations, and create tailored plans to improve mobility and strength. Therapists also educate patients on proper posture and movements to avoid aggravating the joint. Their expertise ensures safe and effective treatment, addressing both the symptoms and underlying causes of SI joint dysfunction, and helping patients achieve long-term relief and improved function.

4.2 Joint Mobilization and Massage

Joint mobilization and massage are effective techniques for SI joint pain relief. Mobilization involves gentle movements to restore joint alignment and reduce stiffness, improving flexibility and reducing discomfort. Massage targets tight muscles around the SI joint, enhancing blood flow and relaxation. These methods, often performed by a physical therapist, help reduce inflammation and promote healing. Regular sessions can significantly alleviate pain and improve mobility, making daily activities easier. These therapies are typically combined with exercises for optimal results, ensuring the SI joint functions properly and pain is managed effectively.

Posture and Ergonomic Tips to Prevent SI Joint Pain

Maintaining proper posture and ergonomic alignment is crucial to prevent SI joint strain. Avoid uneven weight distribution, use supportive furniture, and take regular breaks to move and stretch.

5.1 Avoiding Uneven Weight Distribution

Uneven weight distribution can strain the sacroiliac joint, leading to pain and discomfort. To avoid this, refrain from crossing your legs, standing on one leg, or leaning unevenly. When sitting, ensure both feet are flat on the floor or a footrest, with knees at hip level. While standing, distribute weight evenly on both feet, keeping shoulders relaxed. Avoid activities that require prolonged imbalance, such as carrying heavy bags on one shoulder. Proper balance helps maintain SI joint stability and prevents inflammation. Regular posture checks can help develop habits that support joint health and reduce pain risk.

5.2 Proper Standing and Sitting Postures

Proper posture is essential to reduce SI joint strain. When standing, keep shoulders back, pelvis in a neutral position, and weight evenly distributed on both feet. Avoid slouching or leaning forward. When sitting, choose a chair with lumbar support and ensure knees are at hip level or slightly lower. Feet should be flat on the floor or a footrest to maintain balance. Avoid crossing legs or sitting unevenly, as this can strain the SI joint. Regularly adjust your position to avoid prolonged static postures. Taking short breaks to stand or move can also help maintain proper alignment and reduce discomfort.

When to Seek Professional Help

Seek professional help if SI joint pain is severe, persists despite exercises, or limits mobility. Consult a healthcare provider for personalized treatment, including physical therapy or medical interventions.

6.1 Signs of Severe Pain or Limited Mobility

Severe SI joint pain may manifest as persistent ache, sharp discomfort, or radiating pain in the lower back or legs. Limited mobility, such as difficulty standing, walking, or bending, can indicate advanced dysfunction. If pain exceeds 4/10 on the pain scale or worsens with movement, seek medical attention. Numbness, tingling, or weakness in the legs may signal nerve involvement. Avoiding activities due to pain or experiencing stiffness after rest are red flags. Consulting a healthcare professional is crucial to address underlying issues and prevent further deterioration. Early intervention can significantly improve recovery outcomes and restore functional mobility.

6.2 Importance of Medical Evaluation

Medical evaluation is crucial for accurately diagnosing the cause of SI joint pain and ruling out other conditions. A healthcare professional can assess symptoms, perform physical exams, and may recommend imaging tests for confirmation. Early evaluation ensures proper treatment plans, preventing complications like chronic pain or mobility issues. Delaying medical care can worsen symptoms, making recovery more challenging. A tailored approach by a specialist, such as a physical therapist or chiropractor, addresses specific needs. Professional guidance ensures safe and effective management of SI joint pain, promoting long-term relief and improved quality of life. Timely intervention is key to optimal outcomes.

dodge dakota manual

The Dodge Dakota manual is a comprehensive guide essential for understanding and maintaining your vehicle. It provides detailed instructions for operation, troubleshooting, and repairs, ensuring optimal performance and safety. Whether you’re a DIY enthusiast or a professional technician, this manual offers invaluable insights to keep your Dakota running smoothly. With clear diagrams and step-by-step instructions, it empowers owners to handle maintenance and upgrades confidently.

1.1 Importance of the Manual for Vehicle Maintenance

The Dodge Dakota manual is crucial for proper vehicle maintenance and preventing costly repairs. It provides schedules for routine checks, oil changes, and tire rotations, ensuring longevity. The manual also includes DIY repair solutions and troubleshooting guidance for common issues. By following its recommendations, owners can maintain their Dakota’s performance and safety, benefiting both new and experienced users.

1.2 Where to Find the Dodge Dakota Manual Online

The Dodge Dakota manual can be easily accessed online through various platforms. Authorized dealerships and official Dodge websites offer free downloads for specific model years. Additionally, forums, repair websites, and third-party providers like Haynes or Autozone offer digital versions. Some platforms require a subscription or a one-time fee, while others provide free access. This ensures owners can conveniently locate and download the manual for their vehicle.

History of the Dodge Dakota

The Dodge Dakota, introduced in 1987, was a mid-size pickup truck produced until 2011. Known for its durability and versatility, it became a popular choice for both work and leisure.

2.1 Overview of Dakota Generations (1987-2011)

The Dodge Dakota debuted in 1987 as a compact pickup, evolving through three generations until 2011. The first generation (1987-1996) introduced a robust, versatile design with V6 and V8 engine options. The second generation (1997-2004) featured a more modern styling and improved performance. The third generation (2005-2011) offered enhanced capabilities, including a 4.7L V8 and improved towing capacity, making it a reliable choice for both work and leisure.

2.2 Notable Model Years and Updates

Key updates occurred in 1997 with the second-generation redesign, featuring a more modern style and improved engines. The 2005 model introduced a 4.7L V8 and enhanced towing capacity. In 2010, suspension tweaks improved ride quality, though the 6-speed manual transmission was discontinued. These updates refined the Dakota, balancing performance and practicality, making it a versatile pickup for various needs throughout its production run.

Types of Manuals Available

Dodge Dakota manuals include owner’s, service, repair, and parts manuals. These resources cover maintenance, diagnostics, and component details, catering to both DIY enthusiasts and professionals effectively.

3.1 Owner’s Manual vs. Service Manual

The owner’s manual provides essential information for everyday use, such as operating instructions, features, and basic maintenance tips. In contrast, the service manual offers in-depth technical details, diagnostic procedures, and repair instructions for professional or advanced users. Both manuals are crucial for optimal vehicle care, but they cater to different levels of expertise and needs. Understanding their purposes ensures proper utilization of each resource effectively.

3.2 Repair and Parts Manuals

Repair and Parts Manuals provide detailed instructions for fixing and replacing components, ensuring proper functionality. They include wiring diagrams, parts lists, and step-by-step repair procedures. These manuals are invaluable for technicians and DIY enthusiasts, offering insights into complex systems like engines, transmissions, and electrical circuits. By following these guides, users can perform accurate repairs, maintain safety, and extend the lifespan of their Dodge Dakota effectively.

Key Features of the Dodge Dakota

The Dodge Dakota stands out with its powerful engine options, including V6 and V8 choices, paired with automatic or manual transmissions for versatile performance. Known for its durability and robust build, it features advanced safety systems and maintenance-friendly designs, ensuring reliability and ease of upkeep for drivers seeking a dependable pickup truck.

4.1 Engine Options and Specifications

The Dodge Dakota offered a range of powerful engines, including the Magnum 3.9-liter V6 and the 5.9-liter V8. The 3.9-liter V6 delivered 175 horsepower, ideal for everyday driving, while the 5.9-liter V8 provided increased power for towing and hauling. Both engines were paired with either automatic or manual transmissions, catering to diverse driver preferences and workload requirements. These options ensured the Dakota met various performance and utility needs.

4.2 Transmission Types (Automatic and Manual)

The Dodge Dakota offered both automatic and manual transmissions to suit different driving preferences; The automatic transmission provided smooth shifting and ease of use, while the manual transmission offered precise control and sporty driving dynamics. Earlier models featured a five-speed manual, though later years saw the discontinuation of this option. Both transmission types were designed to optimize performance, fuel efficiency, and towing capacity, catering to a wide range of needs.

4.3 Safety Features and Maintenance Tips

The Dodge Dakota manual emphasizes safety through features like airbags and anti-lock braking systems. Regular maintenance, such as cooling system checks and tire pressure monitoring, is crucial for reliability. Owners are advised to follow scheduled maintenance procedures to prevent breakdowns. Proper loading of trailers and adherence to weight limits ensure safe towing. By following the manual’s guidelines, drivers can optimize safety and performance on the road.

Maintenance and Repair Guidance

The Dodge Dakota manual provides detailed maintenance schedules and repair procedures. Regular checks, fluid changes, and timely inspections ensure longevity and reliability. Follow the manual’s guidelines for optimal performance and to address common issues promptly.

5.1 Scheduled Maintenance Procedures

The Dodge Dakota manual outlines essential scheduled maintenance procedures to ensure optimal vehicle performance. Regular oil changes, tire rotations, and fluid checks are crucial. The manual also details inspections for brakes, suspension, and belts. Adhering to these schedules helps prevent mechanical issues, enhances fuel efficiency, and prolongs the vehicle’s lifespan. Neglecting these routines can lead to reduced efficiency and potential long-term damage.

5.2 Common Repairs and DIY Solutions

The Dodge Dakota manual provides guidance for common repairs, such as replacing belts, changing fluids, and fixing minor electrical issues. DIY solutions are emphasized, with step-by-step instructions for tasks like brake pad replacements and suspension adjustments. These solutions empower owners to address issues independently, saving costs and fostering a deeper understanding of their vehicle’s mechanics. Regular DIY maintenance can extend the truck’s lifespan and performance.

Troubleshooting Common Issues

The Dodge Dakota manual offers detailed guidance for diagnosing common problems, such as electrical faults and cooling system issues. It provides step-by-step solutions to help owners identify and resolve issues efficiently, ensuring optimal vehicle performance and safety. Regular troubleshooting can prevent minor problems from becoming major repairs.

6.1 Electrical System Diagnostics

The Dodge Dakota manual provides detailed wiring diagrams and diagnostic steps for identifying electrical system issues. It covers circuits like A/C, heater, and battery systems, helping users locate faults. Common problems such as blown fuses, faulty sensors, or connector issues are addressed with clear repair guidance. This section ensures owners can troubleshoot and resolve electrical system problems efficiently, preventing further damage and ensuring reliable vehicle operation;

6.2 Cooling System Maintenance

The Dodge Dakota manual outlines essential cooling system maintenance procedures to prevent overheating and ensure engine longevity. It includes steps for inspecting hoses, belts, and the radiator, as well as guidance for checking coolant levels and replacing the coolant. Regular maintenance of the cooling system is crucial for optimal performance and to avoid costly repairs. Follow the manual’s recommendations to keep your Dakota running smoothly and efficiently.

Resources for Dodge Dakota Owners

Explore official Dodge websites, forums, and authorized dealers for genuine parts and expert advice. Utilize online communities like Internet Archive and Haynes Manuals for repair guides and troubleshooting tips. Access FlexCare service contracts and download specific model year manuals (e.g., 2001, 2011) directly from trusted sources to enhance your Dakota’s performance and longevity.

7.1 Online Forums and Communities

Join dedicated forums like forums.dodge.com and Reddit’s r/DodgeDakota for expert advice and real-world experiences. These platforms offer troubleshooting tips, DIY guides, and discussions on upgrades. Access repair manuals and wiring diagrams from trusted sources like the Internet Archive and Haynes Manuals. Engage with enthusiasts and professionals to resolve issues and enhance your Dakota’s performance. Visit www.dodge.com for official resources and support.

7.2 Authorized Dealers and Service Centers

Visit authorized Dodge dealerships for genuine parts and expert service. Use the dealership locator on www.dodge.com to find certified centers near you. Schedule appointments for routine maintenance, repairs, or warranty work. Authorized service centers ensure your Dakota receives factory-approved care, maintaining its performance and longevity. Trust certified technicians for accurate diagnostics and reliable solutions, ensuring your vehicle runs at its best. Contact www.dodge.com for dealership details.

DIY Projects and Upgrades

Explore DIY projects and upgrades for your Dodge Dakota, including suspension tweaks, aftermarket modifications, and maintenance tips for enhanced performance and customization.

8.1 Upgrading Suspension for Better Ride

Upgrading your Dodge Dakota’s suspension enhances ride comfort and handling. Consider coilovers or lift kits for improved stability and ground clearance. Ensure proper alignment and installation to maintain safety and performance. Consult your manual or a professional for guidance on selecting the right components and tools for a successful upgrade, ensuring optimal results for both on-road and off-road driving experiences.

8.2 Installing Aftermarket Parts

Installing aftermarket parts on your Dodge Dakota can enhance performance, aesthetics, or functionality. Always choose parts compatible with your vehicle’s make and model year. Consult your manual or a professional to ensure proper fitment and installation. Follow manufacturer instructions carefully to avoid damage or safety risks. Research reviews and warranties before purchasing to guarantee quality and reliability for your upgrade.

The Dodge Dakota manual is a vital resource for owners, offering insights into maintenance, repairs, and upgrades. Regularly referring to it ensures optimal vehicle performance and longevity.

9.1 Summary of Key Points

The Dodge Dakota manual is a comprehensive guide covering maintenance, repairs, and upgrades. It includes detailed instructions for troubleshooting electrical and cooling systems, essential for optimal performance. The manual serves as a valuable resource for both DIY enthusiasts and professional technicians, ensuring safety and longevity. By following its guidelines, owners can maintain their vehicle effectively, addressing common issues and enhancing overall functionality.

9.2 Final Tips for Optimizing Your Dodge Dakota

Regularly check and maintain fluid levels, filters, and belts to ensure peak performance. Follow the manual’s guidelines for scheduled maintenance to prevent potential issues. Consider upgrading suspension for a smoother ride and install aftermarket parts for enhanced functionality. Join online forums for community support and stay updated on the latest modifications to keep your Dakota running efficiently and safely for years to come.

« Older posts