Month: June 2024 (Page 2 of 2)

pdp guide rod

The PDP guide rod is a performance-enhancing accessory designed for Walther PDP pistols, improving recoil management and shooting accuracy. Crafted from premium materials like stainless steel or brass, it offers compatibility with various PDP models, including PDP Pro, PDP Pro-X PMM, and PPQ, while providing a direct drop-in upgrade to enhance overall shooting performance.

1.1 Overview of the PDP Guide Rod

The PDP guide rod is a critical component designed to enhance the performance of Walther PDP pistols. Crafted from durable materials like stainless steel or brass, it ensures smooth recoil management and improved accuracy. Available in various configurations, including captured guide rods, it offers compatibility with multiple PDP models, such as PDP Pro, PDP Pro-X PMM, and PPQ. Its precision engineering and robust design make it a reliable upgrade for shooters seeking improved functionality and reliability.

1.2 Importance of the Guide Rod in Pistol Functionality

The guide rod plays a pivotal role in the functionality of the PDP pistol, ensuring smooth and reliable operation. It directs the recoil spring’s compression and expansion, controlling slide movement and managing energy transfer during the firing cycle. This critical component enhances accuracy, reduces felt recoil, and improves shot-to-shot recovery, making it essential for optimal performance and reliability in both competitive and tactical shooting scenarios.

Design and Construction of the PDP Guide Rod

Crafted from high-quality materials like stainless steel or brass, the PDP guide rod is precision-machined for durability and performance, ensuring a single-piece design that enhances reliability and functionality.

2.1 Materials Used in the Guide Rod

The PDP guide rod is constructed from premium materials, including stainless steel and American brass, ensuring exceptional durability and weight. Stainless steel offers strength and corrosion resistance, while brass provides increased mass for better recoil control. These materials are carefully selected to enhance performance and longevity, making the guide rod a reliable upgrade for Walther PDP pistols.

2.2 Engineering and Machining Processes

The PDP guide rod undergoes precise engineering and machining processes to ensure optimal performance. It is precision-machined from stainless steel bar stock or single-piece American brass, with attention to detail for a perfect fit. The captured guide rod system is designed to optimize recoil dynamics, while flatwire springs enhance tunability. These processes ensure durability, reliability, and improved functionality, making it a standout upgrade for Walther PDP pistols.

Functionality and Purpose of the Guide Rod

The PDP guide rod is designed to optimize the recoil system, controlling slide movement and managing energy transfer during the firing cycle for improved shooting performance.

3.1 Role in Recoil Management

The PDP guide rod plays a crucial role in recoil management by controlling slide movement and directing the recoil spring’s compression and expansion. It optimizes energy transfer during the firing cycle, reducing felt recoil and muzzle rise. Designed with flatwire springs, it allows shooters to tune the recoil impulse for smoother operation. This system ensures consistent performance, making it an essential component for enhancing shooting comfort and control.

3.2 Impact on Shooting Performance

The PDP guide rod significantly enhances shooting performance by reducing felt recoil and improving shot-to-shot recovery. Its heavy-duty construction, often in stainless steel or brass, increases weight, stabilizing the pistol during firing. This results in tighter shot groups and faster target reacquisition. Enhanced stability and controlled muzzle rise allow for more accurate and consistent shooting, making it a valuable upgrade for competitive shooters and tactical users seeking precision and reliability.

Compatibility with Various PDP Models

The PDP guide rod is compatible with multiple models, including PDP, PDP Pro, PDP Pro-X PMM, PDP SF, F-Series, PPQ, and P99, ensuring wide versatility and performance.

4.1 Supported PDP Models

The PDP guide rod is compatible with various Walther PDP models, including the standard PDP, PDP Pro, PDP Pro-X PMM, PDP SF, and F-Series. It also supports the PPQ and P99 models, ensuring wide versatility. Designed for both 4-inch and 5-inch slide lengths, this guide rod is a universal upgrade for many PDP owners. Additionally, it is compatible with non-steel frame models, enhancing its adaptability across different pistol configurations.

4.2 Considerations for Different Slide Lengths

The PDP guide rod is optimized for compatibility with both 4-inch and 5-inch slide lengths, ensuring consistent performance across various models. Designed for non-steel frame pistols, it accommodates different slide configurations without compromising functionality. The guide rod’s engineering ensures smooth operation and recoil management, regardless of the slide length, making it a versatile upgrade for PDP owners seeking enhanced reliability and accuracy.

Benefits of Upgrading the PDP Guide Rod

Upgrading the PDP guide rod enhances shooting performance by reducing felt recoil, improving stability, and increasing accuracy. Heavy-duty materials like stainless steel or brass provide durability and reliability.

5.1 Reduced Felt Recoil

The PDP guide rod significantly minimizes felt recoil, allowing shooters to maintain better control and recover quickly between shots. By using heavier materials like stainless steel or brass, the guide rod absorbs and distributes recoil energy more effectively, resulting in a smoother shooting experience. This upgrade is particularly beneficial for competitive shooters and those seeking improved accuracy and comfort during rapid fire.

5.2 Enhanced Stability and Accuracy

The PDP guide rod enhances stability by improving weight distribution and minimizing slide movement during recoil. This results in tighter shot groups and improved accuracy. The use of high-quality materials and precision engineering ensures consistent performance, while the flatwire spring system allows for fine-tuned recoil management, making it ideal for both competitive shooters and tactical applications.

Installation and Maintenance Tips

Installation involves replacing the stock guide rod with the upgraded unit, ensuring proper alignment and secure fit. Regular cleaning and lubrication of the guide rod and springs maintain optimal performance and durability.

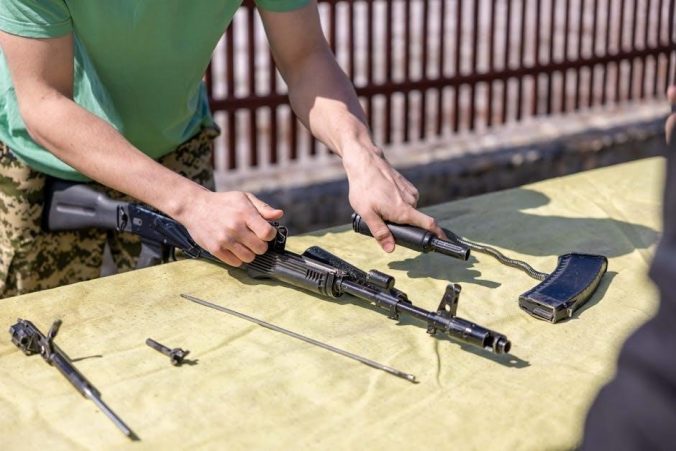
6.1 Step-by-Step Installation Guide

Begin by field-stripping your PDP pistol to access the recoil system; Use a punch or wrench to remove the old guide rod and recoil spring. Align the new guide rod with the slide, ensuring proper seating. Reassemble the pistol and test function by cycling the slide several times. Finally, take the pistol to a controlled environment to verify reliable operation and accuracy.

6.2 Maintenance and Care Instructions

Regularly clean the guide rod and surrounding areas to remove dirt and debris; Use a mild solvent and dry thoroughly to prevent rust. Apply a high-quality lubricant to moving parts to ensure smooth operation. Inspect for wear or damage periodically and replace as needed. Proper maintenance enhances reliability and performance, ensuring optimal functionality of your PDP guide rod.

Aftermarket Options and Manufacturers

Popular brands like ZR Tactical Solutions, Sprinco, and Practical Performance offer high-quality guide rods for the PDP, featuring stainless steel or brass construction and advanced spring systems.

7.1 Popular Brands Offering Guide Rod Upgrades

ZR Tactical Solutions, Sprinco, and Practical Performance are leading manufacturers offering premium guide rods for the PDP. ZR Tactical’s Ultra Mass Guide Rod, crafted from stainless steel or brass, provides exceptional weight and durability. Sprinco’s Captured Stainless Guide Rod ensures smooth recoil management, while Practical Performance’s designs allow easy spring weight customization. These brands deliver enhanced performance and reliability for PDP owners.

7.2 Comparing Different Models and Features

Guide rods for the PDP vary in materials and design, with stainless steel and brass options offering durability and weight advantages. Captured guide rods prevent spring loss, while flatwire springs enhance recoil tuning. Models like the ZR Tactical Ultra Mass Guide Rod and Sprinco’s Captured Stainless Guide Rod cater to different needs, ensuring compatibility across PDP models. Each design emphasizes performance, durability, and customization for tailored shooting experiences.

Choosing the Right Guide Rod for Your Needs

Selecting the ideal guide rod involves considering factors like shooting style, pistol model, and personal preferences. The right choice enhances performance and shooting satisfaction.

8.1 Factors to Consider in Selection

When selecting a PDP guide rod, consider compatibility with your specific PDP model, slide length, and frame type. Material options such as stainless steel or brass offer different weights and durability. Recoil spring weight and adjustability are crucial for tuning performance. Additionally, ensure the guide rod is designed for your intended use, whether for competition, self-defense, or recreational shooting.

8.2 User Reviews and Recommendations

Users praise the PDP guide rod for its effectiveness in reducing recoil and enhancing accuracy. Many recommend opting for stainless steel or brass models for durability and weight. Shooters highlight the ease of installation and the noticeable improvement in shooting performance. Popular brands like ZR Tactical Solutions and Practical Performance are frequently endorsed. Reviews emphasize the importance of selecting the right spring weight for optimal results, tailored to individual shooting styles and preferences.

The PDP guide rod is a vital upgrade for enhancing pistol performance, offering reduced recoil, improved accuracy, and compatibility with various models for a superior shooting experience.

9.1 Summary of Key Points

The PDP guide rod is a crucial upgrade for optimizing pistol performance, designed to enhance recoil management and improve shooting accuracy. Constructed from durable materials like stainless steel or brass, it offers compatibility with various Walther PDP models, including PDP Pro, PDP Pro-X PMM, and PPQ. As a drop-in upgrade, it provides reduced felt recoil, enhanced stability, and the ability to customize spring weights for personalized performance.

9.2 Final Thoughts on Upgrading

Upgrading your PDP guide rod is a cost-effective way to enhance your pistol’s performance; By reducing felt recoil and improving stability, it offers a more controlled and accurate shooting experience. With options like stainless steel or brass constructions, users can choose the best fit for their needs. Trusted manufacturers like ZR Tactical Solutions provide reliable upgrades, making it a worthwhile investment for both recreational and competitive shooters.

Further Reading and Resources

Explore more about PDP guide rods through manufacturer guides, installation tutorials, and community discussions from trusted sources like ZR Tactical, Sprinco, and DPM Systems.

10.1 Recommended Articles and Guides

For deeper insights, check out “Optimizing Recoil Management with PDP Guide Rods” by ZR Tactical and “Enhancing PDP Performance” by DPM Systems. Additionally, “The Ultimate Guide to PDP Upgrades” by Practical Performance offers comprehensive tips. These resources provide detailed installation guides, troubleshooting, and expert recommendations to maximize your PDP’s potential.

10.2 Community Forums and Discussions

Join forums like Reddit’s r/WaltherPDP and Facebook’s PDP Enthusiasts Group for lively discussions on guide rod upgrades. Users share experiences, ask questions, and post reviews. YouTube channels like “PDP Modifications” offer hands-on videos and tips. These platforms foster community engagement and provide valuable insights for optimizing your PDP’s performance through guide rod upgrades and beyond.

16 week half marathon training plan pdf

This structured 16-week program is designed for intermediate runners aiming to build endurance and speed progressively. It includes tailored workouts, recovery sessions, and strategies to ensure runners reach race day ready for 13.1 miles.

Overview of the Training Plan

This 16-week half marathon training plan is tailored for intermediate runners who can comfortably run between 5-10km. It progresses gradually, ensuring a balanced mix of running, recovery, and strength training. The plan is divided into three phases: base building, endurance development, and race-specific preparation. Each week includes 4 structured training sessions, with one day dedicated to long runs and another for cross-training or rest. The program emphasizes consistency and progressive overload to build stamina and speed. Weeks 1-4 focus on establishing a solid foundation, while weeks 5-8 concentrate on increasing endurance. Weeks 9-12 introduce race-pace workouts, and weeks 13-16 involve tapering to ensure peak performance on race day. The plan also incorporates tips on nutrition, hydration, and recovery to support overall progress. By following this structured approach, runners can confidently prepare for the 13.1-mile challenge ahead.

Understanding the Training Schedule

The 16-week plan is structured with progressive workouts, blending running, recovery, and cross-training. Each week includes specific runs, rest days, and long runs, ensuring a balanced approach to build endurance and prevent injury.

Weekly Breakdown of Workouts

The 16-week plan divides workouts into four weekly sessions, including three runs, one cross-training session, and one long run. Each week starts with a rest day or recovery run, followed by speed or threshold workouts. Strength training and mobility sessions are integrated twice a week to enhance performance and reduce injury risk. The long run on Sundays increases gradually, building endurance up to 10-12 miles by race week. Recovery runs are designed to promote active recovery without overexertion. Cross-training, such as cycling or swimming, is included to improve cardiovascular fitness without the impact of running. This balanced approach ensures consistent progress, allowing runners to peak at the right time for race day. The plan also includes rest weeks every fourth week to allow muscles to recover and adapt, ensuring sustained progress throughout the 16 weeks. Proper pacing and hydration strategies are emphasized during long runs to simulate race conditions effectively.

Building a Strong Foundation

Consistent running, strength training, and mobility work are essential in the first weeks to establish a solid base. This phase focuses on injury prevention and building endurance for more intense training ahead.

Weeks 1-4: Base Building

The first four weeks focus on establishing a consistent running routine, with an emphasis on building endurance and preventing injuries. Workouts include shorter runs, recovery sessions, and strength training to enhance overall fitness and stability. These weeks are crucial for creating a solid foundation that will support more intense training in later phases. By incorporating mobility exercises and proper recovery techniques, runners can gradually increase their mileage without risking overtraining. This period is designed to help runners build confidence and prepare their bodies for the demands of the upcoming weeks, ensuring a strong start to their half marathon journey.

Increasing Endurance

This phase focuses on gradually increasing stamina through longer runs and threshold workouts, ensuring runners build the necessary endurance to tackle the demands of the half marathon distance effectively and confidently.

Weeks 5-8: Building Endurance

During weeks 5 to 8, the focus shifts to building endurance through progressively longer runs and structured workouts. This phase introduces threshold runs, tempo runs, and long slow distance (LSD) runs to enhance stamina and mental resilience. Runners will gradually increase their weekly mileage, with one shorter recovery run mid-week and a longer run on the weekends. Strength training and cross-training sessions are incorporated to improve overall running efficiency and reduce injury risk. Proper recovery, including stretching and hydration, is emphasized to support the body’s adaptation to the increased demands. By the end of week 8, runners should notice significant improvements in their endurance, allowing them to tackle longer distances with confidence. Consistency and patience are key during this phase, as the body adapts to the progressive overload. This foundational endurance will serve as the backbone for the more intense training phases ahead.

Advanced Training Techniques

This phase incorporates speed work, interval training, and strength sessions to enhance running efficiency and endurance. Threshold runs and tempo workouts are introduced to improve race pace and mental toughness. Proper recovery is emphasized to optimize performance and prevent injuries.

Weeks 9-12: Race-Specific Training

During weeks 9-12, the focus shifts to race-specific training, fine-tuning your fitness for the demands of the half marathon. This phase introduces threshold runs, interval workouts, and race-pace segments to build speed and endurance. Long runs are gradually reduced to allow for recovery while maintaining stamina. Strength training continues to enhance running efficiency and prevent injuries. The plan incorporates simulated race conditions, such as pacing and fueling strategies, to mentally and physically prepare you for race day. Tapering strategies are introduced to ensure peak performance, balancing intensity with recovery. This phase is crucial for adapting to the specific demands of the event, ensuring you feel confident and ready to tackle the 13.1-mile distance effectively.

Final Preparations

Final preparations involve tapering training volume and intensity, focusing on active recovery through light runs and cross-training, while mentally preparing for race day and organizing race logistics to ensure readiness.

Weeks 13-16: Taper and Race Prep

During the final four weeks, the focus shifts to tapering and race preparation. This phase reduces training volume and intensity to allow the body to recover and adapt, ensuring peak performance on race day. Week 13 introduces a slight reduction in mileage, with shorter runs and recovery sessions. Threshold workouts are included to maintain speed and endurance without overexertion. By week 14, the long run distance begins to decrease, while easy runs and cross-training continue to keep the body active without strain. Weeks 15 and 16 focus on active recovery, with minimal running and emphasis on rest, stretching, and mental preparation. The final week includes a taper, with only light jogging or short runs to keep the legs fresh. This strategic approach ensures runners feel rested, confident, and ready to perform at their best during the half marathon.

vissani window air conditioner manual

Welcome to the Vissani Window Air Conditioner Manual, your comprehensive guide to installing, operating, and maintaining your unit. This manual provides essential instructions for optimal performance and safety, ensuring you get the most out of your Vissani air conditioner. Whether you’re a new user or looking to troubleshoot, this resource covers everything you need to know.

Overview of the Vissani Window Air Conditioner

The Vissani Window Air Conditioner is a compact and energy-efficient cooling solution designed for single-room use. Available in models like VWA05 (5000 BTU) and VPA06 (6000 BTU), it offers multiple fan speeds, a remote control, and an adjustable thermostat for precise temperature control. With a focus on ease of use, it features a washable filter and energy-saving modes to optimize performance. Suitable for windows 25-36 inches wide, it provides reliable cooling for spaces up to 250 square feet, making it ideal for small rooms or offices.

Importance of the Manual for Proper Usage

The manual is crucial for safe and effective operation of your Vissani Window Air Conditioner. It provides step-by-step installation guidance, maintenance tips, and troubleshooting solutions, ensuring optimal performance. By following the manual, you can prevent hazards, extend the unit’s lifespan, and maintain energy efficiency. Referencing the manual helps users understand features like the remote control, thermostat, and sleep mode, ensuring a hassle-free cooling experience. Proper usage as outlined in the manual also ensures compliance with safety standards and environmental regulations.

Key Features of the Vissani Window Air Conditioner

The Vissani Window Air Conditioner boasts multiple fan speeds, an adjustable thermostat, and a remote control for convenient operation. It also features an energy-saving sleep mode and a washable filter for easy maintenance, ensuring efficient cooling and clean air circulation.

Models and Specifications (e.g., VWA05, VPA06)

The Vissani Window Air Conditioner series includes models like the VWA05 and VPA06, offering capacities of 5,000 to 6,000 BTUs. These units are designed to cool spaces up to 250 square feet, featuring multiple fan speeds, adjustable thermostats, and remote controls for precise temperature management. The VWA05 model includes a washable filter and energy-saving sleep mode, while the VPA06 offers enhanced dehumidification and a compact design for smaller windows, ensuring efficient cooling and comfort.

Cooling Capacity and Energy Efficiency

Vissani window air conditioners deliver efficient cooling with capacities ranging from 5,000 to 6,000 BTUs. The VWA05 model offers an energy-saving sleep mode, while the VPA06 features a high CEER rating of 11.0, ensuring lower energy consumption. These units are designed to provide consistent cooling while minimizing utility costs. Their compact designs and advanced features make them ideal for small to medium-sized rooms, offering both comfort and energy efficiency for eco-conscious users.

Installation and Setup Guidelines

Ensure proper installation by using all supplied parts and following instructions carefully to avoid hazards. Correctly position and secure the unit in the window for safe operation.

Step-by-Step Installation Instructions

Start by measuring your window opening to ensure compatibility with the Vissani air conditioner. Carefully unpack the unit and prepare all included parts. Slide the unit into the window opening, ensuring it fits securely. Use the adjustable side panels to seal gaps and stabilize the unit. Install the mounting brackets for added support and safety. Finally, seal any remaining gaps with weatherstripping to prevent air leaks. Always follow the manufacturer’s instructions for proper installation and safety.

Window Opening Requirements and Compatibility

The Vissani window air conditioner requires a window opening of 21 to 36 inches wide for proper installation. Ensure the window sill is level and sturdy to support the unit’s weight. For models like VWA05 and VPA06, measure the window opening to confirm compatibility. Proper fitting ensures efficient cooling and prevents air leaks. Always refer to the manual for specific sizing recommendations to ensure safe and effective installation.

Maintenance and Care Tips

Regularly clean or replace the air filter every 30 days for optimal performance. Check for blockages in the air vents and ensure proper drainage to prevent water buildup.

Filter Cleaning and Replacement

Regular filter maintenance is crucial for efficient cooling. Remove the filter monthly and wash it with mild soap and warm water. Allow it to dry completely before reinstalling. Replace the filter every 3-6 months or as needed. A clean filter improves airflow, reduces energy consumption, and prevents dust buildup; Refer to the manual for specific instructions tailored to your Vissani model. Always ensure the filter is securely in place to maintain optimal performance and air quality.

Regular Maintenance for Optimal Performance

Regular maintenance ensures your Vissani window air conditioner runs efficiently. Clean the filter monthly and replace it as needed. Check condenser coils for dust buildup and clean them gently. Ensure proper drainage to prevent water accumulation. Inspect the unit for blockages and tighten any loose connections. Schedule professional inspections annually to address internal components. Regular upkeep prevents breakdowns, improves cooling performance, and extends the unit’s lifespan while maintaining energy efficiency and reliability throughout the seasons.

Safety Precautions and Warnings

Ensure stable installation to prevent unit tipping and electrical hazards. Keep flammable materials away and avoid open flames near the air conditioner for safe operation.

Handling Flammable Refrigerants (e.g., R32)

Handle R32 refrigerant with caution, as it is flammable. Avoid open flames or sparks near the unit. Properly dispose of the air conditioner through authorized agencies to prevent environmental hazards. Follow all safety guidelines in the manual to ensure safe handling and minimize risks associated with flammable refrigerants. Never attempt to repair or modify the refrigerant system yourself. Always contact a qualified technician for servicing.

Avoiding Hazards During Installation and Usage

To prevent accidents, ensure the air conditioner is installed correctly using all provided parts. Keep the area around the unit clear of flammable materials and avoid exposing it to direct sunlight or water. Follow the installation instructions precisely to maintain stability and safety. Regularly inspect the power cord and plug for damage. Never operate the unit near open flames or sparks, and keep children away from moving parts. Proper usage ensures a safe and efficient cooling experience.

Operating the Vissani Window Air Conditioner

Operate your Vissani air conditioner using the remote control or thermostat for precise temperature control. Adjust fan speeds and modes to customize your cooling experience efficiently.

Using the Remote Control and Thermostat

Control your Vissani air conditioner effortlessly with the remote control or built-in thermostat. Adjust temperature, fan speed, and operating modes for personalized comfort. The remote offers convenient operation, while the thermostat ensures precise temperature maintenance. Use the remote’s clear buttons to select modes like Cool, Fan, or Energy-Saving. Ensure the remote is pointed directly at the AC for optimal signal reception. Refer to the manual for specific button functions and thermostat calibration for efficient performance.

Adjusting Fan Speeds and Modes

Adjust the fan speed and mode on your Vissani air conditioner to customize airflow and comfort. Choose from multiple fan speeds—low, medium, or high—to suit your needs. Use the remote control to conveniently switch between modes such as Cool, Fan, or Energy-Saving. The Cool mode efficiently lowers the temperature, while the Fan mode circulates air without cooling. The Energy-Saving mode optimizes performance and reduces energy consumption. Adjust settings to maintain a comfortable environment while ensuring efficient operation.

Troubleshooting Common Issues

Identify and resolve common issues with your Vissani air conditioner, such as cooling problems, unusual noises, or water leakage. Check filters, drainage, and power supply for solutions.

Diagnosing and Solving Operational Problems

Diagnose issues by checking error codes or unusual behaviors. Ensure the unit is properly installed and filters are clean. For no cooling, verify thermostat settings and refrigerant levels. Address noise by balancing the unit or tightening screws. If water leaks, inspect the drain pan and ensure proper installation. Reset the unit if it malfunctions. Always refer to the manual or contact customer support for unresolved issues to maintain efficiency and safety.

Resetting the Air Conditioner

To reset your Vissani window air conditioner, unplug it from the power source and wait 5-10 minutes. Plug it back in and check if it operates normally. If issues persist, ensure the circuit breaker isn’t tripped. Resetting can resolve minor malfunctions like sensor errors or power interruptions. Always follow safety precautions and consult the manual if problems continue. Regular resets can help maintain optimal performance and extend the unit’s lifespan.

Customer Support and Resources

For assistance, contact Vissani Customer Service at 1-877-527-0313 or visit their website for online support and resources. Additional help is available through FAQs and troubleshooting guides.

Contact Information for Vissani Customer Service

For any questions or concerns, contact Vissani Customer Service at 1-877-527-0313. Representatives are available Monday through Friday from 8 a.m. to 7 p.m. EST and Saturday from 9 a.m. to 6 p.m. EST. Visit their official website for additional support resources and troubleshooting guides. Ensure to reference your product model number when reaching out for assistance. Proper disposal instructions are also available through their customer support team.

Downloading the PDF Manual Online

To access the Vissani Window Air Conditioner manual, visit authorized websites like ManualsLib or Home Depot. Models such as VWA05 and VPA06 are available for download. Simply search for your specific model, and select the PDF version. Ensure the manual matches your unit for accurate instructions. Additional resources, including installation guides and troubleshooting tips, can also be found online. Always verify the source for authenticity and safety.

Energy Efficiency and Environmental Considerations

The Vissani Window Air Conditioner features energy-saving modes and eco-friendly refrigerants like R32. Proper disposal is crucial to avoid environmental harm. Follow guidelines for safe handling and recycling.

Energy-Saving Features

The Vissani Window Air Conditioner incorporates advanced energy-saving technologies to reduce power consumption. Features include an energy-efficient sleep mode, programmable timer, and adjustable thermostat. These elements work together to optimize cooling while minimizing energy use, helping you save on utility bills. Additionally, the unit’s washable filter reduces maintenance costs and prolongs lifespan, contributing to eco-friendly operation. By utilizing these features, users can enjoy both cost savings and environmental benefits.

Proper Disposal of the Air Conditioner

Proper disposal of the Vissani Window Air Conditioner is essential to prevent environmental harm. The unit contains flammable refrigerant (e.g., R32), which requires specialized handling. Do not dispose of the air conditioner in regular trash. Instead, contact a qualified agency or local authorities for safe disposal options. Ensure compliance with environmental regulations to avoid hazardous waste. Always follow manufacturer guidelines for eco-friendly disposal, protecting both the environment and public safety.

By following the Vissani Window Air Conditioner Manual, you ensure optimal performance, energy efficiency, and safety. Proper usage and maintenance will extend the unit’s lifespan and effectiveness.

Final Tips for Maximizing Performance

For optimal performance, ensure proper window installation and maintain a clean filter. Use the remote control to adjust settings conveniently and leverage the energy-saving sleep mode. Regularly clean the filter to maintain airflow and efficiency. Adjust fan speeds according to room conditions for consistent cooling. Properly seal the window kit to prevent air leaks, ensuring maximum cooling efficiency and energy savings. Following these tips will extend the unit’s lifespan and enhance overall performance.

Benefits of Following the Manual

Following the Vissani Window Air Conditioner Manual ensures safe and efficient operation, maximizing performance and energy savings. Proper installation and maintenance procedures prevent hazards and extend the unit’s lifespan. The manual’s guidelines help you avoid common issues, ensuring reliable cooling and comfort. By adhering to the instructions, you can optimize energy efficiency, reduce utility bills, and enjoy consistent performance. This comprehensive guide empowers you to use your air conditioner effectively and responsibly, ensuring years of trouble-free operation.

instruction manual for technika tv

Welcome to your Technika TV instruction manual. This guide provides essential information to help you set up, operate, and troubleshoot your television effectively. It covers safety, features, and optimal usage tips to ensure a smooth viewing experience.

1.1. Safety Precautions

Before using your Technika TV, read all safety instructions to ensure safe operation. Avoid exposing the TV to water or extreme temperatures. Keep it away from direct sunlight and ensure proper ventilation. Never touch electrical parts with wet hands. Use only original accessories and follow installation guidelines carefully. Avoid overclocking or modifying the device. Always unplug during lightning storms and allow the TV to cool down before cleaning. Follow these precautions to prevent damage and ensure optimal performance.

1.2. Important Safety Warnings

Read all instructions carefully before operating your Technika TV to avoid potential hazards. Never place objects on the TV, as this may cause damage or injury. Avoid exposing the device to moisture or extreme temperatures. Ensure the power cord is not damaged or overloaded, as this could lead to fire risks. Keep the vents clear to prevent overheating. Handle the TV with care to avoid scratching the screen. Follow these warnings to ensure safe and reliable operation of your Technika TV.

Connecting Your Technika TV

Connect your Technika TV using the provided RF cable to the aerial socket and plug in the power cable. Ensure all external devices are securely connected via HDMI or other compatible ports for optimal performance.

2.1. Initial Setup and Installation

Begin by carefully unpacking your Technika TV and ensuring all components are included. Attach the stand according to the provided instructions for stability. Connect the RF cable to the TV aerial wall socket and plug in the power cable. Insert the batteries into the remote control. Turn on the TV and follow the on-screen prompts to complete the initial setup, including language selection and tuning channels. Refer to the quick start guide for detailed steps to ensure proper installation.

2.2. Connecting External Devices

To connect external devices to your Technika TV, use the HDMI ports for devices like DVD players, gaming consoles, or soundbars. Ensure the TV is turned off before connecting any cables. Plug one end of the HDMI cable into the device and the other into the TV’s HDMI port. Turn on the TV and navigate to the input menu to select the correct HDMI channel. For USB devices, insert the USB drive into the USB port and follow on-screen instructions to access media content.

2.3. Connecting to a TV Aerial

To connect your Technika TV to a TV aerial, use the supplied RF cable. Attach one end to the aerial wall socket and the other to the TV’s RF input. Ensure the connection is secure. Turn on the TV and navigate to the channel tuning menu. Select “Auto Search” to scan for available digital and analog channels. The TV will automatically detect and store the channels. If no channels are found, check the aerial connection and repeat the process. This ensures optimal reception and channel availability.

Picture and Sound Settings

Adjust your Technika TV picture settings for optimal clarity and color balance. Customize sound settings to enhance audio quality, ensuring an immersive viewing experience tailored to your preferences.

3.1. Adjusting Picture Settings

Customize your Technika TV picture settings for an enhanced viewing experience. Access the picture menu using the remote control to adjust settings like brightness, contrast, and color balance. Select from preset modes such as Standard, Movie, or Dynamic to suit your preferences. Fine-tune settings for optimal clarity and color accuracy. For cinematic experiences, enable features like motion smoothing or HDR if available. Adjusting these settings ensures your TV displays content as intended, providing vivid and lifelike visuals for all your favorite shows and movies.

3.2. Optimizing Sound Settings

Enhance your audio experience by adjusting the sound settings on your Technika TV. Access the sound menu using the remote control to explore options like equalizer presets, balance, and surround sound. Select modes such as Standard, Movie, or Music to match your content. Enable features like dialogue clarity for better speech intelligibility or bass boost for deeper lows. For a more immersive experience, ensure HDMI devices are connected to the correct audio ports and adjust settings accordingly. Proper calibration ensures clear and balanced sound output for all your entertainment needs.

Channel Setup

Welcome to the channel setup section. This guide helps you tune digital and analog channels, organize your channel list, and ensure a smooth viewing experience with clarity.

4.1. Tuning Digital and Analog Channels

To tune digital and analog channels on your Technika TV, connect the TV aerial and access the menu. Select the channel tuning option and choose auto-scan for digital channels. This feature automatically detects and stores available channels. For analog channels, manual tuning may be required. Ensure the aerial is properly connected for optimal signal reception. Digital channels offer better picture quality and more options. Once tuning is complete, your channel list will be updated with all available stations.

4.2. Organizing Channel List

After tuning, organize your channel list for easy access. Use the menu to sort channels alphabetically or by frequency. You can also manually reorder channels by selecting and moving them. Favorites can be grouped together for quick access. Additionally, you can hide or remove unwanted channels. Regularly update your channel list to ensure all available stations are included. This feature helps personalize your viewing experience and makes navigation more efficient. Resetting the channel list will revert it to the default order if needed.

Using the Remote Control

The remote control allows easy navigation through menus and channels. Insert two AAA batteries correctly to ensure proper function. Use the directional buttons to scroll and select options. The remote also features shortcut buttons for quick access to settings and favorite channels. Ensure the remote is within line of sight of the TV for optimal signal strength. Regularly clean the buttons to maintain responsiveness.

5;1. Understanding the Remote Layout

The remote control features a user-friendly design with buttons for power, volume, and channel navigation. The directional pad allows easy menu navigation, while the numeric keypad offers quick channel selection. Dedicated buttons for settings, EPG, and source input simplify access to key functions. The remote also includes shortcuts for common tasks, ensuring intuitive control of your Technika TV. Familiarize yourself with the layout to enhance your viewing experience and efficiently manage all available features.

5.2. Navigating the On-Screen Menu

Use the remote control’s directional pad to navigate the on-screen menu effortlessly. Press OK to select options and BACK to return to the previous screen. The menu provides access to picture and sound settings, channel tuning, and device connections. Explore the Electronic Programme Guide (EPG) for channel listings and program details. Customizing settings allows you to personalize your viewing experience. Use the remote’s shortcuts to quickly access frequently used features and optimize your TV’s performance for enhanced entertainment.

Troubleshooting Common Issues

Identify and resolve common problems like no signal, poor picture, or sound issues. Restart the TV, check connections, and ensure proper settings. For persistent issues, reset to factory settings or consult the manual for detailed solutions to restore optimal performance.

6.1. Common Problems and Solutions

Address frequent issues such as no signal, poor picture quality, or sound problems. Ensure all cables are securely connected and properly configured. Restart the TV to resolve temporary glitches. Adjust picture and sound settings to optimize viewing. For channel-related issues, retune or reorganize your channel list. If the remote control malfunctions, replace the batteries or reset the TV. Refer to the Electronic Programme Guide (EPG) for scheduling conflicts or missing programs. These steps will help restore your TV to optimal functionality.

6.2. Resetting Your TV to Factory Settings

To reset your Technika TV to factory settings, navigate to the settings menu using your remote control. Select the “Factory Reset” option, usually found under the “System” or “Advanced Settings” section. Follow the on-screen instructions to confirm the reset. Note that this will erase all saved data and revert the TV to its original settings. Ensure you have completed any necessary software updates before performing the reset. This process can resolve persistent software-related issues effectively.

Electronic Programme Guide (EPG)

The Electronic Programme Guide (EPG) provides a 7-day TV schedule, allowing you to browse and plan your viewing. Access it in Digital TV mode for detailed program information.

7.1; Accessing and Using the EPG

Access the Electronic Programme Guide (EPG) by pressing the EPG or Guide button on your remote. This feature displays a 7-day schedule of TV programs. Use the arrow keys to navigate through channels and programs. Highlight a program to view detailed information, including start times and descriptions. You can also set reminders or schedule recordings directly from the EPG. This tool helps you plan your viewing and never miss your favorite shows.

Software Updates

Regularly update your Technika TV software for improved performance. Go to the Menu, select Settings, and choose Software Update to check for and install the latest version.

8.1. Checking for and Installing Updates

To ensure optimal performance, regularly check for software updates on your Technika TV. Navigate to the Settings menu, select System, and choose Software Update. The TV will automatically search for available updates. If an update is found, follow the on-screen instructions to download and install it. Ensure the TV remains powered on during the update process. Once complete, your TV will restart with the latest software version installed.

Accessories

Your Technika TV comes with essential accessories, including a remote control, batteries, RF cable, power cord, and a user guide. These items ensure optimal setup and operation.

9.1. Included Accessories and Their Functions

Your Technika TV includes a range of essential accessories to ensure easy setup and operation. The remote control allows you to navigate menus and adjust settings effortlessly. Batteries are provided for the remote, ensuring immediate use. An RF cable connects your TV to an aerial for channel reception. The power cord ensures reliable electricity supply, and the user guide offers detailed instructions for installation and troubleshooting. These accessories are designed to enhance your viewing experience and simplify TV operation.

Frequently Asked Questions (FAQs)

This section provides answers to common questions about your Technika TV, including setup, channel tuning, and troubleshooting, helping you resolve issues quickly and efficiently.

10.1. Common Questions and Answers

Here are answers to frequently asked questions about your Technika TV.
Q: How do I connect external devices?
A: Use HDMI or AV ports.
Q: Why is the picture blurry?
A: Check signal strength or adjust settings.
Q: Can I update the software?
A: Yes, via the menu.
Q: How to access EPG?
A: Press the guide button.
Q: Remote not working?
A: Replace batteries or reset.
Q: How to tune channels?
A: Use auto-tune in settings.

definitive guide to dax

DAX is a powerful formula language for business intelligence‚ enabling data modeling and analytics in Power BI‚ Excel‚ and SQL Server. The Definitive Guide to DAX by Marco Russo and Alberto Ferrari provides comprehensive insights‚ covering basics‚ advanced optimizations‚ and best practices for mastering DAX expressions and data models.

What is DAX and Its Importance in Business Intelligence

DAX (Data Analysis Expressions) is a formula language developed by Microsoft for business intelligence and data analysis. It enables users to define custom calculations in Power BI‚ Excel‚ and SQL Server Analysis Services. DAX is essential for creating dynamic and interactive data models‚ allowing organizations to transform and analyze data efficiently. Its importance lies in its ability to handle complex aggregations‚ time intelligence‚ and advanced calculations‚ making it a cornerstone of modern business intelligence. By leveraging DAX‚ professionals can uncover insights‚ optimize operations‚ and support data-driven decision-making. As highlighted in The Definitive Guide to DAX‚ mastering this language empowers organizations to maximize the value of their data assets.

Key Features and Benefits of Using DAX

DAX offers a robust set of features that make it indispensable for business intelligence. Its ability to handle complex calculations‚ time intelligence‚ and dynamic data modeling stands out. Key benefits include enhanced flexibility in creating custom metrics and aggregations. DAX enables users to build scalable and efficient data models‚ ensuring fast query performance. Its integration with Power BI‚ Excel‚ and SQL Server Analysis Services makes it a versatile tool for modern analytics. Additionally‚ DAX supports advanced functions like CALCULATE and iterator functions‚ which simplify complex calculations. By leveraging these features‚ organizations can create powerful‚ interactive dashboards and reports‚ driving data-driven decision-making. As emphasized in The Definitive Guide to DAX‚ mastering its capabilities ensures optimal performance and unlocks advanced analytical possibilities.

Getting Started with DAX

Learn the fundamentals of DAX with The Definitive Guide to DAX. Start with basic syntax‚ functions‚ and evaluation contexts to build a strong foundation for advanced calculations and data modeling.

Basic Syntax and Functions in DAX

DAX is a formula language used for calculations and data analysis in business intelligence tools like Power BI‚ Excel‚ and SQL Server Analysis Services. Its syntax is similar to Excel formulas but designed for row-by-row data evaluation. A basic DAX expression starts with an equal sign‚ followed by a function or calculation. For example‚ SUM(‘Table'[Column]) calculates the total of a column. Functions like FILTER and ALL help manipulate data context‚ while IF and SWITCH enable conditional logic. Understanding basic functions is crucial for building robust DAX expressions. The Definitive Guide to DAX provides detailed explanations of these fundamentals‚ ensuring a solid foundation for advanced calculations.

Understanding Evaluation Contexts in DAX

Evaluation contexts in DAX determine how data is processed and calculated. There are two primary contexts: row context and filter context. Row context applies calculations at the row level‚ often used in functions like SUMMARIZE or ADDCOLUMNS. Filter context‚ on the other hand‚ applies to larger datasets‚ influencing functions like SUM or AVERAGE. Understanding these contexts is crucial for accurate calculations‚ especially when using CALCULATE‚ which can modify filter context. The Definitive Guide to DAX explains how these contexts interact and impact results‚ helping users avoid common pitfalls and write more efficient expressions. Mastering evaluation contexts is essential for leveraging DAX’s full potential in business intelligence and data modeling.

Advanced DAX Concepts

Explore advanced DAX techniques‚ including CALCULATE‚ variables‚ and iterator functions‚ to enhance calculations and performance. The Definitive Guide to DAX provides detailed insights into mastering these powerful tools.

Using CALCULATE and Its Impact on DAX Expressions

DAX’s CALCULATE function is a cornerstone for dynamic calculations‚ enabling users to alter the filter context and create flexible expressions. It is fundamental for business intelligence and analytics‚ allowing precise control over data evaluations. The Definitive Guide to DAX highlights its versatility in handling complex scenarios‚ such as time intelligence and alternative data perspectives. Mastering CALCULATE ensures efficient and accurate data models‚ while improper use can lead to performance inefficiencies. Experts Marco Russo and Alberto Ferrari provide practical examples and optimization tips‚ making it essential for advanced DAX practitioners to understand its power and limitations for robust business intelligence solutions.

Working with Variables in DAX for Enhanced Calculations

Variables in DAX revolutionize calculation processes by enabling intermediate results to be stored and reused within expressions. This feature enhances efficiency‚ reducing redundant calculations and improving performance. The Definitive Guide to DAX emphasizes how variables simplify complex expressions by breaking them into manageable parts. They are particularly useful for handling dynamic conditions and nested calculations. Experts Marco Russo and Alberto Ferrari highlight best practices for variable usage‚ ensuring clarity and optimization. Properly leveraging variables can transform intricate analytical tasks into streamlined solutions‚ making advanced DAX modeling accessible and effective for business intelligence applications.

Mastering Iterator Functions for Advanced Aggregations

Iterator functions in DAX are essential for performing advanced aggregations by iterating through tables or values. Functions like SUMMARIZE‚ ADDCOLUMNS‚ and ROW enable detailed row-wise operations. The Definitive Guide to DAX explains how these functions can transform data analysis by calculating values at different granularities. Experts Marco Russo and Alberto Ferrari provide insights into optimizing expressions with iterators for complex scenarios. Mastering these functions allows for deeper data exploration‚ enabling users to uncover insights that standard aggregations might miss. Proper use of iterators ensures efficient and accurate results‚ making them a cornerstone of advanced DAX capabilities for business intelligence.

Data Modeling Best Practices

Optimizing data models for DAX expressions ensures efficient calculations. Star and snowflake schemas are recommended for better performance. Experts emphasize proper table relationships and minimal data redundancy for optimal results.

Optimizing Data Models for DAX Expressions

Optimizing data models is crucial for efficient DAX expressions. Star schemas are ideal due to their simplicity and query performance benefits. Ensuring tables are properly related and avoiding unnecessary columns reduces complexity. Snowflake schemas‚ while more complex‚ can also be effective if designed carefully. Experts recommend minimizing data redundancy and leveraging aggregation tables to speed up calculations. Proper model optimization ensures faster query performance and better user experience in Power BI and Excel. This aligns with best practices outlined in The Definitive Guide to DAX‚ making it a key aspect of mastering business intelligence solutions.

Creating Efficient Star and Snowflake Schemas

Efficient data modeling with star and snowflake schemas is essential for optimal DAX performance. A star schema consists of a central fact table surrounded by dimension tables‚ minimizing joins and improving query speed. Snowflake schemas extend this by normalizing dimension tables into multiple related tables‚ reducing redundancy but increasing complexity. Both designs support efficient DAX calculations when properly optimized.Marco Russo and Alberto Ferrari emphasize that star schemas are generally preferred for simplicity and performance in The Definitive Guide to DAX. Ensuring fact tables are granular and dimension tables are lightweight is key. Avoiding unnecessary columns and relationships further enhances efficiency‚ making these schemas foundational for robust BI solutions.

DAX Optimization Techniques

Writing efficient DAX expressions and leveraging tools like DAX Studio are crucial for optimizing performance. These techniques ensure faster query execution and better resource utilization in BI solutions.

Writing Efficient DAX Expressions for Faster Performance

Optimizing DAX expressions is essential for enhancing performance in Power BI and other BI tools. By understanding how DAX processes data‚ you can avoid common pitfalls like unnecessary calculations. Simplifying formulas and reducing the use of volatile functions can significantly improve speed. Using tools like DAX Studio allows you to analyze query plans and identify bottlenecks. Proper use of CALCULATE and understanding evaluation contexts are key to efficient expressions. Additionally‚ leveraging best practices from resources like The Definitive Guide to DAX ensures your models run smoothly and deliver fast results‚ making your business intelligence solutions more effective and scalable.

Leveraging DAX Studio for Query Analysis and Optimization

DAX Studio is a free‚ open-source tool designed to help users analyze and optimize their DAX queries. It provides a user-friendly interface for writing‚ debugging‚ and troubleshooting DAX expressions. With features like syntax highlighting‚ code completion‚ and query performance analysis‚ DAX Studio empowers developers to identify bottlenecks and refine their calculations. The tool allows for detailed query plan visualization‚ enabling deeper insights into how DAX processes data. By leveraging DAX Studio‚ users can test and optimize their expressions‚ ensuring faster and more efficient performance in Power BI‚ Excel‚ or SQL Server Analysis Services. This makes it an indispensable resource for anyone aiming to master DAX and improve their business intelligence solutions.

Latest Updates and Tools

Explore the latest updates to DAX‚ including new functions like LOOKUPWITHTOTALS and INFO.DEPENDENCIES‚ enhancing data modeling and query optimization. Discover updated tools that streamline DAX workflows for better analytics.

New DAX Functions and Features in 2025

In 2025‚ DAX introduced exciting new functions such as LOOKUPWITHTOTALS and INFO.DEPENDENCIES‚ enhancing data retrieval and dependency tracking. These updates empower users to create more dynamic and efficient calculations. LOOKUPWITHTOTALS simplifies complex lookups by including grand totals‚ while INFO.DEPENDENCIES provides insights into data relationships. Additionally‚ the DAX Guide is now automatically updated‚ ensuring users always have access to the latest features and best practices. These advancements reflect Microsoft’s commitment to improving DAX for business intelligence‚ making it easier to optimize data models and improve query performance. Stay ahead with these cutting-edge tools to elevate your analytics capabilities.

Power BI and DAX: Best Practices for Business Intelligence

Power BI‚ combined with DAX‚ revolutionizes business intelligence by enabling efficient data modeling and analytics. Best practices include optimizing data models for DAX expressions‚ leveraging tools like DAX Studio for query analysis‚ and mastering functions like LOOKUPWITHTOTALS for dynamic calculations. Experts recommend using variables and iterator functions to enhance performance. The Definitive Guide to DAX highlights modern techniques to simplify expressions and improve query speed. By following these practices‚ users can create robust‚ scalable solutions for complex business scenarios‚ ensuring accurate and actionable insights. Regular updates and resources like Sqlbi’s courses further empower users to maximize Power BI’s potential with DAX.

The Definitive Guide to DAX provides a comprehensive roadmap for mastering DAX‚ empowering users to optimize data models‚ enhance calculations‚ and deliver impactful business intelligence solutions with confidence.

Final Thoughts on Mastering DAX for Business Intelligence

Mastery of DAX transforms business intelligence capabilities‚ enabling efficient data modeling and analytics. The Definitive Guide to DAX equips professionals with advanced techniques for optimization and problem-solving‚ ensuring faster performance and accurate insights. By understanding evaluation contexts‚ leveraging functions like CALCULATE‚ and utilizing tools like DAX Studio‚ users can create dynamic‚ scalable solutions. The guide emphasizes modern best practices‚ making it an essential resource for both beginners and experts. Continuous learning and practical application are key to unlocking DAX’s full potential‚ driving informed decision-making in today’s data-driven world.

Newer posts »